


6
PROGRAM MODE
The Program Mode is laid out in a manner that allows you to program each
function separately, or you can follow the instructions entirely to program
the Weather Center. Complete programming is usually done for the initial
set-up, and will require you to skip step 1 of each programming section
(from section III to XII). The programming mode can be exited at any time
by either pressing the MIN/MAX button, or waiting for the 20-second time-
out to take effect.
**Important note: Due to a programming error, the WS-7095U will not
properly recognize the dates March 1 or 2. When the date switches from
February 28 (February 29 in leap years), the unit will reset all information to
the default values. Any attempt to set this unit to March 1 or 2 will give the same
result. To prevent this, set the unit to March 3 on February 28 or sooner. Once
the actual date is March 3, you may then reset it. As of this printing, no software
changes are scheduled, and we apologize for that. This product is very
specialized, and volumes do not allow us to easily change the software. We
appreciate your business, and strive to maintain our quality of products. We
hope that you will find this unit has enough good features to help you overlook
the missed programming. Feel free to call or e-mail us with any further
questions.
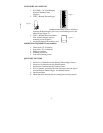
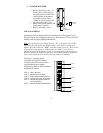
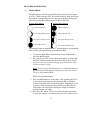
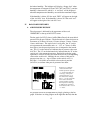
I. FUNCTION BUTTONS
There are 5 function buttons located on the front of the Weather Center,
under the LCD Screens. The function buttons are labeled: SET, MOON,
MIN/MAX, RAIN, and CH/+.
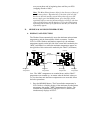
II. SETTING THE LCD CONTRAST
1. Hold down the SET button for 3 seconds, the default setting
“LCD 7” will flash in LCD 2.
2. Press the CH/+ button to advance through the LCD settings.
There are 16 settings to select from—“LCD 0” is the lightest and
“LCD 15” is the darkest.
3. Press the SET button to confirm, and to advance to select
12/24-hour time display.
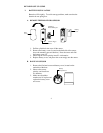
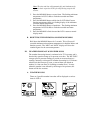
III. 12/24 HOUR TIME DISPLAY SELECTION
1. Press the SET button twice to enter the 12/24-hour selection mode.
2. The default setting “12” will flash in LCD 1.
3. Use the CH/+ to select either “12” or “24” hour time display.