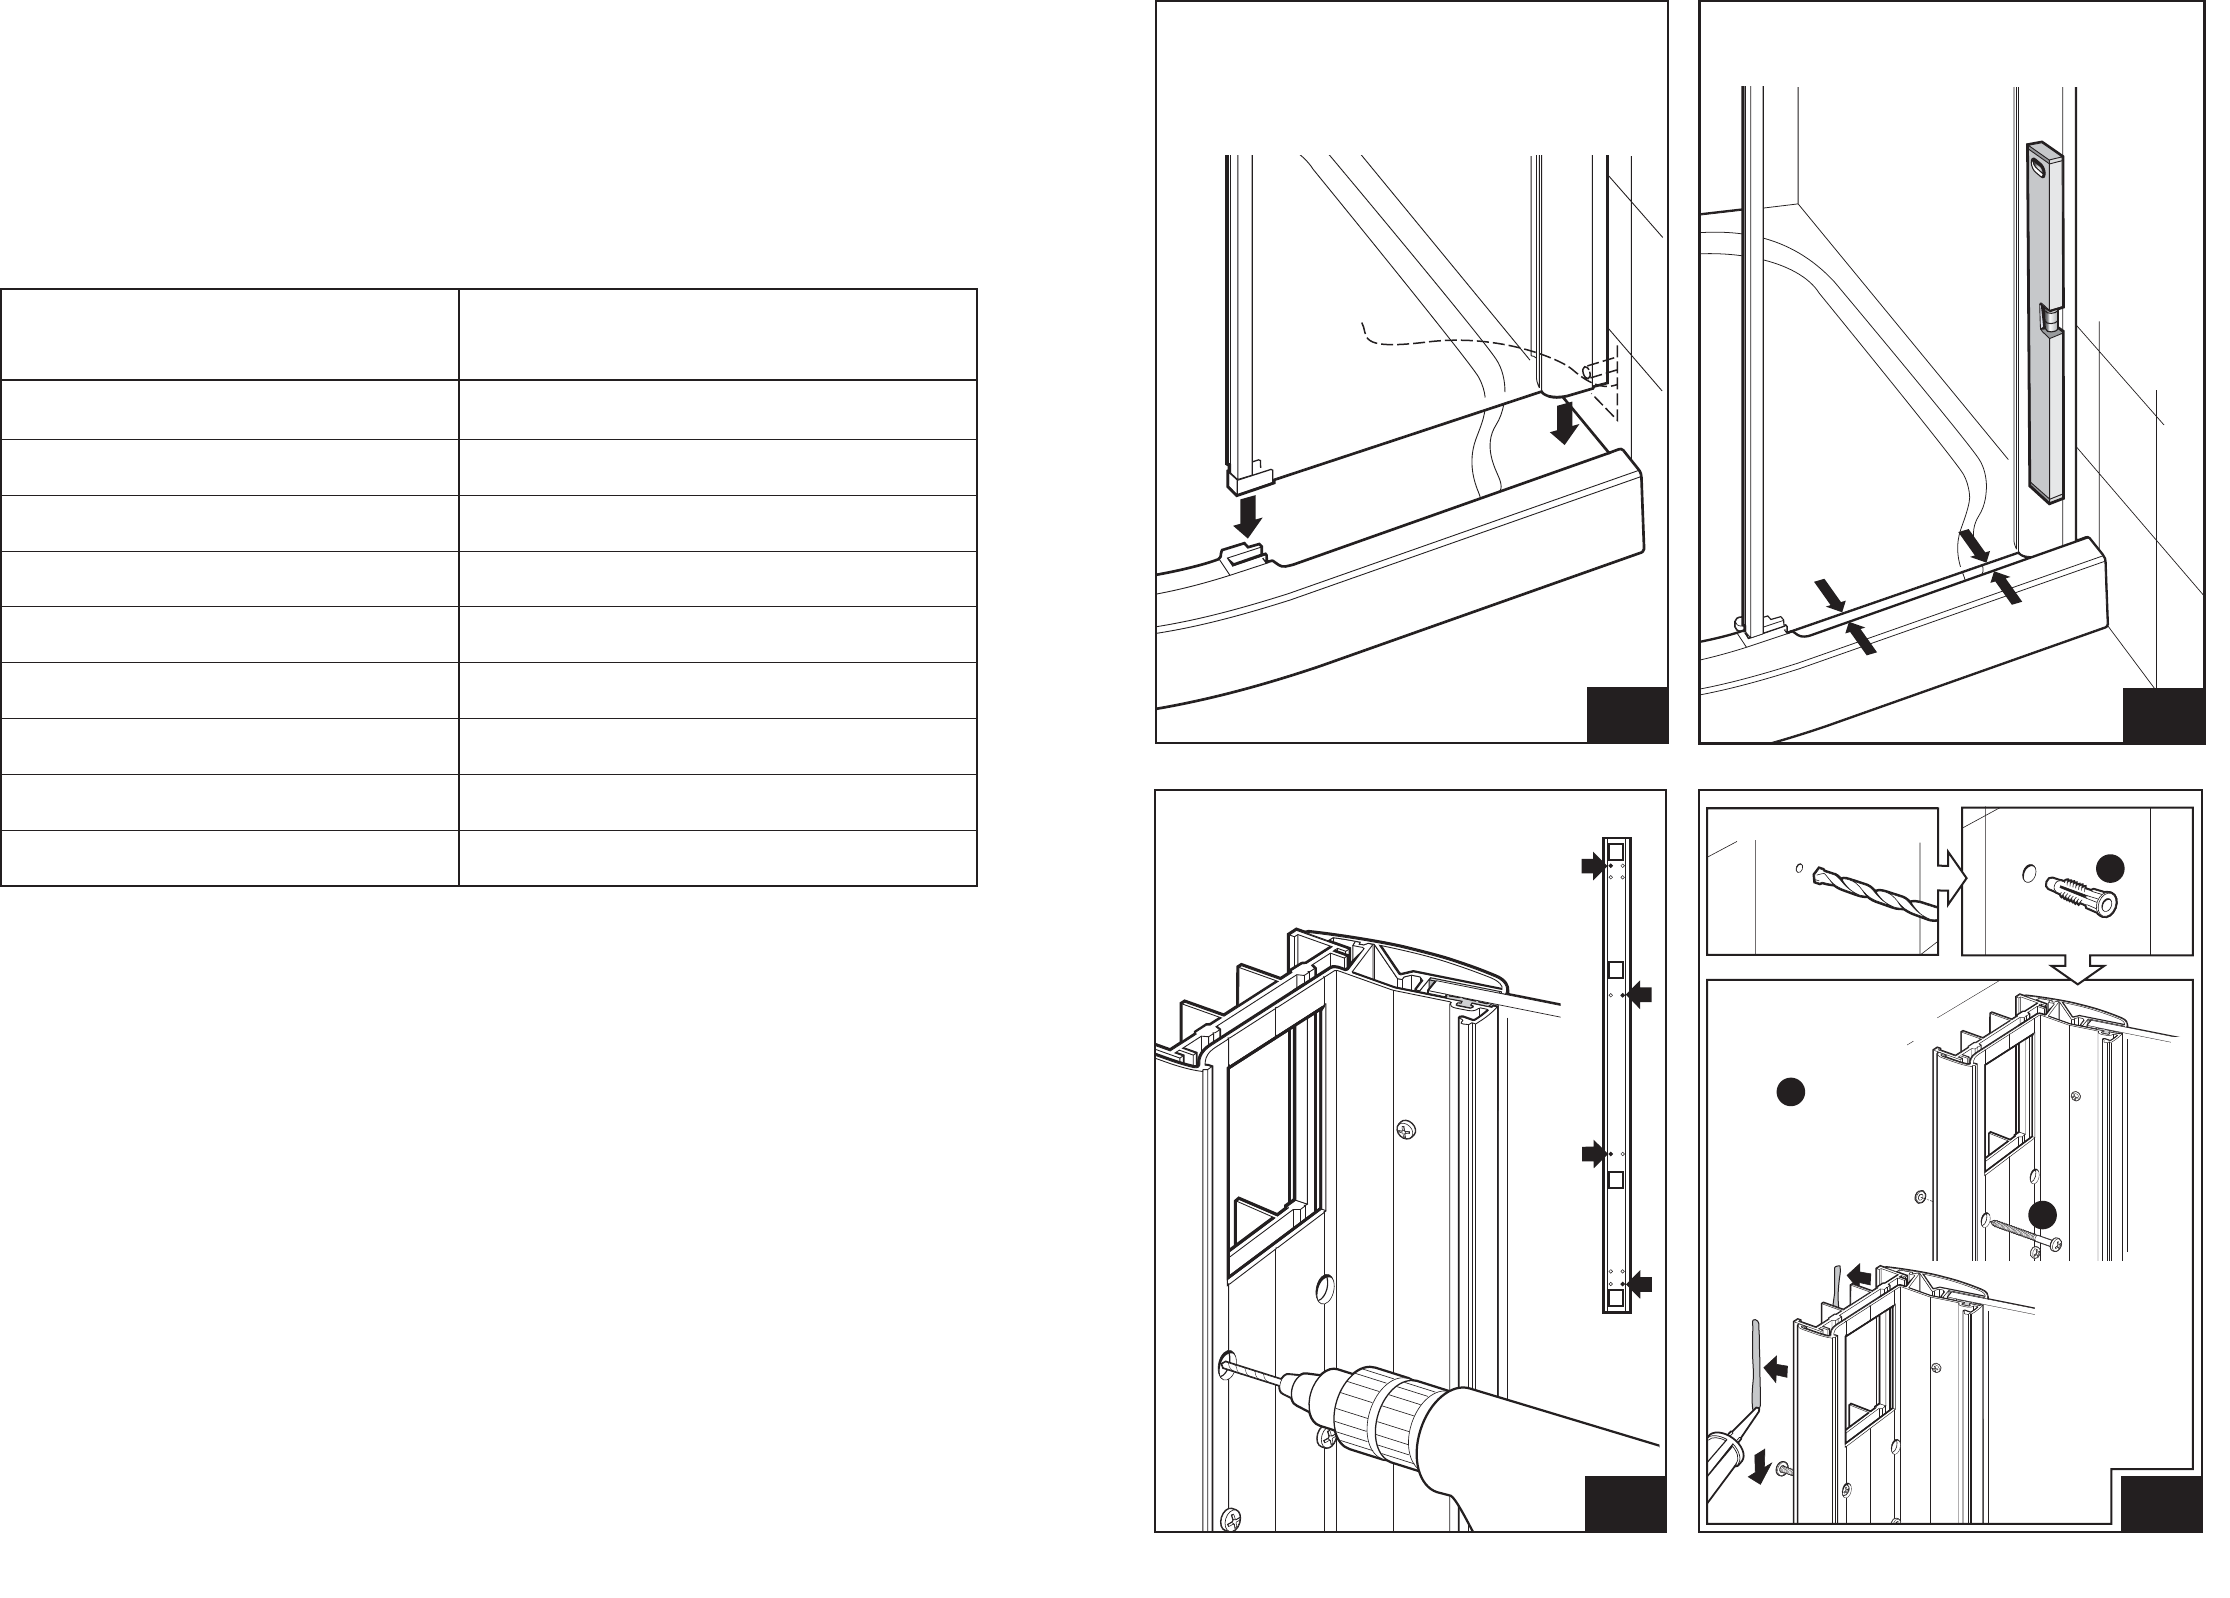
Drill 4 x 8mm holes
Fit plugs
Loosely fit
4 x screws
A
Carefully lift the panel
back into postion
Seal behind
the wall channel
and tighten
screws
A
B
A
Spot drill through 4 fixing holes in the
wall jamb and mark the wall. Only 4 of the
8 holes are using alternate sides ‘A’.
Carefully remove the panel from the tray
A
B
Adjust wall jamb until glass is parallel to the
edge of the tray ‘A’ and vertical at ‘B’.
20
CFI230G
9
CFI230G
Carefully lift the assembly onto the tray. The end
of the glass panel fits into slot ‘A’ on the tray.
The wall channel end sits on the flat section of
the tray ‘B’
A
B
STEP
14
STEP
15
STEP
16
STEP
17
Take care not to
damage pipe and
cable protruding
from wall
The lock mode may be activated when the unit is OFF in which case the unit cannot be switched ON
unless the mode is cancelled as above.
Removing power from the unit also cancels the mode
4. Timeout
Note! Timeout allows you to run the shower for a set period of time before it automatically shuts off. This can
only be set when the unit has not been used for a period of 10 minutes.
4.1. Timeout Selection - Set the temperature control knob to the desired position, as per the table below.
4.2. Enabling - Press and momentarily hold the Warm Up and Low keys at the same time.The two keys will
flash twice and beep three times to confirm the selection is successful.
Temperature Control Timeout (Minutes)
Knob Position
1 30
2 30
3 3
4 4
5 5
6 6
7 7
8 8
9 9


