


English – 17
INSTALLATION
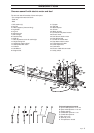
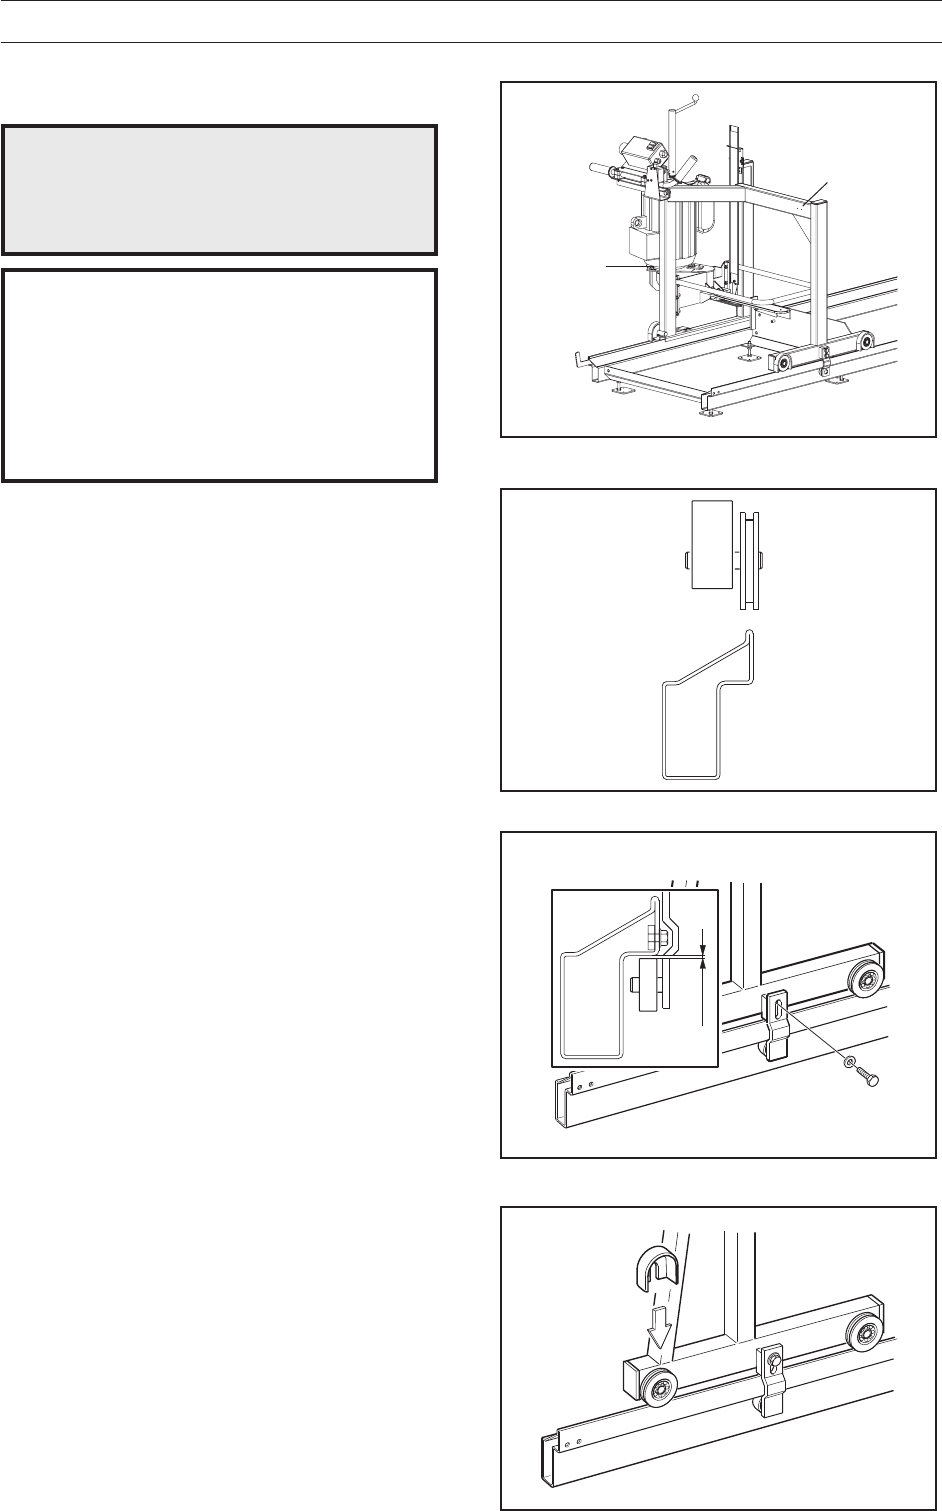
Setting up the Saw Carriage (FIG. 24)
WARNING!
The saw carriage is heavy. Two
persons are required when setting
up. Always wear boots with steel
toecaps.
CAUTION!
Do not drop the saw carriage onto the rails or
any other hard surface too heavily. This will
result in permanent damage to the saw
carriage’s bearings.
Do not place the saw carriage directly on the
ground so that dirt and unnecessary con-
tamination can come into contact with the
saw carriage’s wheels.
Assembly is done as follows:
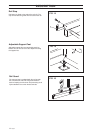
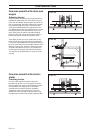
1.Fix the guide wheel’s bracket in place with a screw.
Place a 0.2 mm feeler gauge between the bearing
and rail (FIG. 26).
2.Press the bearing against the rail and tighten the
bearing bracket screw. Tightening torque: 40-50
Nm. Now remove the feeler gauge.
3.Carry out 1-2 above for the remaining guide wheels.
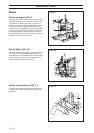
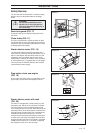
4.Position the four rail guards (FIG. 27) above the
wheel.
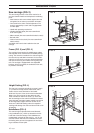
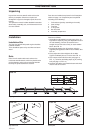
Saw Carriage Adjustment (FIG. 26)
The saw carriage is aligned on the rails by fitting its
lower guide wheels and rail guards. The lower guide
bearings have the task of preventing the saw carriage
from tilting and the rail guards keep the rails and the
saw carriage’s wheels free from dirt and the like.
Assembled on the saw carriage are:
• Two lower guide wheels
• Four rail guards.
!
Place the saw carriage on the rails and make
adjustments as follows:
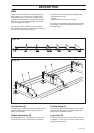
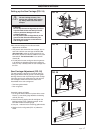
1.Two persons take hold of the saw carriage, one on
each side. Hold the saw carriage as follows: The
right-hand side: under the engine console (A) on
the electric sawmill or under the saddle on the chain
saw sawmill. The left-hand side: in the sawmill
chassis (B).
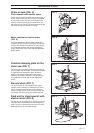
2.Lift and place the saw carriage so that the grooves
in its wheels are positioned above their respective
rails (FIG. 25). Carefully lower the saw carriage onto
the rails.
FIG. 24
FIG. 25
FIG. 26
FIG. 27
0,2 mm
A
B