8
Chipping tips
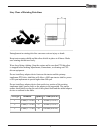
• Feed the blunt end of the branch in rst.
• Trim the side limbs that won’t t into the hopper before you feed the chipper. Remember
that this is a gravity feed chipper and it will not feed itself if there are side limbs that do not
t through the chip opening. If you have a branch that will not feed properly you may need
to turn it or remove it from the hopper and trim some of the limbs off. Never force a branch
through! Your hands could slip and get into the blades.
• Feed smaller material into the hopper from the side of hopper so that debris doesn’t y
back at you.
• If you have a lot of dry material try to mix in some green (fresh) limbs with the dry. The
moisture in the green wood will lubricate and cool the knives. Chipping only dry wood will
cause the knives to heat up. A hot knife will lose its edge much quicker.
Startup
• Place tractor transmission in neutral and set the parking brake, then turn the tractor engine
off.
• Connect the 3 pt. hitch linkages to the chipper and secure them with safety snap pins.
• Adjust the top link so that the chipper sits level.
• Connect the pto shaft to the tractor. Be sure that the balls are set in the ball groove of the
tractor pto shaft. Make sure that the pto safety chains are attached to both the tractor and
the chipper to keep the protective PTO shield from rotating.
• Turn the chip chute in a safe direction and adjust the chip deector to the desired position.
• Start tractor engine and hold the engine rpm’s at a strong idle. Engage the pto slowly. If
the tractor is running at a high speed when you engage the PTO you could damage the
drive belts or break the shear bolt on the PTO shaft. After the rotor is spinning freely raise
the tractor rpm’s until the pto speed is around 540 rpm.
• With the chipper now running at full speed you may begin chipping. Start by feeding small
diameter branches until you get better acquainted with the machine and its operation, then
you may begin feeding larger pieces.
OPERATION


