


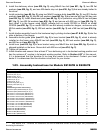
3.04 - Attaching to the Tractor
Unit may be used on tractors ranging from 16 to 30 HP equipped with a standard rear PTO and
category 1 three point hitch
6
. Never use this spreader with tractors over 30 HP.
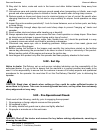
DANGER: Do not allow anyone to stand between spreader and tractor while attaching
implement.
WARNING: Never attempt to attach the implement to the tractor or make an adjustment to it
without first turning the tractor off.
CAUTION: Check the tractor PTO rpm to ensure it is set at 540 rpm and turns clockwise.
CAUTION: Be sure the tractor tire pressure is correct. It is important to strictly follow the
safety guidelines and instructions laid out in the tractor manual.
To attach the implement to the tractor do the following:
Back the tractor up to the implement in order to slip the tractor hitch arms over the hitch pins bolted to
the frame. Turn off the tractor engine and engage the park brake. Secure the two tractor hitch
arms to the implement with lynch pins. Tighten the tractor arms side movement with either the sway
chains or blocks to limit side swing.
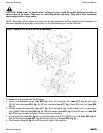
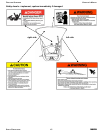
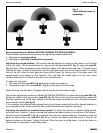
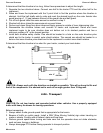
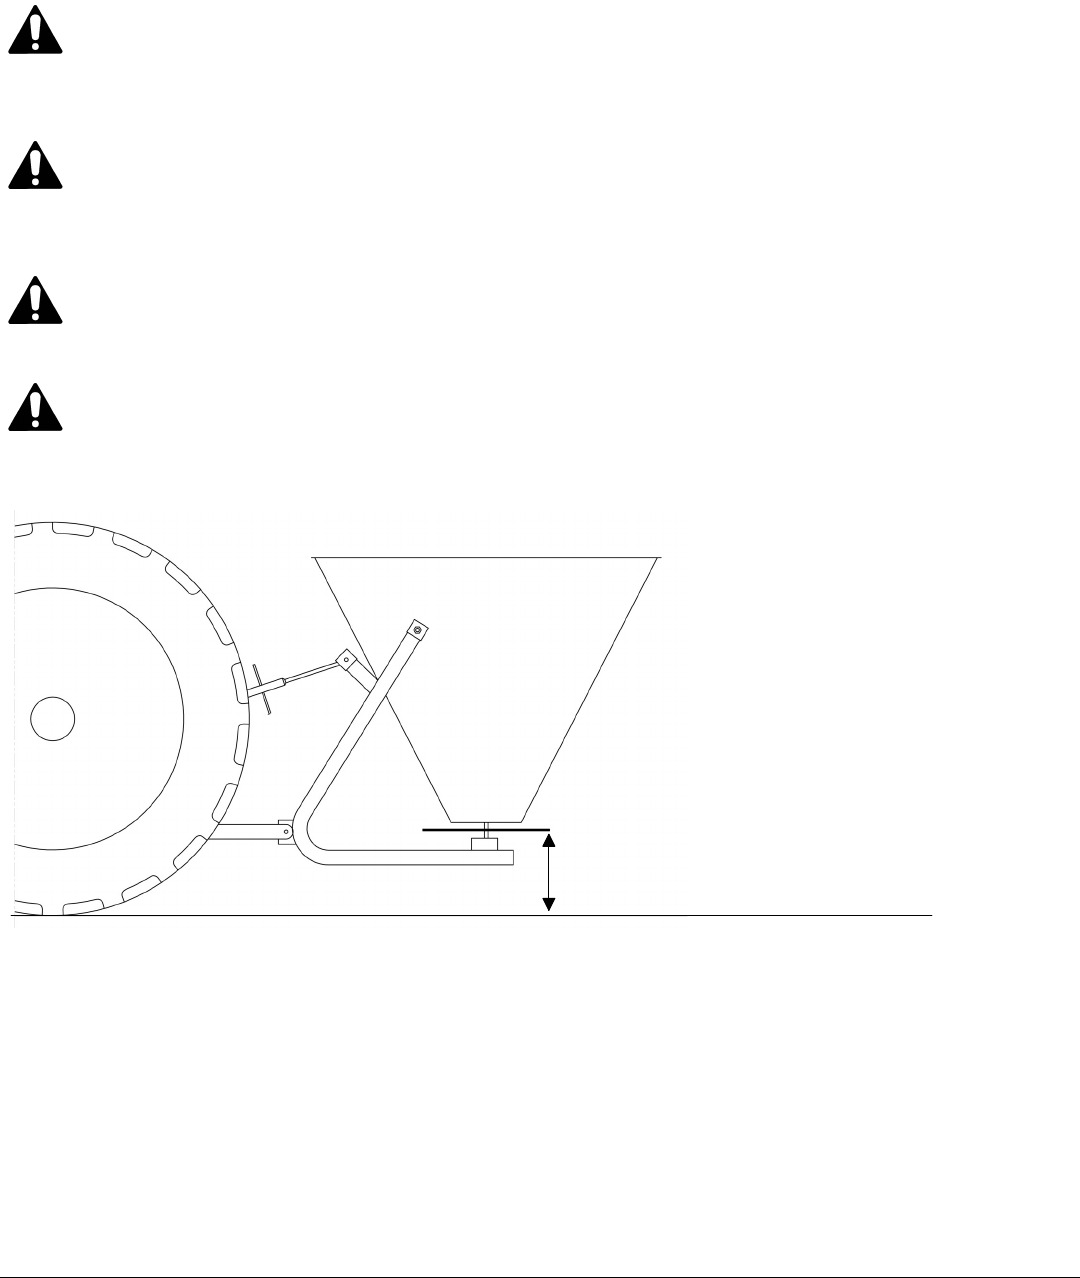
Connect the top link, locking it in place with the top hitch pin. Adjust it so the implement is as near
parallel to the ground as possible with the spreading disc at a distance 28” to 32” above ground level
(see fig. 7).
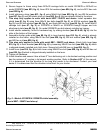
Install the end of the driveline to the spreader and the opposite end to the tractor PTO. Be sure each
end is connected securely with either the locking pin or bolt and nut. Connect the driveline shielding
chains to the tractor and to the implement to prevent the protective shielding from rotating during
FERTILIZER SPREADERS OPERATOR’S MANUAL
OPERATION 16 FRONTIER
6
See Table 2, page 24.
Fig. 7 - Hopper spreading adjustment.
28" to 32"
Ground level