


optional adapter has floating yokes that will allow the mower to follow the contour of the
ground.
WARNING: When using a Quick Hitch on a PTO driven implement always ensure
there is the proper driveline overlap prior to use. If there is not the minimum 6”
driveline overlap do not use and contact your nearest dealer to purchase a longer
driveline.
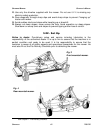
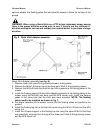
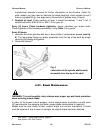
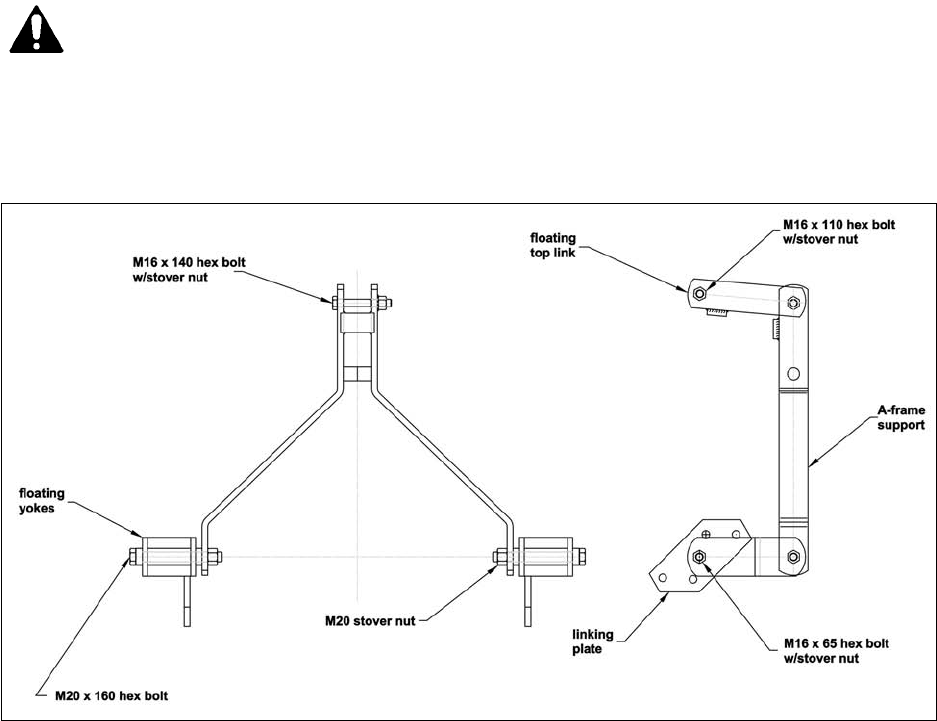
Quick Hitch Adapter assembly (see fig. 6):
1. Remove lower hitch arms from grooming mower’s linking plates.
2. Remove the M16x140 bolt on top of the three point hitch of the grooming mower.
3. Remove the M16x45 bolts that hold the top hitch supports to the linking plates of the
mower.
4. Install the floating yokes of Quick Hitch Adapter assembly to the linking plates of the
mower using the M16x65 hex bolts and the M16 stover nuts. Install the floating
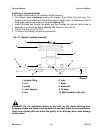
yokes in the same hole that the hitch pins were mounted. NOTE: The floating
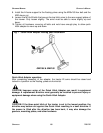
yokes need to be installed as shown on fig. 7.
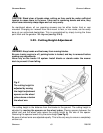
5. For proper operation of the mower, ensure that the floating yokes are parallel to the
ground.
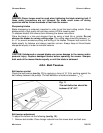
6. Install the floating top link to the top hitch arms using the M16x110 bolt and the M16
stover nut.
7. Install the A-frame support to the floating top link using the same M16x140 bolt that
was previously removed from the top of the three point hitch of the grooming mower
and the M16 stover nut.
OPERATION 19 FRONTIER
G
ROOMING MOWERS OPERATOR’S MANUAL
Fig. 6 - Quick Hitch Adapter assembly.