1
Important
The bathtub must be installed per installation instructions D884000 for the Merano™ or E160000 for the Siena™.
Follow the instructions to ensure that proper framing has been provided to support the J-Shower Tower. Finishing
materials must be waterproof and sealed so that spray and condensation do not cause moisture damage.
NOTE: The J-Shower Tower has been partially pre-assembled for your convenience during installation.
The installer must still follow the instructions to ensure proper installation of the tower and components
(see page 13). We recommend that two persons perform this installation.
Contents
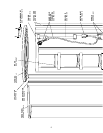
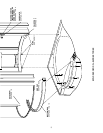
Exploded View of J-Shower Tower ________________________________________________________ 2
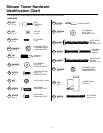
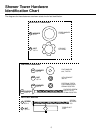
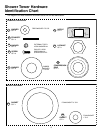
Shower Tower Hardware Identification Chart __________________________________________________ 4
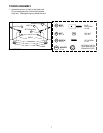
Tower Assembly _______________________________________________________________________ 7
Water Lines to Mixer/Diverter Valve _________________________________________________________ 10
Attaching Diverter Valve to Shower Wall _____________________________________________________ 10
Tower Installation ______________________________________________________________________ 12
Tower Disassembly ______________________________________________________________________ 13
Placing Tower __________________________________________________________________________ 14
Fixed Panel Assembly____________________________________________________________________ 15
Mounting Top Ring and Wall Bracket to Tower_________________________________________________ 17
Fixed Glass Frame Attachment_____________________________________________________________ 19
Sealing and Trimming ____________________________________________________________________ 20
Attaching Face Plate _____________________________________________________________________ 21
Handle Installation_______________________________________________________________________ 21
Handle Operation _______________________________________________________________________ 22
Tools Required
1. Drill.
2. Drill bits: 3/32", 1/8", 3/16" and 5/16".
3. Flat blade screw driver, No. 1.
4. Phillips type blade screw driver, No. 2.
5. 5/16" or 8 mm deep socket or nut driver.
6. Caulking gun.
7. Sealant (100% silicone).
8. Adjustable wrenches (small and medium).
9. Allen wrenches: 1.5 mm, 2.5 mm, 3 mm and 5/64".
10. Step ladder.


