


Luxury Whirlpool Bath
Page 8 www.jacuzzi.com Installation and Operation
English
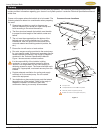
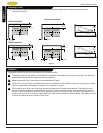
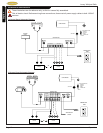
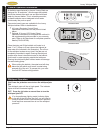
Clearance Examples
2-Wall Installation
3-Wall Installation
•
To ensure the installer has space to maneuver and install the bathtub, allow adequate wall and ceiling
clearance (Figure 3).
32˝
(812mm)
3˝
(76mm)
10˝
(254mm)
32˝
(812mm)
48˝
(1219mm)
32˝
(812mm)
32˝
(812mm)
3˝
(76mm)
32˝
(812mm)
10˝
(254mm)
10˝
(254mm)
Floor Cutout for
Drain/Overow
Floor Cutout for
Drain/Overow
Floor Cutout for
Drain/Overow
Floor Cutout for
Drain/Overow
BATHTUB
CUTOUT
BATHTUB
CUTOUT
BATHTUB
CUTOUT
BATHTUB
CUTOUT
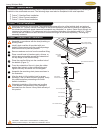
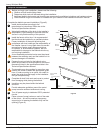
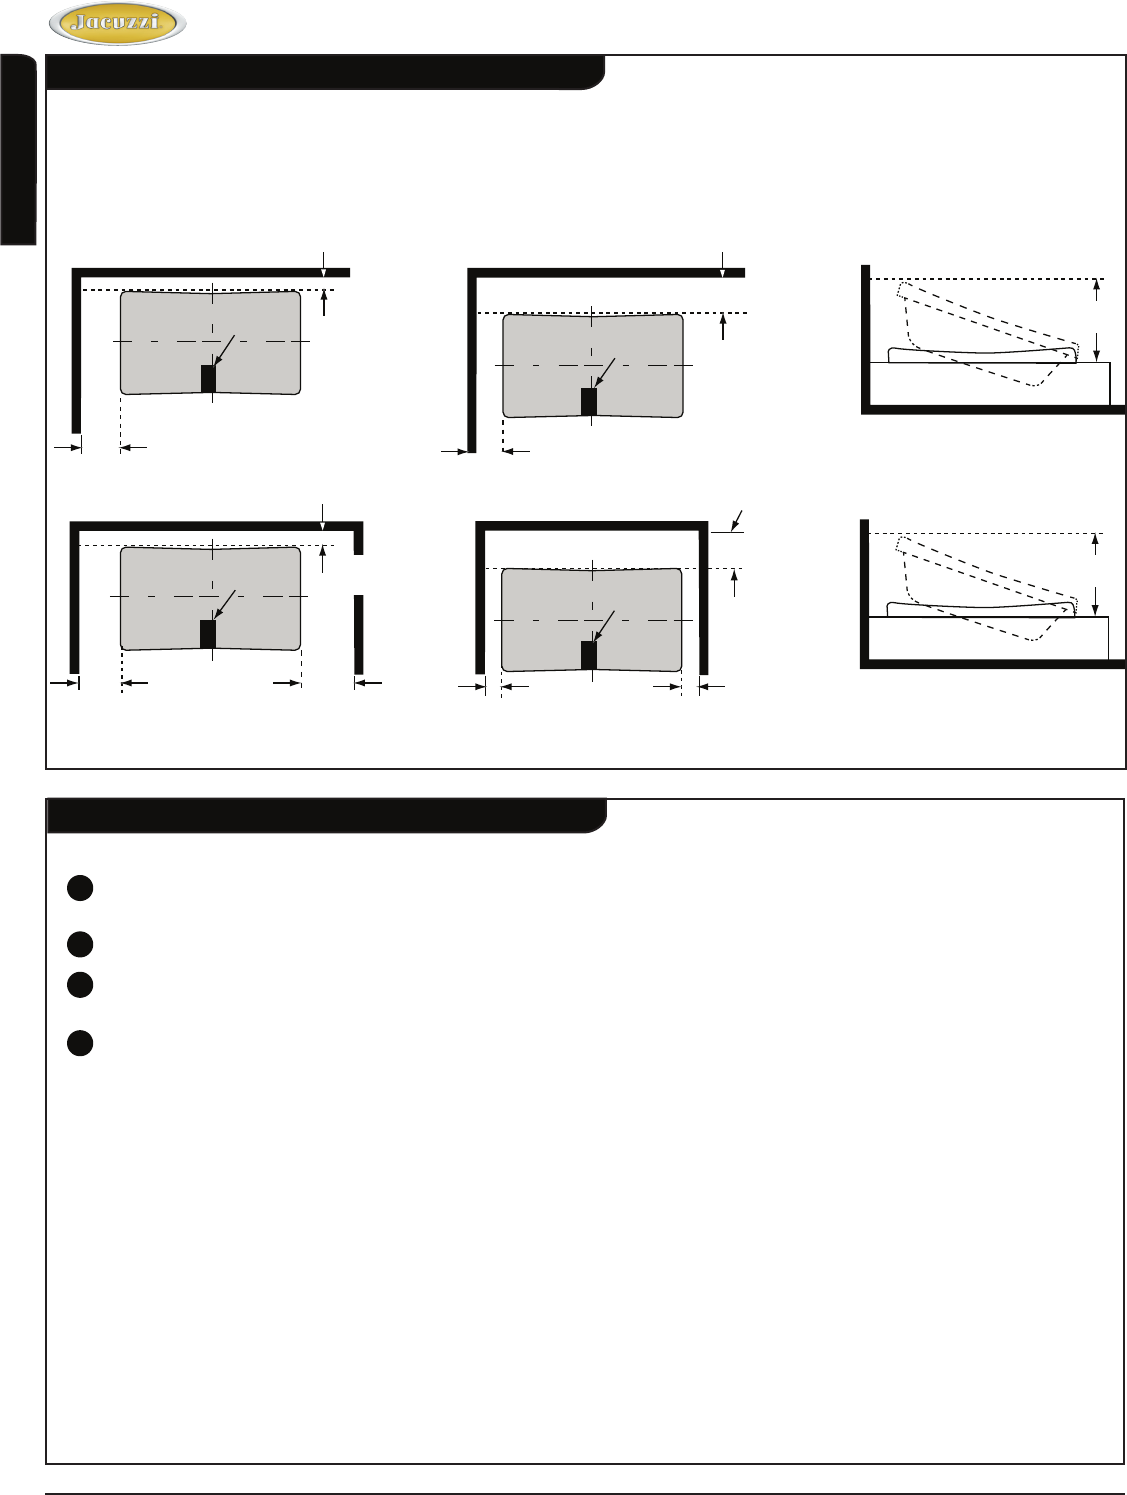
Framing (con’t)
Suboor
Prepare the suboor for the drain and ensure that the area is level.
1
The drain/overow of the bathtub extends below the bottom of the bathtub. Identify the drawing in the Technical
Specications Manual that corresponds with your bathtub.
2
Make appropriate cuts to the suboor to accommodate the drain.
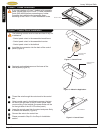
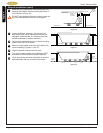
3
Jacuzzi’s Tru-Level™ base is a standard feature on all bathtubs. If the suboor is level and a continuous surface,
no other preparation is necessary. Proceed to the “Installation” section.
4
If the suboor is not level, you must level the entire surface prior to installing the bathtub. The materials used
will insure that the bathtub is supported from the bottom. These materials include: leveling compound, mortar,
plaster or minimal expansion structural foam (having a density of a minimum 5lbs/cubic foot). The bathtub must
remain level in order for it to drain properly and must make contact with the leveling material. Both sides of a joint
or splice of suboor should be level to each other.
Figure 3
48˝
(1219mm)