


5
1.2. Telescope Assembly
The numbers in brackets refer to the keys shown in Figure 1 & Figure 2.
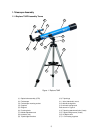
1. Unpack and identify the components of your telescope using the list shown in previous pages.
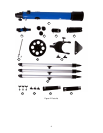
2. Take the Tripod legs (#10) out of the package. Lock each one with supplied Tripod locking screws (#15).
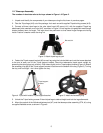
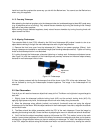
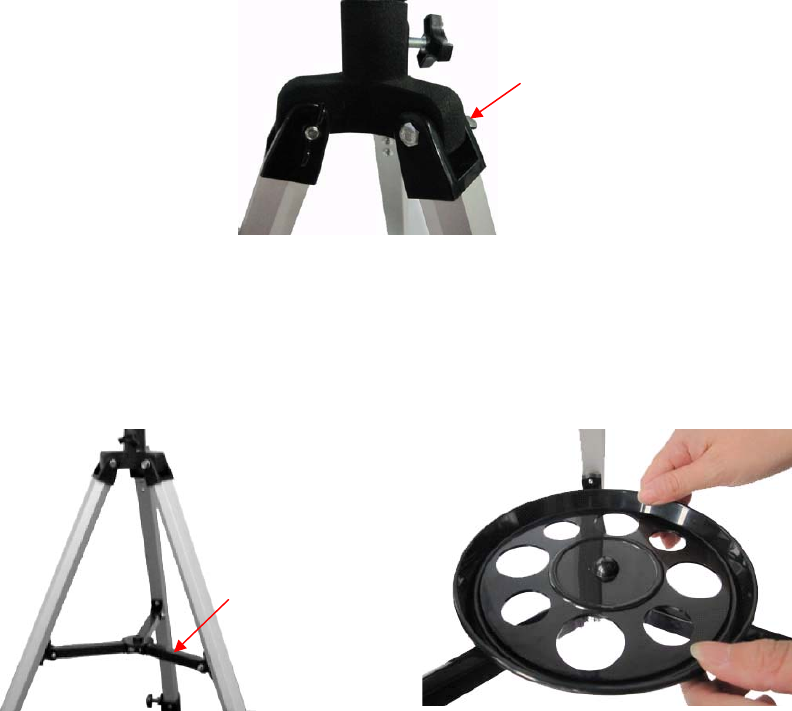
3. Connect all three tripod legs to the yoke tripod head (AZ mount, #11) with the supplied Tripod leg
attachment bolts, washers, and nuts (#14), as shown in Figure 3. Each leg has a hinged black metal flange
located halfway down its length. The legs should be positioned so that these hinged flanges are facing
inside. Position a washer under the wing nut.
Figure 3. Attach tripod legs to york
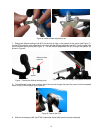
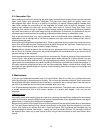
4. Fasten the Tripod support bracket (#9) to each leg using the included bolts and nuts that come attached
to the end of each arm of the Tripod support bracket. Stand the telescope's tripod mount upright by
spreading the tripod's legs out uniformly. Push down slightly on the Tripod support bracket (Figure 4.) Attach
the accessory tray (#8) to the Tripod support bracket via a screw on the bottom of the tray (Figure 5.) Turning
the tray until hand tight – don’t over tighten the tray.
Figure 4. Tripod with installed Tripod support bracket
Figure 5. Install the Accessory tray
5. Unlock the Tripod locking screws. Extend tripod legs to desired height and lock the legs afterwards.
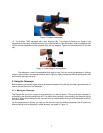
6. Mount the eyebolt of the Altitude adjustment rod (#7) onto the telescope tube assembly (OTA, #1) using
a supplied flathead screw, as shown in Figure 6.
Bolt set #14
Tripod support
bracket