10
ASSEMBLY INSTRUCTIONS
Model AR19
1. Wear eye protection. Remove wooden blocks. NOTE: Watch for nails and wood splinters.
2. Carefully cut open side of carton.
3. Lawn Aerator is shipped with handle folded. Lock handle in position using the cam lock lever.
Model AR25
1. Wear eye protection. Remove wooden blocks. NOTE: Watch for nails and wood splinters.
2. Carefully cut open side of carton.
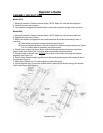
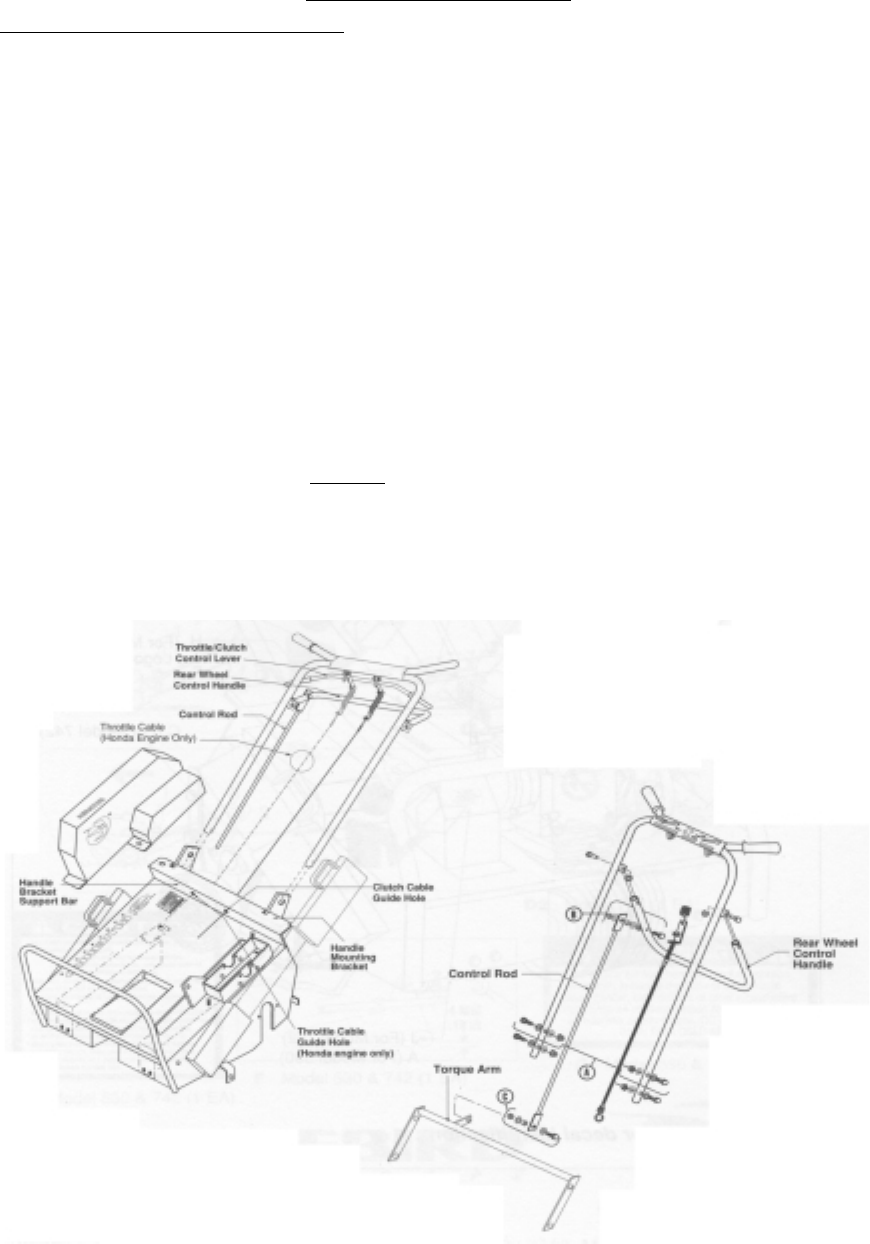
3. AR25 Lawn Aerator is shipped with the handle detached. Mount the handle using 2 each ½”
wrenches.
(A) Slide handle onto handle mounting brackets (see Figure 4).
(B) Insert and tighten fasteners, which are located on handle mounting brackets (see Figure
5-A). For further detail on assembly, see parts manual.
4. Connect top of control rod to rear wheel control handle with fasteners located on rear wheel
control handle (see Figure 5-B) For further detail on assembly, see parts manual.
5. Connect bottom of control rod to
OUTER side of lever on the torque arm using the fastener
assembly (see Figure 5-C).
6. Run the clutch cable through the guide hole in the handle bracket support bar located at rear of
the deck (see Figure 4).
7. Attach end of cable to the “S” hook located on the belt idler pulley.
8. (Honda Engines Only) Connect the throttle cable by attaching the throttle spring to the throttle/
clutch control lever. (see Figure 4)
Figures 4 and 5
Operator’s Guide


