Indoor Installation:
T
he following installation and service clearances
m
ust be maintained from the heater to combustible
materials. See Figure 22.
*For installations in which the vent terminates
in a wall directly behind the heater, allow 23”
between the rear of the heater and the outside of
the wall. See Figure 23.
Connecting Special Gas Vent to the
Heater:
A
ttach the Special Gas Vent to the Vent Adapter
using the adhesive specified by the vent manufactur-
er. Do not drill holes or use screws to connect Vent to
Vent Adapter.
1. Apply a bead of adhesive, about
1
⁄8” in diameter,
completely around the male end of the vent section,
between
1
⁄4” to
3
⁄8” from the end of the section.
2. Fully insert the male section into the female fitting
of the Vent Adapter.
3. Secure vent section Vent Adapter by sliding the
ring of the vent section over the tabs of the Vent
Adapter and bending the tabs over the ring. See
Figure 24.
11
Horizontal or Vertical Venting—Positive
Pressure:
T
he heater can be vented either horizontally or
vertically with positive pressure vent system if one of
the Special Gas Vent Systems listed in Figure 17 is
used. Do not use a draft hood with this heater. The
vent system must be installed in accordance with the
National Gas Code ANSI Z223.1 or the CAN/CGA
B149 Installation Codes, Local Codes and the Vent
Manufacturer’s Instructions.
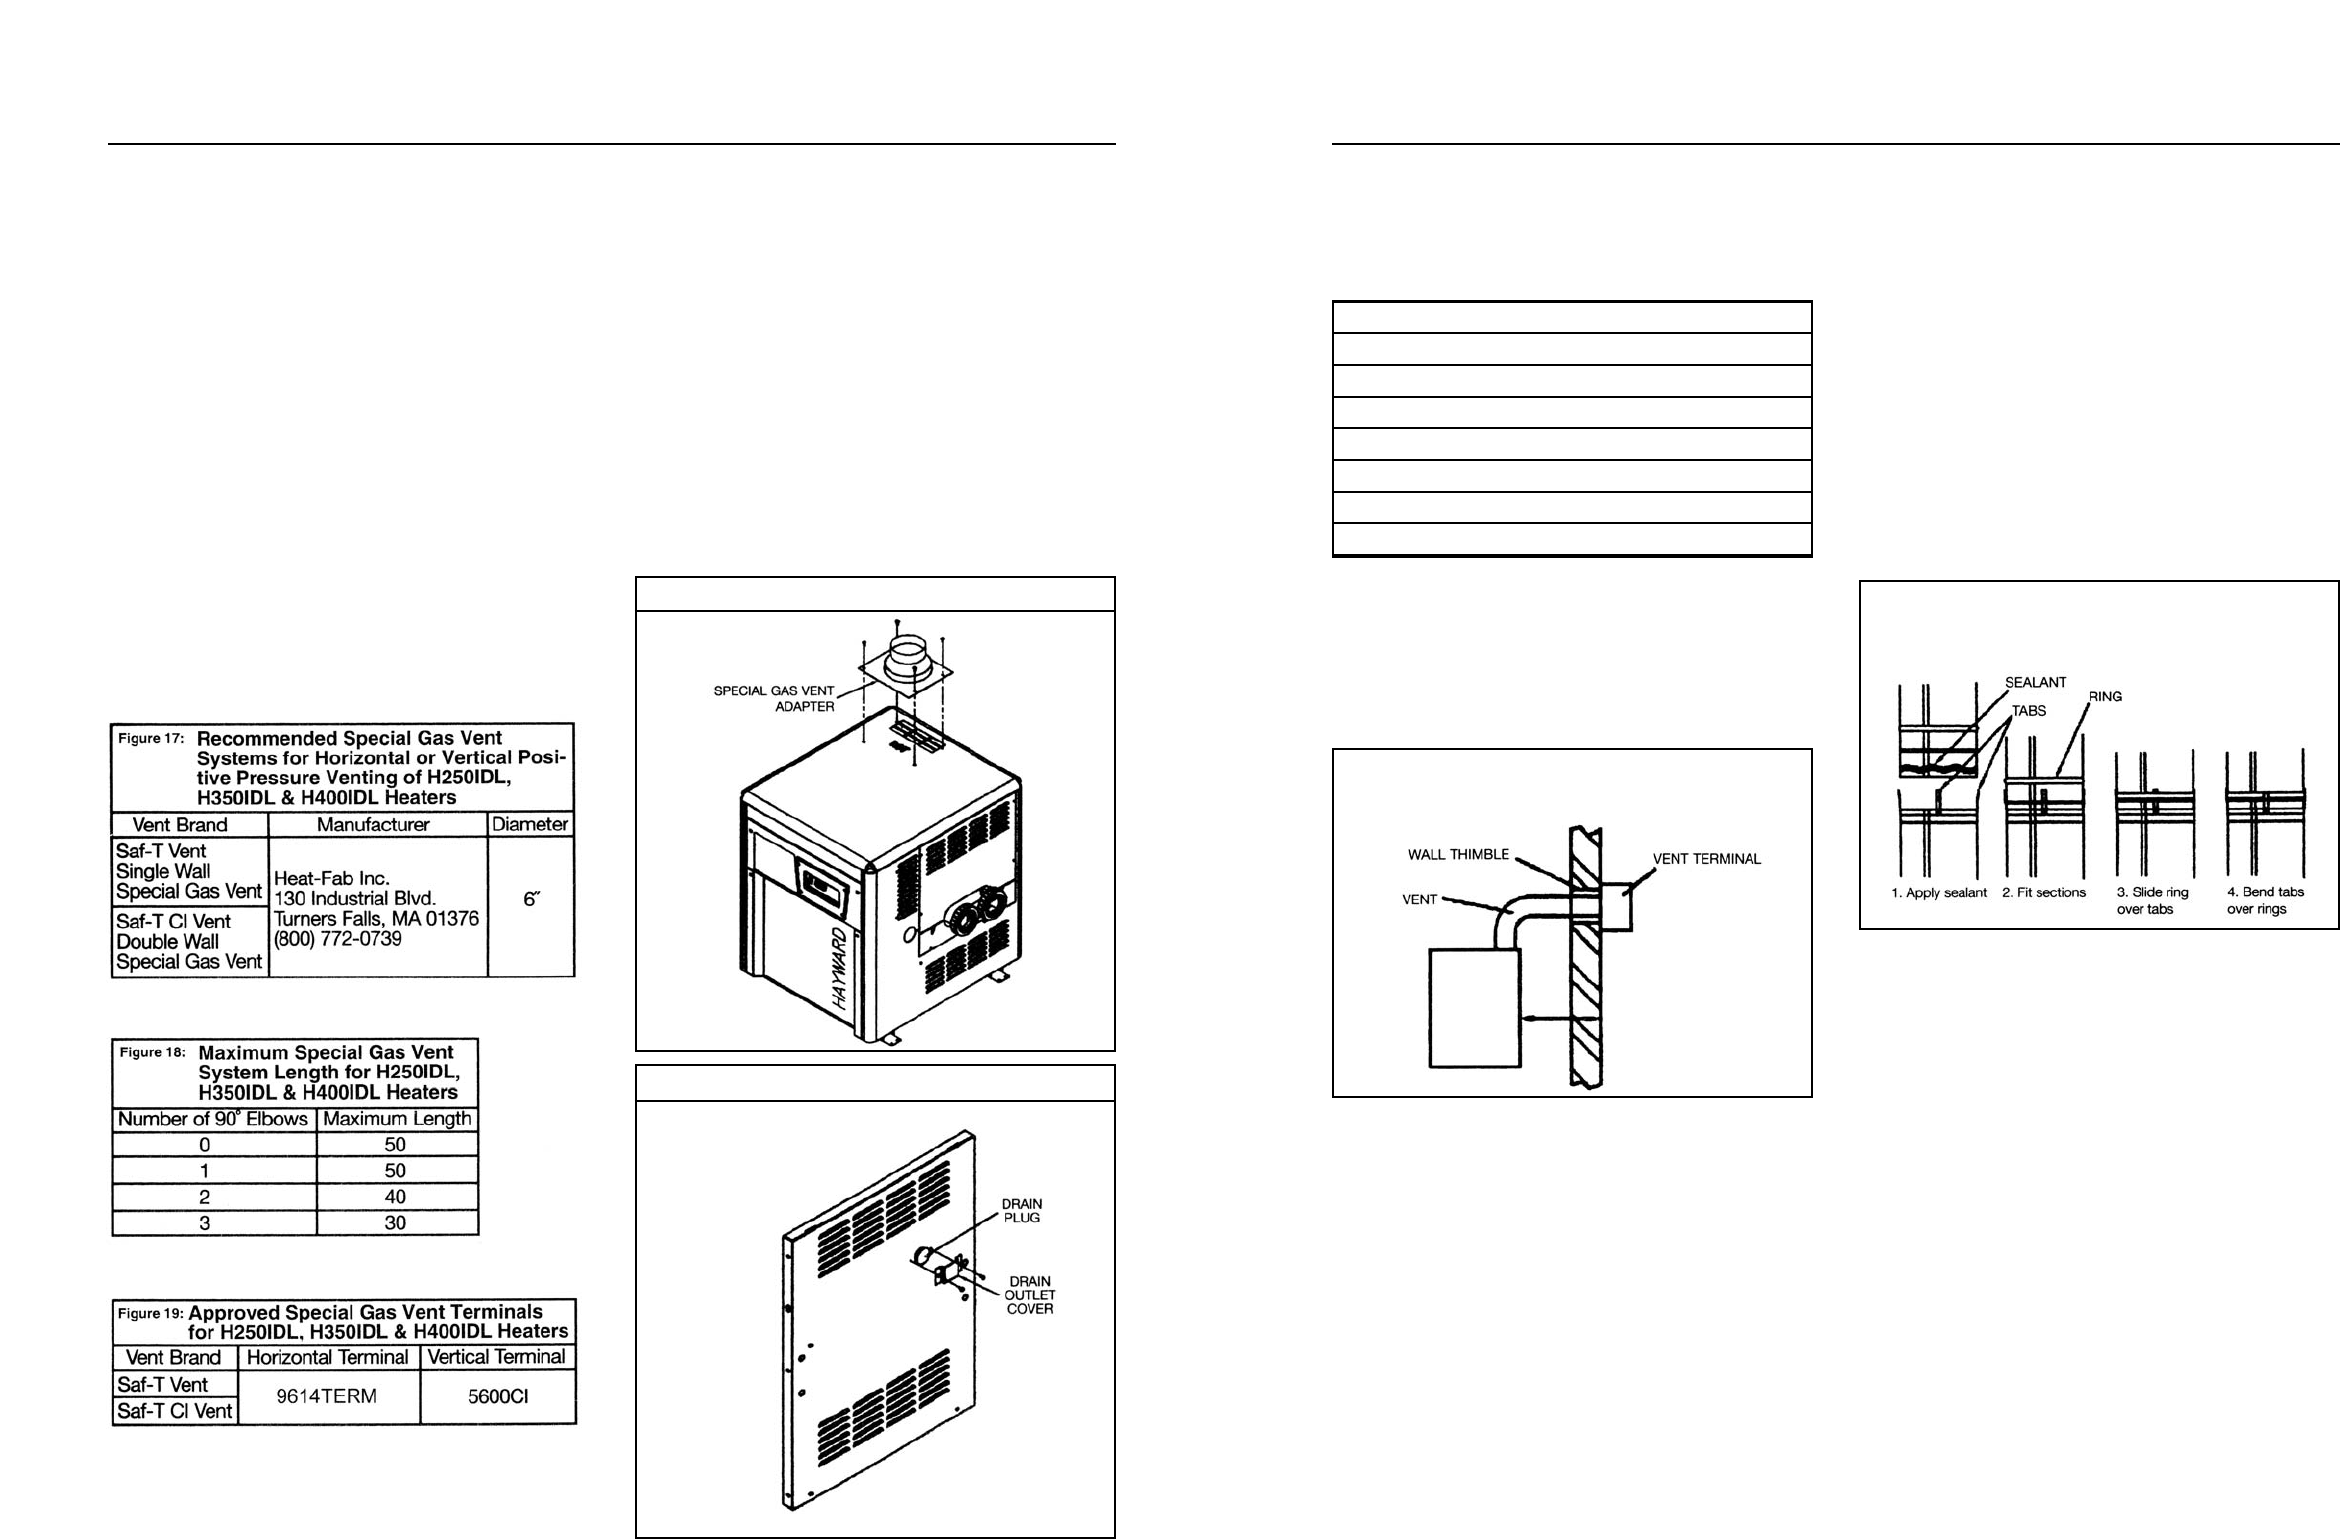
See Figure 17 for permissible vent diameters for
these heaters.
See Figure 18 for maximum permissible vent
lengths.
The Vent System must terminate with a Vent
Terminal approved for this Pool Heater. See figure 19
for a list of approved vent terminals.
A Special Gas Vent Adapter Kit must be installed
on heater before connecting the Special Gas Vent to
the Heater.
Special Gas Vent Adapter Kit
Installation:
A Special Gas Vent Adapter collar must be installed
to the heater exhaust outlet, and a drain plug and out-
let cover must be installed. These components are
contained in the Special Gas Vent Adapter Kit.
The installation of the kit is done as follows:
1. Remove the 4 screws that fasten the vent
cover to the internal vent assembly. Discard
the vent cover. Install the vent adapter and
gasket over exhaust using 4 screws
previously removed. See Figure 20.
2. Install plug into drain outlet at rear of heater.
Install drain outlet cover over the drain outlet
using 2 screws. See Figure 21.
10
Special Gas Vent Adapter Installation Figure 20
Drain Outlet Cover Installation Figure 21
Clearance for Vent Termination in Wall
Directly Behind Heater
Figure 23
Attaching Vent to Vent Adapter
Figure 24
Indoor Installation Figure 22
Top - 36”
Front - Unobstructed
Back - 6”
Right side (Water side) - 12”
Left side - 6”
For use on combustible floors.
Do not install in a closet.


