


For technical questions, please call 1-800-444-3353;
Troubleshooting section at end of manual.
SKU 99741 PAGE 11
CAUTION! NEVER use any products not
designed for pressure washer use,
nor any products with chlorine or any
caustic materials, including liquids
containing solvents, trisodium phos-
phate products, ammonia, or acid-
based cleaners.
Fill the Detergent Dispenser only
when the unit is not running or
plugged in.
Setup
CHECK THE WATER SUPPLY.1. Prior to
using the Pressure Washer for the rst
time, it is ESSENTIAL to verify that the
water supply is adequate. The Pres-
sure Washer needs TWICE the water
supply (or volume) than the stated
water output (1.6 GPM). This Pres-
sure Washer will need about 3-4 GPM
to operate correctly and efciently. If
the water is being supplied by a well/
pump, make certain that the well/pump
produces enough water to keep up with
the Pressure Washer’s water demands.
Water supply hoses should be heavy
duty to withstand the forces involved.
Water hoses up to 25’ long must be
5
/
8
”
ID. Water hoses up to 50’ long must be
3
/
4
” ID. Do not use hoses longer than
50’. The more minerals in the water
(the harder the water) you use, the
more often mineral buildup will need
to be cleaned out from the nozzles.
Flow rate of the water supply must nev-
er be allowed to fall below 3 GPM.
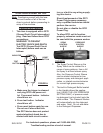
To determine the water supply’s ow
rate: Run the water at full for one
minute into a 5 gallon container, and
measure the amount of water in the
container.
CAUTION! If the Pressure Washer is
run with an inadequate water supply, the
pump will cavitate. Cavitation causes the
pump to operate loudly and will damage it.
ARRANGE FOR A PROPER ELEC-2.
TRICAL SUPPLY. This unit uses
a large amount of current, espe-
cially during start-up. Turn off power
switch, then connect this unit only to
a dedicated household circuit capable
of providing ample current to it. A
dedicated circuit has no additional
loads (running devices) connected to
it; shut off any appliances that slow
down or lights that dim while the
washer is running. For best results,
connect the plug to that circuit’s outlet
that is nearest to the circuit breaker
panel.
MAKE SURE THE WASHER IS 3.
CLEAN AND READY FOR USE. En-
sure the inlet water strainer, nozzle,
and the rest of the Washer are com-
pletely free of buildup or debris.
PLAN OUT THE JOB:4. Plan out what
areas will be cleaned, how many ses-
sions will be necessary, and how long
the individual sessions of work will
need to be. Plan to clean the higher
portions rst, because the higher
portions will typically remain cleaner
while the other areas are cleaned.
Plan a safe direction for runoff to
ow while the job is being performed,
and plan on working your way in that
direction. You will have a clearer idea
of the time involved to clean the area
after doing a test run, as explained on
page 14.