


Page 11SKU 97005 For technical questions, please call 1-800-444-3353.
Mix fuel stabilizer (not included) with 3.
89 octane (or better) unleaded gaso-
line according to fuel stabilizer direc-
tions.
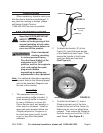
Fill the Fuel Tank (101) to about 1 4.
inch under the lip of the gasoline tank
with the stabilized unleaded gasoline
mixture. (See Figure I.)
Then replace the Fuel Tank Cap 5.
(109). (See Figure I.)
Checking Pump Oil Level
CAUTION! Your Warranty is VOID if the
Pump’s Housing (13) is not properly
lled with oil before each use. Before
each use, check the oil level. Do not
run the Pump with low or no oil. Run-
ning the Pump with no or low oil WILL
permanently damage the Pump.
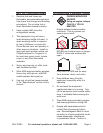
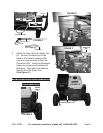
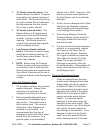
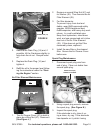
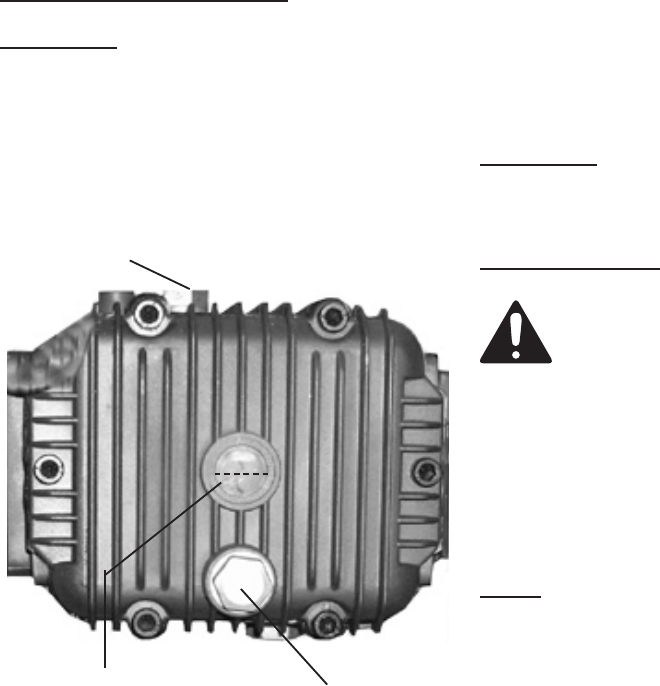
PUMP OIL GAUGE (26)
OIL LEVEL WINDOW (28)
(PROPER OIL LEVEL)
OIL DRAIN PLUG (3)
FIGURE J
1. Remove the Oil Gauge (26) and wipe
it off with a clean rag.
(See Figure J.)
Reinsert the Oil Gauge (26) com-2.
pletely and remove it to check the
oil level. The oil level should be
between the high and low marks on
the Gauge. Also, the proper oil level
can be visually observed through the
oil Level Window (28). The proper
oil level should appear midway in the
Window. (See Figure J.)
If the oil level is below the low mark
add the appropriate type of oil until
the oil level is between the high and
the low marks. Do not overll.
(See Figure J.)
Oil type:
32° F or above = SAE 25W
Below 32° F = SAE 15W-40
Replace the Oil Gauge. 3.
(See Figure J.)
CAUTION! Do not run the Pump with too
little or too much oil. The Pump will
be permanently damaged.
Start Procedure
Before starting the engine:
Follow the Set Up a.
Instructions to prepare the
equipment.
Inspect the equipment and b.
engine.
Fill the engine with the c.
proper amount and type of
both fuel and oil.
Note: This engine includes an automatic
low oil shutdown sensor that disables
the engine if the oil level is too low.
Read the Equipment d.
Operation section that
follows.
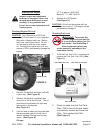
Turn the engine Fuel Valve (104) to 1.
its “OPEN” position. (See Figure E.)
Turn the Engine Switch (3) to its ON 2.
or RUN position. (See Figure D.)
REV 09b; 09i