5GDL 30A Installation Instructions
Under-deck-mounting the GA 32 Antenna
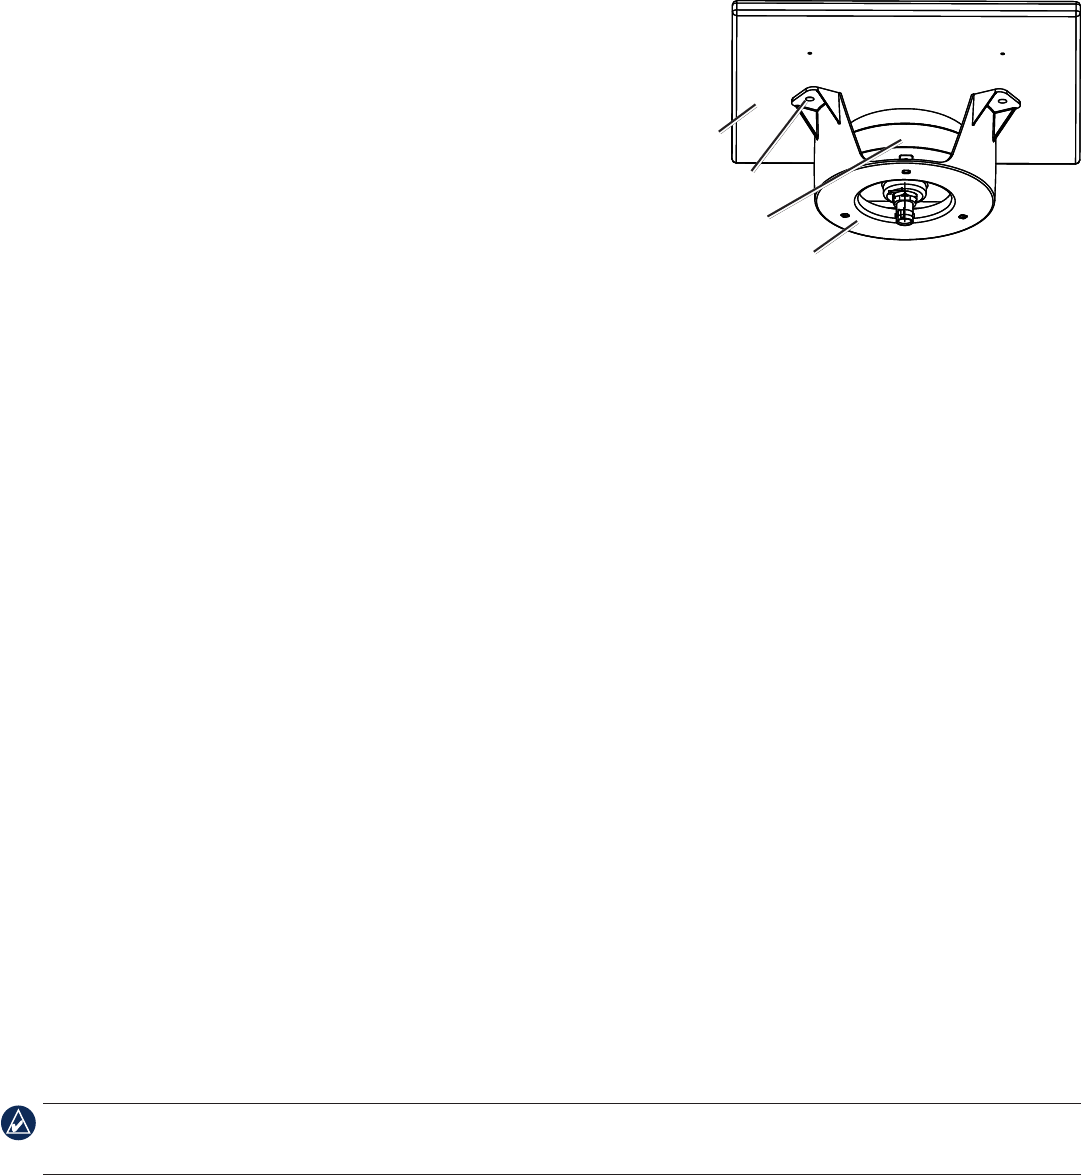
The GA 32 antenna can be mounted under a berglass surface with the included adhesive pads. The antenna will not acquire XM satellite
signals through metal—you can only use the under-deck mount under a berglass surface.
1. Determinethelocationontheberglasssurfacewhereyouwanttomountthe
GA 32 antenna.
2. Place the adhesive pads on the under-deck mounting bracket.
There are holes in the under-deck mounting bracket that can be used to secure
the under-deck mount to the mounting surface with screws. Garmin does not
recommend attaching the under-deck mounting bracket to the surface with
screws, because of the likelihood that screws will protrude through the top
of the mounting surface. If you choose to use screws, do so with extreme care.
3. Place the GA 32 antenna in the under-deck mounting bracket.
4. Adhere the under-deck mounting bracket to the mounting surface.
5. Connect the cable to the GA 32 antenna.
6. Route the cable away from sources of electronic interference, and connect it to
your GDL 30A.
Connecting the GA 32 to the GDL 30A
Place the GA 32 connector onto the GDL 30A ANTENNA connector andtwist clockwise to secure.
Check the antenna’s performance with potentially interfering equipment turned on and off before permanently mounting the antenna. Perform
this test after the XM WX Weather service is activated.
Other electronic equipment, fan motors, the engine ignition system, alternators, generators, radar, and VHF radio transmissions could
potentially cause interference. After proper operation is veried, permanently install the antenna.
Using the GDL 30A
The GDL 30A turns on and off automatically with the Garmin Marine Network to which it is connected. To verify proper operation, turn on the
chartplotter and verify that the Status LED on the front of the GDL 30A is blinking green. For more detail on the blink codes, see page 6.
Subscribing to XM WX Weather and XM Radio
With the GDL 30A installed, contact XM Satellite Radio to activate your XM WX weather and audio subscription service. Follow the
instructions. Complete steps 1–3 BEFORE calling XM Satellite Radio:
Step 1: Check the system setup
Make certain the GDL 30A is fully wired and is connected to a chartplotter. Verify that the GA 32 antenna has been properly installed. If
you own a GDL 30A, verify that the audio cable is connected to your GDL 30A and to your stereo receiver.
Step 2: Turn on your system
Turn on your chartplotter. This automatically turns on the GDL 30A.
Step 3: Identify radio ID(s)
On a GPSMAP 4000/5000 series chartplotter, from the Home screen, select Congure > System > System Information.
On a GPSMAP 3000 series chartplotter, press and hold down the ADJ/MENU key. The Main Menu page appears. A list of tabs appears
down the left side of the Menu page. Using the ROCKER key, highlight the XM tab and select the Information subtab.
Record the XM Weather Radio ID and the XM Audio Radio ID. Write these numbers on the front page of these instructions.
Have the ID numbers, your billing address, and other billing information ready when you contact XM Satellite Radio.
To verify that the audio portion functions correctly, on a GPSMAP 4000/5000 series chartplotter, from the Home screen select
. On a GPSMAP 3000 series chartplotter, select the Audio subtab (next to the Information subtab). Verify that XM Preview appears in the
Radio Tuning box.
•
•
GA 32
antenna
Under-deck
mounting bracket
Mounting
surface
Adhesive pads
GA 32
antenna
Under-deck
mounting bracket
Mounting
surface
Adhesive pads


