


2 GDL 30A Installation Instructions
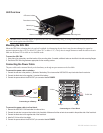
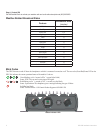
Unit Overview
Power/data connector
LED status indicator
Mounting holes
Weather cap
Network port
Antenna connector
Audio connector
Always wear safety goggles, ear protection, and a dust mask when drilling, cutting, or sanding. When drilling or cutting, always check
what is on the opposite side of the surface.
Mounting the GDL 30A
Mount the GDL 30A in a location that is dry and well ventilated. Avoid mounting the unit where it may become submerged or exposed to
extreme temperatures above 158°F or below 5°F (above 70°C or below -15°C). Verify there is enough clearance to attach the cables to the unit.
Make sure the Status LED is visible to view the blink codes.
To mount the GDL 30A:
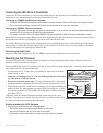
1. Usingtheunitasatemplate,markthelocationofthemountingholes.Ifneeded,additionalholescanbedrilledinthesidemountinganges.
2. Secure the GDL 30A using fasteners appropriate for the mounting surface.
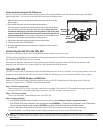
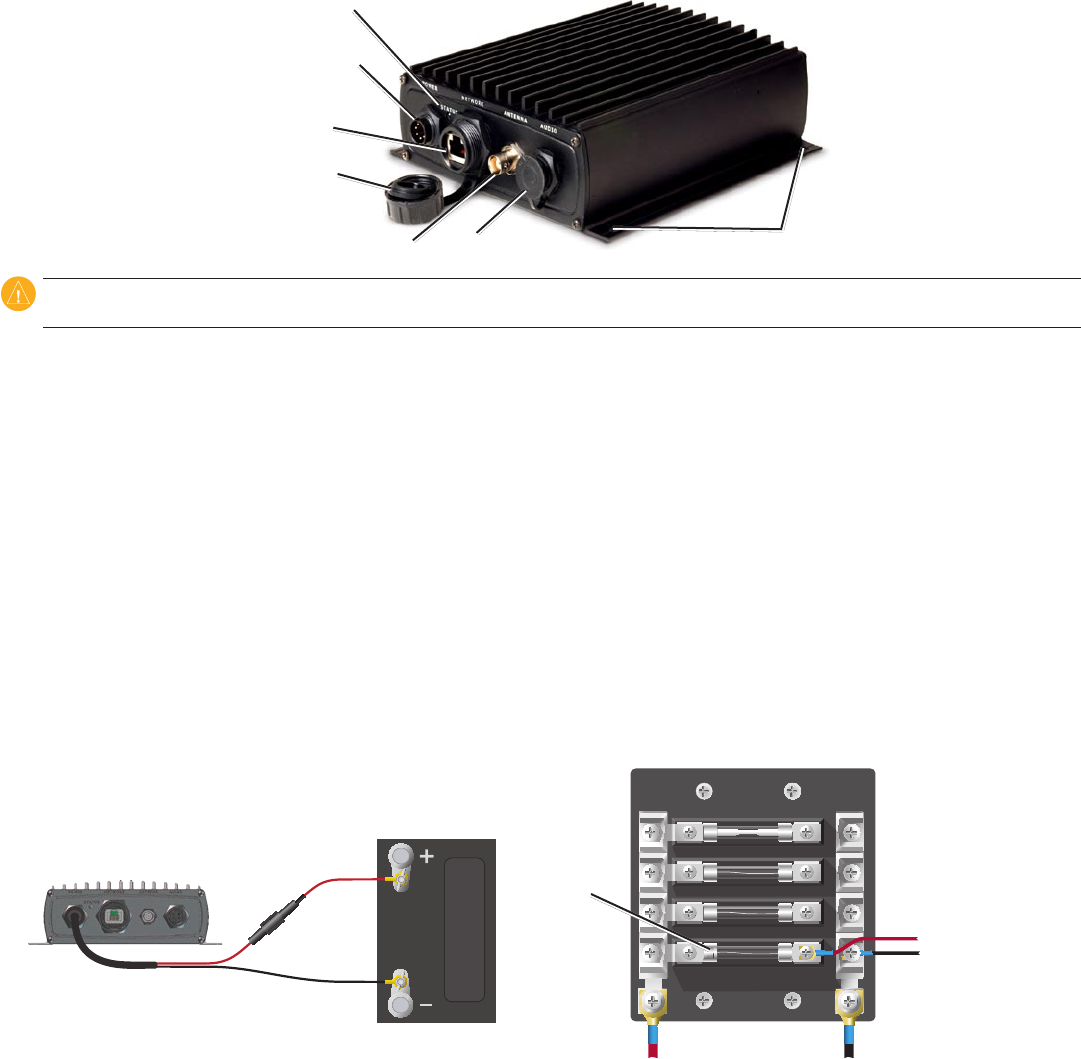
Connecting the Power Cable
The power cable can be connected directly to the boat battery or through an open connector on the fuse block.
To connect the power cable to a battery:
1. Connect the red wire to the positive (+) terminal of the battery. Do not remove the AGC/3AG 2.0 amp fuse holder from the red wire.
2. Connect the black wire to the negative (-) terminal of the battery.
3. Connect the power cable to the GDL 30A 7-pin connector labeled POWER.
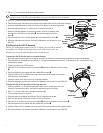
Red
Black
Connecting to a Fuse Block
To GDL 30A
Battery +
Battery -
2 A fuse
Connecting to a Battery
To connect the power cable to a fuse block:
1. Remove the AGC/3AG 2.0 A fuse holder from the red wire.
2. Connect the red wire to an open fuse holder in the fuse block. Make sure that the red wire is connected to the positive side of the fuse block.
3. Connect the black wire to the negative side of the fuse block.
4. Install a 2.0 A fuse in the fuse holder.
5. Connect the power cable to the GDL 30A 7-pin connector labeled POWER.
10–35
VDC