


4
GB
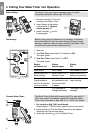
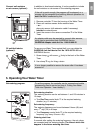
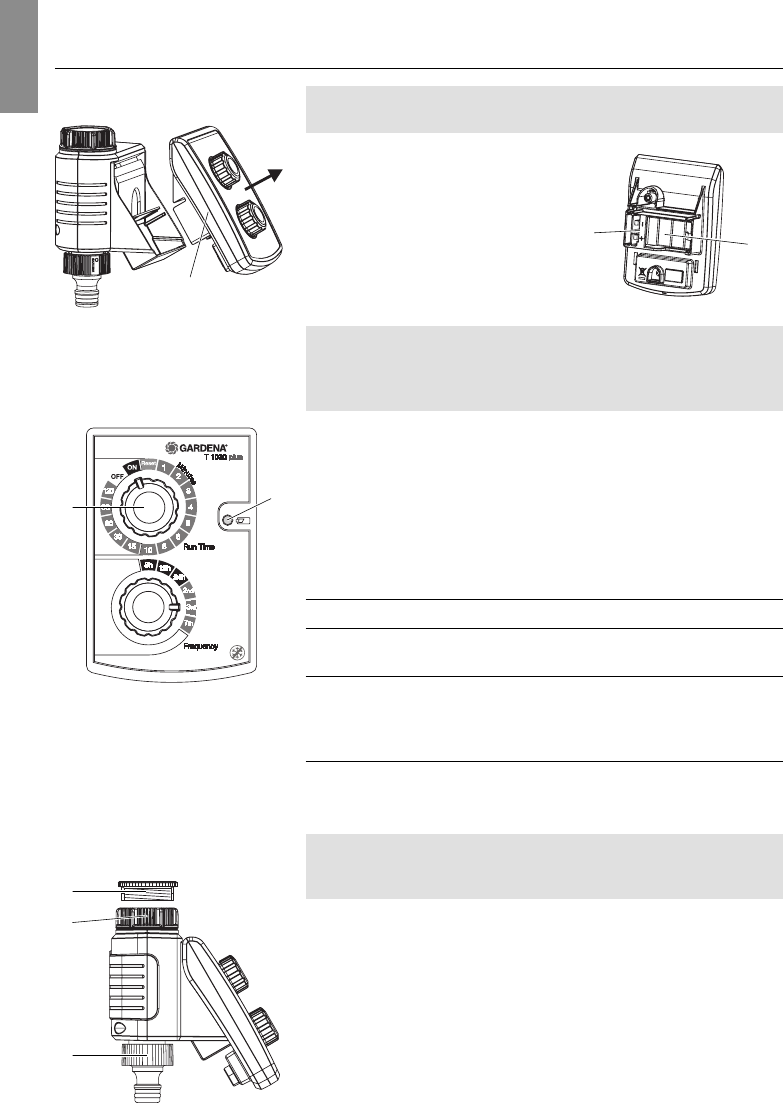
Insert battery:
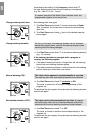
Test battery:
4. Putting Your Water Timer into Operation
The Water Timer may only be operated with a 9 V alkali-
manganese (alkaline) battery type IEC 6LR61.
1. Remove controller
4
from the
housing of the Water Timer.
2. Insert battery in the battery
compartment
5
. Observe
correct polarity
z
P
.
3. Install controller
4
on the
housing again.
Before a long period of absence (e.g. holidays), the battery
should be tested. So that the water running off cannot cause
damage, a specific outlet is to be provided on the Water Timer
(connect hose, place bucket underneath etc.).
1. Open tap.
2. Turn Run-Time control knob
1
clockwise to ON.
The valve opens.
3. Turn Run-Time control knob
1
to OFF.
The valve closes.
Battery Battery Battery
sufficiently full almost empty flat
Valve opens. Valve opens. Valve does not open.
Battery level LED
3
Battery level LED
3
Battery level LED
3
does not flash. flashes 5 times. flashes permanently.
The Water Timer The Water Timer The Water Timer
is guaranteed to will continue to work stops working.
work for a minimum for no more than
of 4 more weeks. 4 weeks.
It is advisable to The battery must be
change the battery. changed.
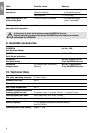
The Water Timer is fitted with a sleeve nut
6
for taps with G1
"
(33.3 mm) thread. The adaptor supplied
7
allows the Water
Timer to be connected to taps with a G
³⁄₄
"
(26.5 mm) thread.
1. For tap with a G
³³⁄⁄₄₄
"
(26.5 mm) thread:
Screw adaptor
7
on to the tap manually (do not use pliers).
2. Screw sleeve nut
6
of the Water Timer on to the adaptor
thread by hand (do not use pliers).
3. Screw tap connector
8
on to the Water Timer.
z
P
5
7
8
6
Connect Water Timer:
4
1
3