


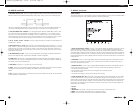
Program ON/OFF timers (starting 53)
• Press MENU to activate MAIN MENU
• Press ‘5' to activate TIMERS menu.
• Press ‘1' and set TIMER 1 ON time using Keypad.
• Press ‘STORE’ to save.
• Press ‘2' and set TIMER 1 OFF time using keypad.
• Press ‘STORE’ to save.
• Press ‘3' and set TIMER 1 Memory Channel using key-
pad and press ‘STORE’ to save.
• Repeat for TIMER 2 using menu entries 4,5, and 6.
• Press ‘9' to exit menu.
Activate (Enabling) Timer (page 56)
• Press ‘TIME’ to activate TIMER 1 menu.
• Press ‘ENABLE‘ to activate.
• Press ‘TIME’ again to activate TIMER 2 menu.
• Press ‘ENABLE’ to activate.
• Press ‘TIME’ again twice to return to normal operation.
• TIMER 1 and/or 2 will be displayed below the clock to
indicate activation.
Lock (or Unlock) Controls (page 56)
• Press and hold ‘CLR/LOCK’ until “LOCK”is displayed
(extinguishes).
• Pushbuttons (except POWER) and ‘TUNING’ knob are
inactive (active).
Display light On/Off (page 57)
• Press ‘LIGHT’ to scroll display lighting through bright,
medium, dim and off.
Disable Beep (page 25)
• Press ‘MENU’ to enable MAIN MENU.
• Press ‘2' to enable the AUDIO SETTINGS menu.
• Press ‘2' to toggle Beep on and off.
• Press ‘9' to exit menu.
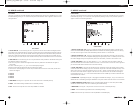
MEMORY FUNCTIONS
• Store MEMORY Channel (page 26)
• Store COUNTRY Channel (page 28)
• Select frequency, bandwidth,AGC and mode.
• Press ‘STORE’.This will activate MEMORY or COUNTRY
memory mode.
• Press MEMORY or COUNTRY to select your preference.
• Select an empty location using ‘TUNING’ or ‘< SELECT >’.
• Press ‘STORE’ to save.
• If in MEMORY mode,use ‘TUNING’ and ‘< SELECT >’ to
assign name, and press STORE again.
• Recall MEMORY Channel (page 26)
• Recall COUNTRY Channel (page 28)
• Press ‘MEMORY’ or ‘COUNTRY’.
• Use ‘TUNING’ and/or ‘< SELECT >’ to select desired
memory channel.
Select MEMOR
Y or COUNTRY Channel
for T.SCAN (page 51)
• Recall a MEMORY or COUNTRY channel as above.
•
Press
‘T
AG’ to mark the channel for T.SCAN.
• Set SQUELCH to desired level.
• Press ‘T.SCAN’ to activate scan.
• Delete a MEMORY Channel (page 28)
• Delete a COUNTRY Channel (page 30)
•
‘Select a MEMOR
Y or COUNTRY channel to delete as
described above
.
• Press and hold ‘DELETE’ for 3 seconds.A high pitched
beep will be heard and listed channel will be deleted.
Quick Reference Guide continued > > >
48 49
E
1
M
ANUAL
QUICK REFERENCE GUIDE continued
QUICK REFERENCE GUIDE
Q
UICK REFERENCE GUIDE
The symbol indicates that the key is to be
pressed within three seconds.
Select normal frequency display (VFO) (page 19 item 20)
• Press ‘VFO’
Select normal frequency display (VFO) (page 19 item 21,
22, 23)
• Press ‘FM’, SW,MW or LW softkeys to select FM
Broadcast, Shortwave,AM Broadcast or Long Wave
bands.When in Shortwave mode, press ‘SW’ two or
three digit entry from ‘Direct-Key-Input’ keypad for
Shortwave Meter band designation.
Adjust Frequency (page 21)
• Select Band.Turn ‘TUNING’ knob,Press ‘< SELECT >’
keys, use ‘Direct-Key-Entry’ keypad.
Select Mode (page 22-25)
• Press ‘AM’ for displayed ‘AM’
• Press ‘AM’ again to toggle to ‘AM SYNCH’
• Press ‘SSB’ to scroll between ‘USB’,‘LSB’ and DSB
when ‘AM SYNCH’ is displayed.
• Press ‘FM’ as required to display ‘FM’.
• Press ‘SSB’ to select SSB mode.(AM SYNC must be
off.To turn off, press AM).
Select AM SYNC (page 23)
• With unit in ‘AM’ mode, press ‘AM’ again.‘AM SYNC’
will flash and then lock on.
Select Bandwidth (page 19, item 13)
• Press ‘BW’ for displayed ‘7.0',‘4.0' or ‘2.3' kHz (not
active in FM).
Select AGC (page 19,item 12)
• Press ‘AGC’ for displayed ‘SLOW’,‘FAST’,or AUTO (not
active in FM).
DX (preamplifier) On or Off (page 15 item 16)
• Press ‘DX’ for displayed ‘DX’ or blank.
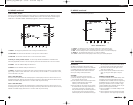
Set Time (page 52)
• Press ‘MENU’ to display MAIN MENU.Then press ‘3’ to
display SET CLOCKS display.
• Press ‘1',set Local time using keypad,and press
STORE to start clock.
• Press ‘2',set GMT time using keypad and press
‘STORE’ to start clock.
• Press ‘9' to exit SET CLOCKS display
Display GMT or Local Time (page 48)
• Press ‘TIME’ key 3 times.
• Press GMT or LOCAL softkey to select.
•
Press
‘TIME’ k
ey again to exit menu.
• Time is always displayed in upper right corner when
on, and in center of display when off.
Quick Reference Guide continued > > >
3
E1_manual_eng_APR06.qrk 5/5/06 10:22 AM Page 50