www.desatech.com
114144-01E
6
CHECK FOR LEAKS
IMPORTANT: The heater must be leak tested be-
fore any further assembly is done. Use only a soap
and water solution. DO NOT USE FLAME.
Turn control knob to the OFF position. Securely
connect regulator to propane/LP gas cylinder.
Open propane/LP cylinder valve. Apply a soap
and water solution to connections at the manifold,
burner, and control assembly. Bubbles forming
show a leak. In case of any leaks, turn off pro
-
pane/LP cylinder valve, remove manifold, check
and clean connection. Reconnect manifold and
leak test again.
Upon completion of leak test, and when there is
no sign of a leak, turn off propane/LP cylinder
valve and disconnect regulator from propane/LP
gas cylinder. Remove propane/LP gas cylinder and
continue to next step.
POLE AND BURNER/CONTROL
ASSEMBLY
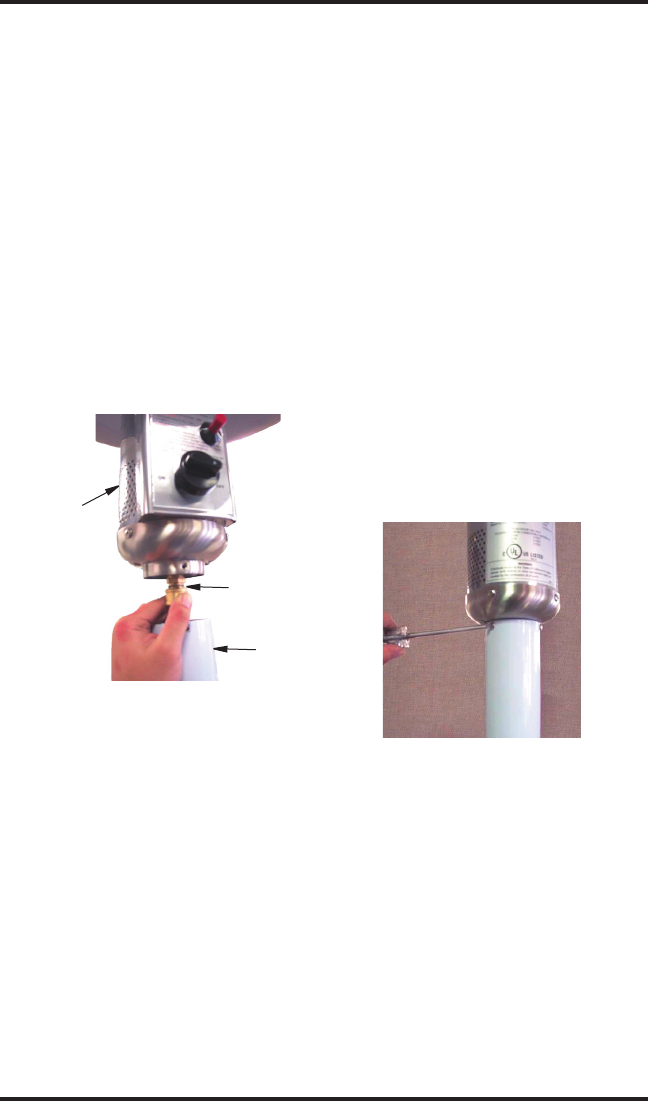
Attach pole to burner and control assembly (see
Figure 6). Align the three holes. Insert a small
bolt in each hole and tighten using #2 Phillips
head screwdriver.
ASSEMBLY INSTRUCTIONS
Continued
Figure 6 - Attach Burner and Control
Assembly to Pole
BURNER AND CONTROL
ASSEMBLY
The connection between the fuel line to the burner
is a quick connect connection type. Follow these
steps to assemble, while referring to Figure 5.
1.
Pull manifold out of top end of pole.
2. Slide/move quick connect collar of manifold
to the back.
3. Attach manifold to burner and control assem
-
bly by pushing burner and control assembly
connection all the way through manifold.
4. Make sure manifold and burner assembly snap
in properly.
5. Release the quick connect collar of manifold
that was slid to the back in step 2.
6. Place burner and control assembly onto pole.
Figure 5 - Connecting Manifold Assembly
to Burner and Control Assembly
Burner and
Control
Assembly
Manifold
Assembly
Pole


