


25se c t i O n 7 — se r v i c e
Off-Season Storage
If the machine is to be inoperative for a period longer than 30
days, the following procedures are recommended:
WARNING! Never store the machine or fuel
container indoors where there is an open flame,
spark or pilot light such as on water heater, furnace,
clothes dryer or other gas appliance.
NOTE: Fuel left in the fuel tank during warm weather deteriorates
and will cause serious starting problems.
To prevent gum deposits from forming inside the engine’s
carburetor and causing possible malfunction of the engine, the
fuel system must be either completely emptied, or the gasoline
must be treated with a stabilizer to prevent deterioration.
If using a fuel stabilizer:1.
Read the product manufacturer’s instructions and a.
recommendations.
Add to clean, fresh gasoline the correct amount of b.
stabilizer for the capacity of the fuel system.
Fill the fuel tank with treated fuel and run the c.
engine for 2-3 minutes to get stabilized fuel into the
carburetor.
If emptying the fuel system:2.
Do not drain fuel when the engine is hot. Allow a.
the engine adequate time to cool. Drain fuel into
an approved container outdoors, away from open
flame.
Drain any large volume of fuel from the tank by b.
disconnecting the fuel line from the in-line fuel filter
near the engine.
Reconnect the fuel line and run the engine until c.
it starts to falter, then use the choke to keep the
engine running until all fuel in the carburetor has
been exhausted.
Again disconnect the fuel line and drain any d.
remaining gasoline from the system.
WARNING! Drain fuel only into an approved
container outdoors, away from an open flame. Allow
engine to cool. Extinguish cigarettes, cigars, pipes,
and other sources of ignition prior to draining fuel.
Remove the spark plug and pour one (1) ounce of engine oil
through the spark plug hole into the cylinder. Crank the engine
several times to distribute the oil. Replace the spark plug.
Before storing for an extended period, clean and lubricate the
tractor as instructed in “Maintenance and Adjustments.”
Cutting Deck Removal
To remove the cutting deck, proceed as follows:
Disengage the PTO (Blade Engage) and engage the parking 1.
brake.
Place the deck gauge wheels in their highest setting 2.
(lowest deck setting).
Lower the deck by moving the deck lift lever into the 3.
bottom notch on the right fender.
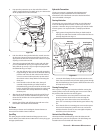
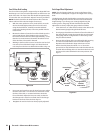
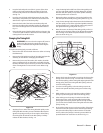
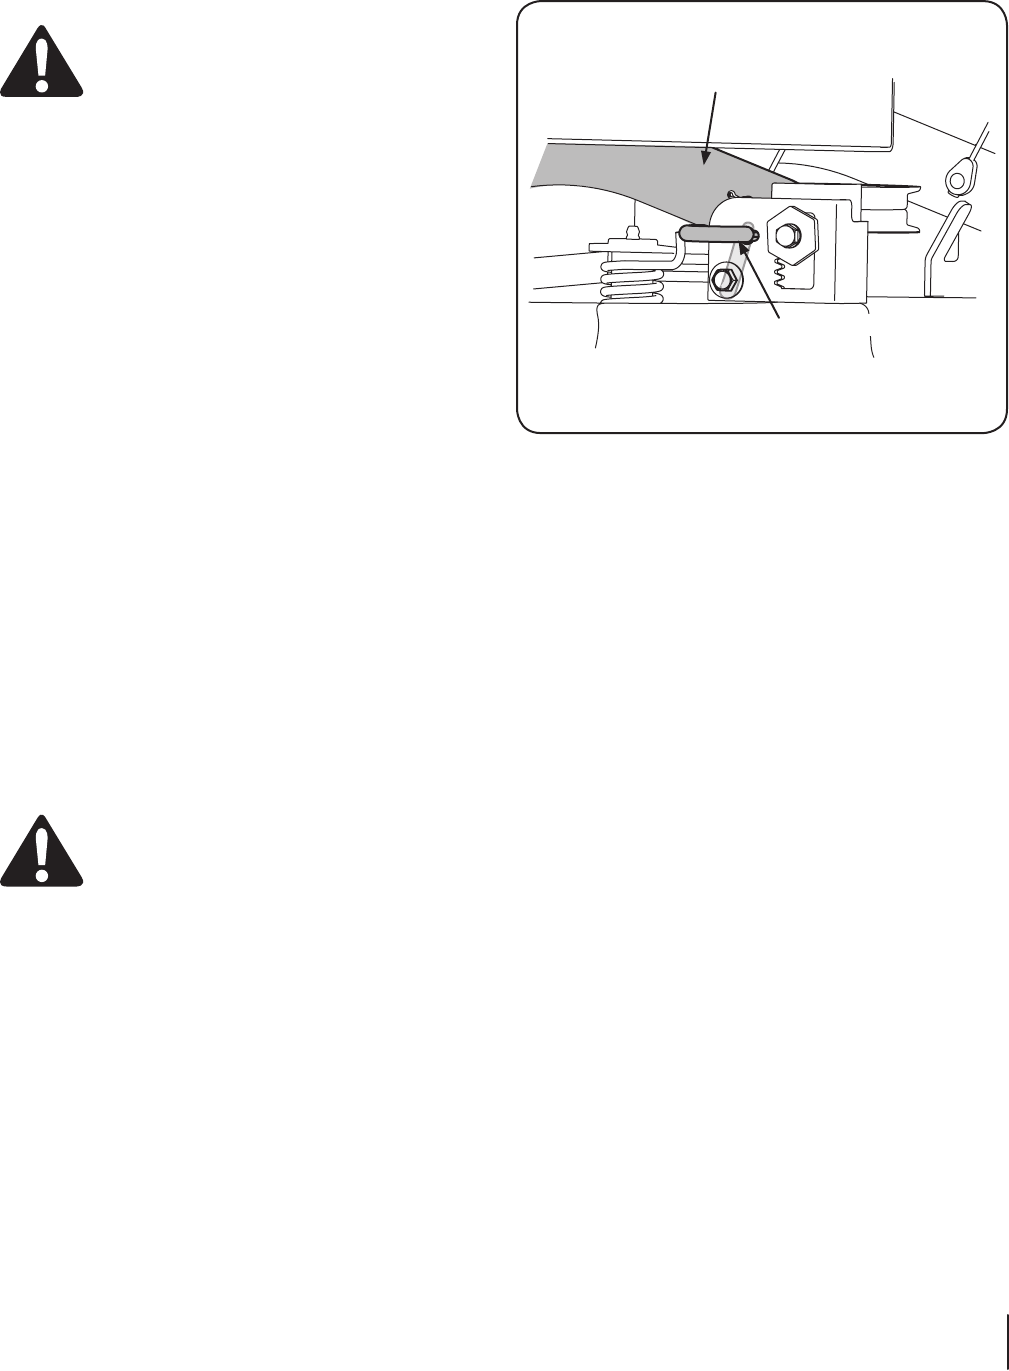
Looking at the cutting deck from the left side of the tractor, 4.
locate the deck support pin on the rear left side of the
deck. Refer to Fig. 7-1.
Pull the deck support pin outward to release the deck from 5.
the deck lift arm. Pivot the support pin handle downward
to lock the pin in the disengaged position. Refer to Fig. 7-1.
Move to the right side of the tractor and repeat the 6.
previous step to release the deck from the RH lift arm.
Move the deck lift lever into the top notch on the right 7.
fender to raise deck lift arms up and out of the way.
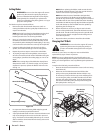
Carefully slide the cutting deck forward until the front deck 8.
hanger rod can be removed from the slots of the hanger
bracket at the front of the deck.
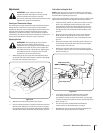
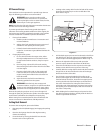
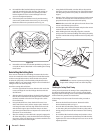
The PTO belt is captured inside the PTO pulley on the 9.
bottom of the engine by a belt keeper. From beneath the
front/left side of the tractor, locate the hex tapping screw
securing the left side of the belt keeper to the bottom of
the tractor frame. After first noting the frame hole into
which right side of the belt keeper is inserted, remove the
hex tapping screw and belt keeper. Slide the PTO belt off
the tractor’s PTO pulley.
While holding the front deck hanger rod upward to clear 10.
the deck front hanger bracket, carefully slide the deck out
from the right side of the tractor.
Deck Lift Arm
Deck Support Pin
Figure 7-1