


6
OPERATING INSTRUCTIONS
WARNING: Before you begin using any
attachment, read and understand the manual that
came with the attachment. Follow all safety
information contained within.
WARNING: To avoid serious personal injury and
damage to the unit, shut the unit off before
removing or installing attachments.
OPERATING TIPS
• To reduce the risk of hearing loss associated with sound
level(s), the use of hearing protection is required.
• Operate power equipment only at reasonable hours—not
early in the morning or late at night when people might be
disturbed. Comply with time listed in local ordinance. Usual
recommendations are 9:00 am to 5:00 pm, Mon. through Sat.
• To reduce noise levels, limit the number of pieces of
equipment used at any one time.
• To reduce noise levels, operate power blowers at the
lowest possible speed to do the job.
• Use rakes and brooms to loosen debris before blowing.
• Conserve water by using power blowers instead of hoses for
many lawn and garden applications, including areas such as
gutters, screens, patios, grills, porches, and gardens.
• Watch out for children, pets, open windows, or freshly
washed cars, and blow debris away.
• After using blowers and other equipment, CLEAN UP!
Dispose of debris in trash receptacles.
TIPS FOR BEST TRIMMING RESULTS
• Keep the cutting attachment parallel to the ground.
• Cut from left to right whenever possible. Cutting to the right
improves the unit's cutting efficiency. Clippings are thrown
away from the operator.
• Trim only when grass and weeds are dry.
• The life of your cutting line is dependent upon:
- Following the trimming tips
- What vegetation is being cut
- Where vegetation is being cut
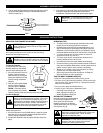
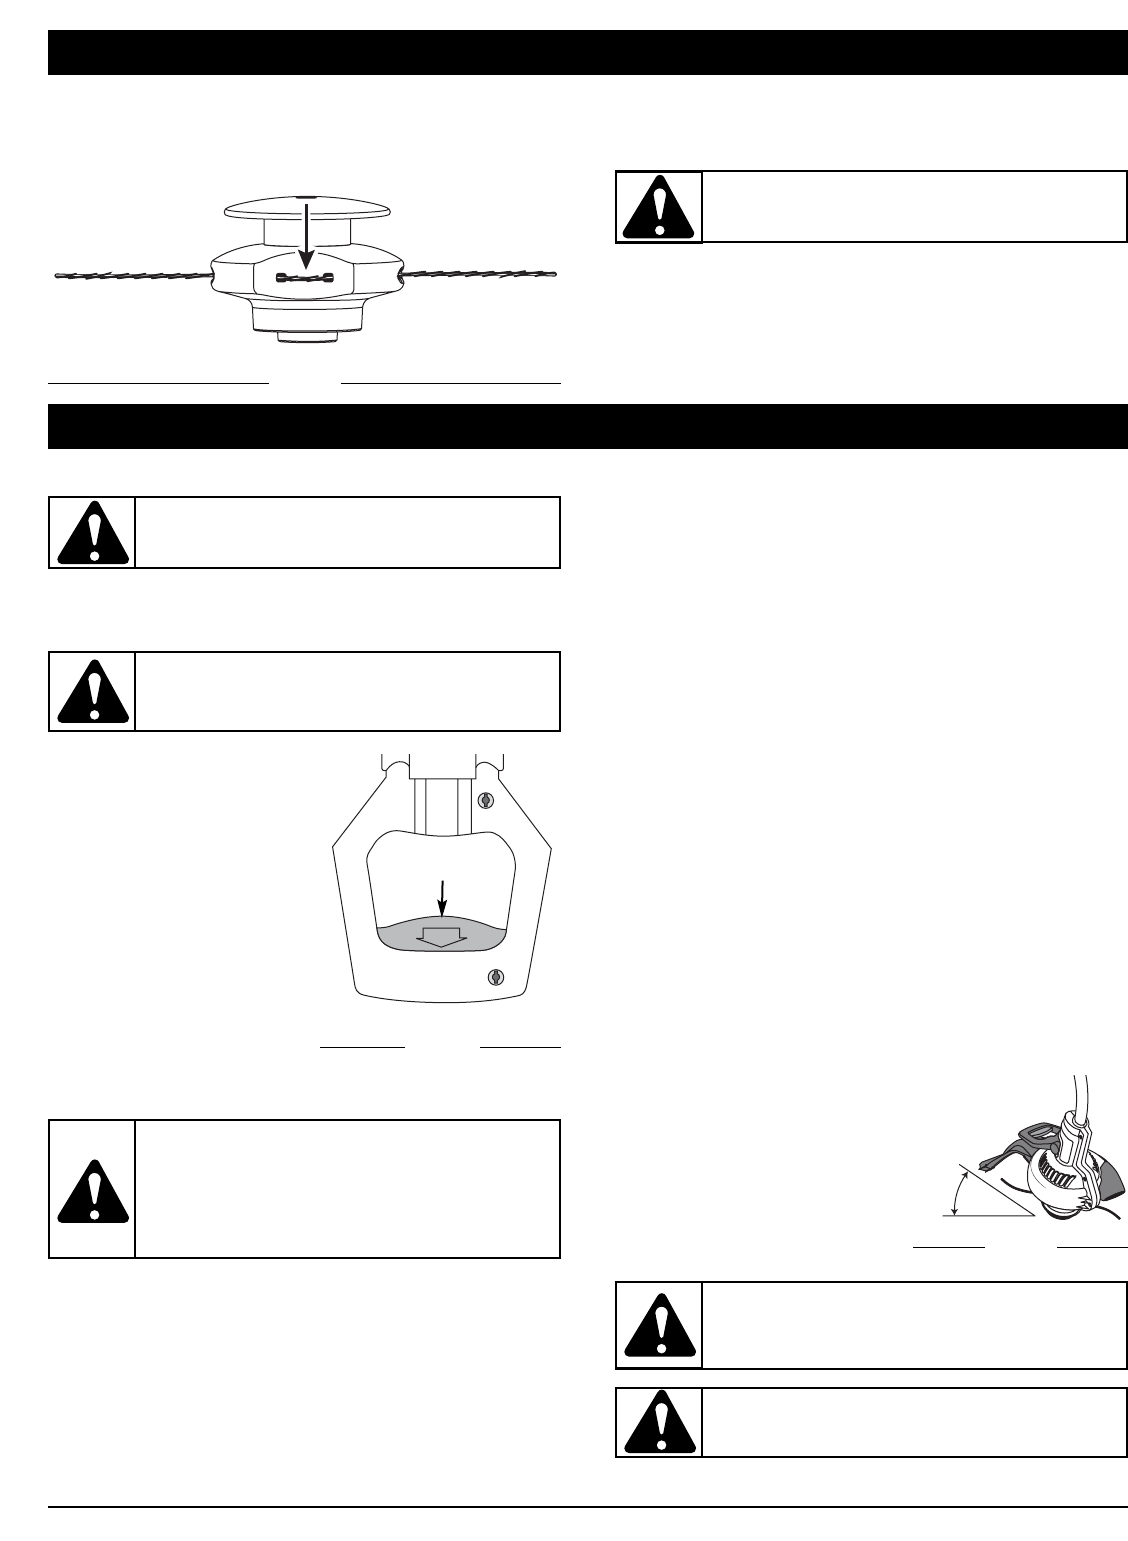
DECORATIVE TRIMMING
Decorative trimming is accomplished
by removing all vegetation around
trees, posts, fences and more.
Rotate the whole unit so that the
cutting attachment is at a 30° angle
to the ground (Fig. 9).
SELECTING THE TRIMMER OR BLOWER
To switch between the trimmer and blower functions of this
unit, make sure that the unit is turned off and the cutting
attachment has stopped spinning.
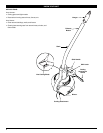
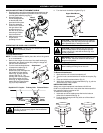
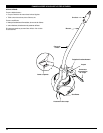
To Use the Trimmer
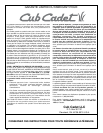
To use the trimmer, make sure
the shift handle is in the DOWN
position before starting the unit.
1. If the shift handle is in the UP
position, grasp the yellow
shift latch (Fig. 8) on the shift
handle and squeeze until the
internal locking mechanism
releases.
2. Push the shift handle DOWN
until the yellow shift latch
locks into place. DO NOT
FORCE. If the latch fails to
lock completely into position,
rotate the cutting head until the latch locks into place.
To Use the Blower
To use the blower, make sure the shift handle is in the UP position
before starting the unit.
1. If the shift handle is in the DOWN position, grasp the yellow
shift latch (Fig. 9) on the shift handle and squeeze until the
internal locking mechanism releases.
2. Pull the shift handle UP until the yellow shift latch locks into
place.
WARNING:
To avoid serious personal injury or
damage to the unit, DO NOT attempt to shift between
the trimmer and the blower while the unit is operating.
Fig. 8
Shift Latch
Shift Handle
WARNING: Always wear eye, hearing, foot and
body protection to reduce the risk of injury when
operating this unit.
WARNING: To prevent serious injury to yourself or
others, or possible damage to property, never point
the blower in the direction of people or pets, or in
the direction of windows. Always direct the blowing
debris away from people, animals, and windows.
Use extra caution when blowing debris near solid
objects such as trees, automobiles, walls, etc.
30º
Fig. 9
ASSEMBLY INSTRUCTIONS
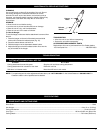
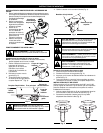
Fig. 7
WARNING: To avoid serious personal injury,
always turn your unit off before you clean or
service it.
3. Pull the ends through making sure that the ends are of equal
length and the middle of the line is centered between the
insertion holes (Fig. 7).
4. If the ends are not of equal length, push the longer end back
through the head part way and pull the shorter end to
compensate. Repeat until both ends are the same length.