


38
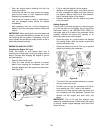
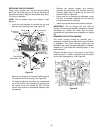
• Stop the engine before checking the fuel line
hoses and clamps.
• Check that the fuel line hose clamps are snugly
securing the hoses to their respective fittings.
Replace any damaged clamps.
• Check the fuel hoses for wear or deterioration,
and any damaged hoses should be replace
immediately.
• After replacing a fuel line, it will be necessary to
bleed air from the fuel system before starting the
engine.
IMPORTANT: When servicing the fuel line hoses and
clamps, care should be taken to prevent dirt or dust
from entering the fuel system. If replacing a fuel line
hose, inspect the new hose to make certain no dirt or
debris has entered the hose.
ENGINE OIL AND OIL FILTER
Checking the Engine Oil Level
Check the engine oil level before each use. If
checking the oil level after running the engine, wait at
least 5 minutes after stopping the engine to get an
accurate reading.
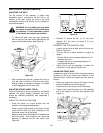
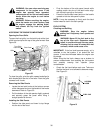
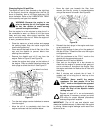
• Remove the left side panel.
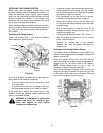
• Clean the area around the dipstick to prevent
debris from entering the crankcase; then with-
draw the dipstick from the engine and wipe clean.
See Figure 55.
Figure 55
• Fully re-insert the dipstick into the engine.
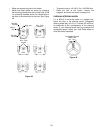
• Withdraw the dipstick again, and check that the
oil level is between the upper and lower marks on
the dipstick. Always keep the oil level between
the full and add marks on the dipstick.
• Reinsert the dipstick into the engine and press
firmly into place.
Adding Engine Oil
If the oil level is low, add enough oil to bring the level
up to the full mark on the dipstick. Do not overfill the
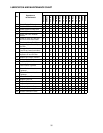
crankcase. Refer to the LUBRICATION TABLE for
the proper type of oil to add to the crankcase. When
possible, maintain the brand and viscosity of oil
previously used to service the engine.
• Place the tractor on a level surface and engage
the parking brake. Stop the tractor engine and
remove the ignition key.
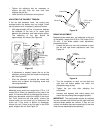
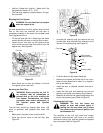
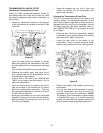
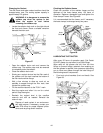
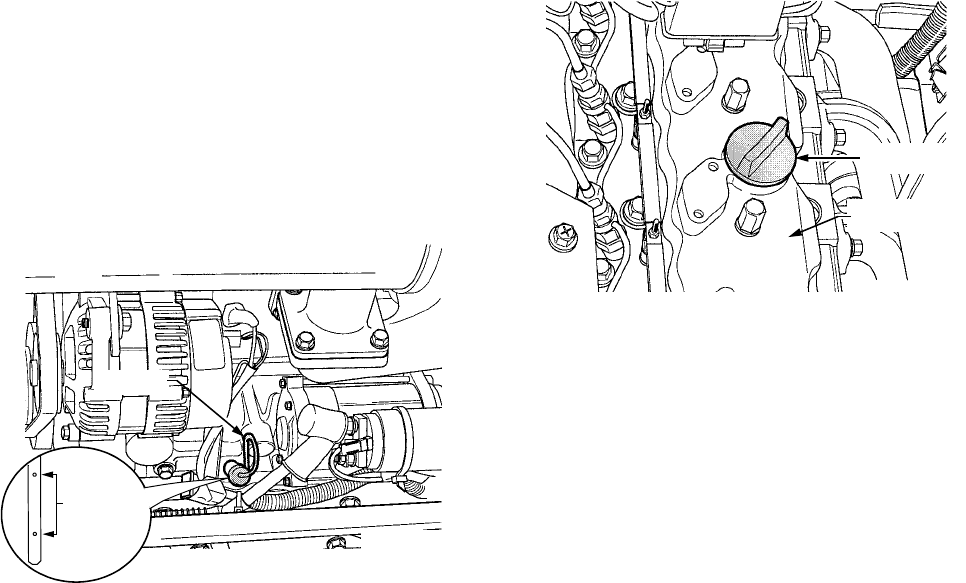
• Clean the area around the oil filler cap to prevent
debris from entering the crankcase.
Figure 56
• Turn the oil filler cap counterclockwise to unscrew
from the rocker arm cover.
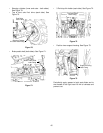
• SLOWLY pour oil into the crankcase until the oil
level reaches the “FULL” mark on the dipstick.
• Insert the oil fill cap into the rocker arm cover and
turn clockwise until fully tightened. Reinsert the
dipstick into the engine and push firmly into
place.
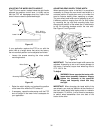
IMPORTANT: The oil fill cap and dipstick must
always be installed securely in place when the engine
is running. Severe engine damage could result from
failure to do so.
Operating
Range
Dipstick
Oil Fill Cap
Rocker Arm
Cover