


BRAKE
(International Cub Cadet 123 Tractor)
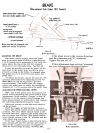
Speed control lever centering ~
zone when brake pedal is used
Top surface of
pedal foot pad
/)/(~--
Pedal return stop
Speed control lever is
in "N" position
'"
"""'"
~
'--
Braking zone:
Brake must be engaged .'
when pedal is in this zone.
Foot s~pport~..
() I J
1-5/16-inch maximum
3/4 -inch minimum,
--j
~~j
Brake must be fully engaged when,
pedal arm reaches this position.
~
!
Pedal stop
i
'-..J
A-86719 A
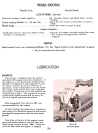
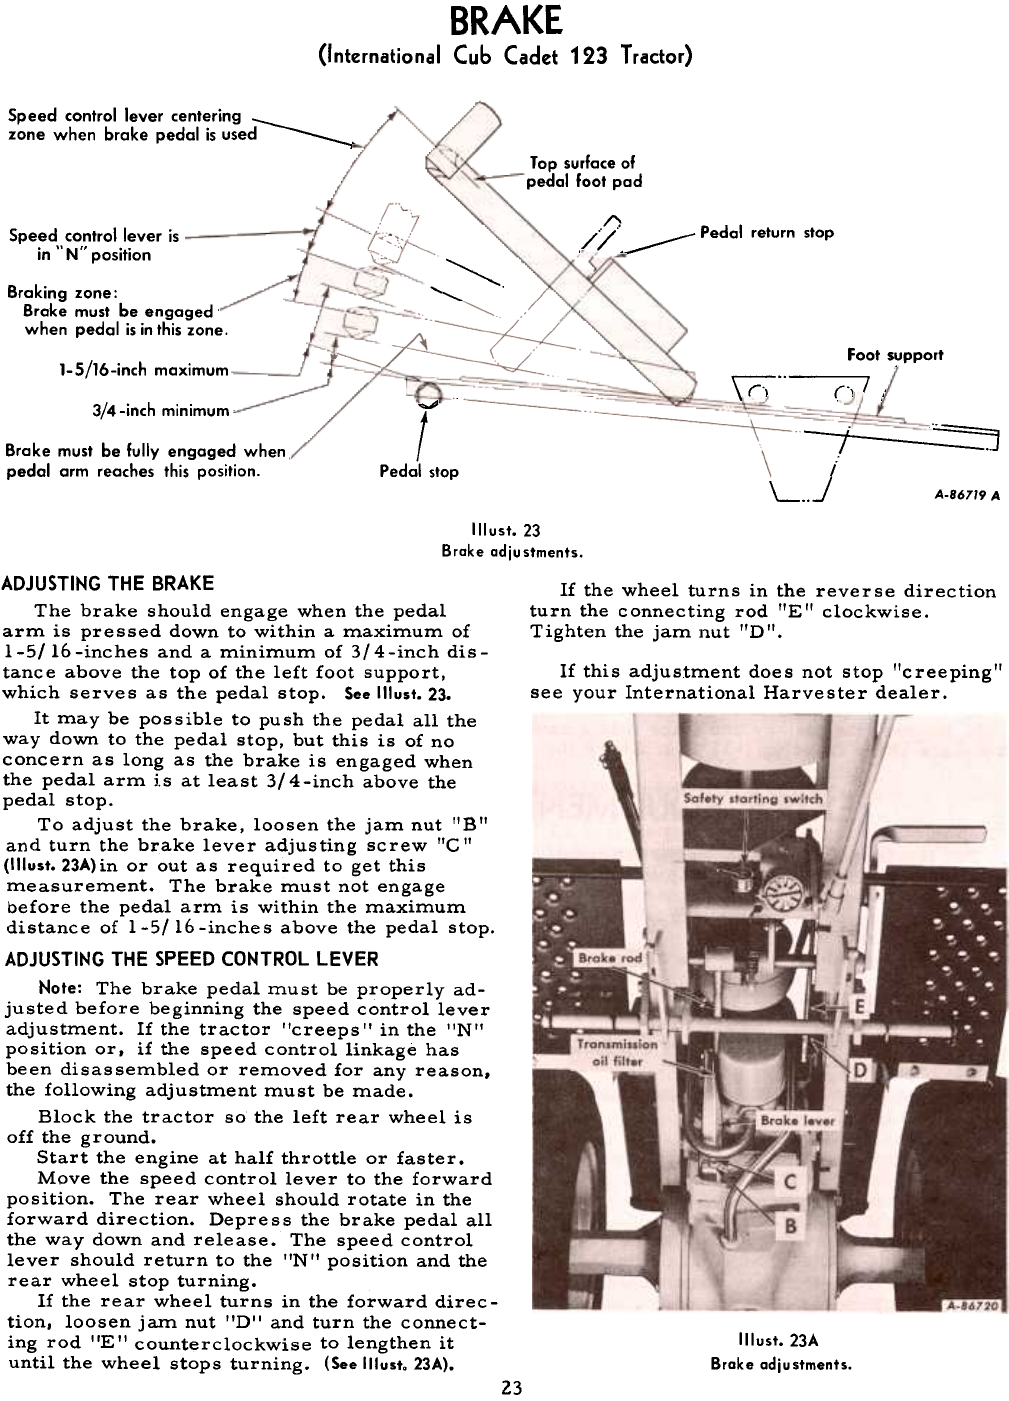
Illust.23
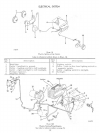
Brake adjustments.
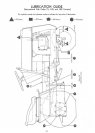
If the wheel turns in the reverse direction
turn the c onnec ting rod lIE II clockwise.
Tighten the jam nut lID II.
If this adjustment does not stop "creeping"
see your International Harvester dealer.
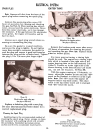
ADJUSTING THE BRAKE
The brake should engage when the pedal
arm is pressed down to within a maximum of
1-5/16-inches and a minimum of 3/4-inch dis-
tance above the top of the left foot support,
which serves as the pedal stop. See Illust. 23.
It may be possible to push the pedal all the
way down to the pedal stop, but this is of no
concern as long as the brake is engaged when
the pedal arm is at least 3/4-inch above the
pedal stop.
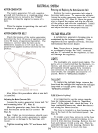
To adjust the brake, loosen the jam nut "B"
and turn the brake lever adjusting screw "G"
(1IIust. 23A) in or out as required to get this
measurement. The brake must not engage
before the pedal arm is within the maximum
distance of 1-5/16-inches above the pedal stop.
ADJUSTING THE SPEED CONTROL LEVER
Note: The brake pedal must be properly ad-
justed before beginning the speed control lever
adjustment. If the tractor "creeps" in the "N"
position or, if the speed control linkage has
been disassembled or removed for any reason,
the following adjustment must be made.
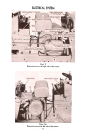
Block the tractor so the left rear wheel is
off the ground.
Start the engine at half throttle or faster.
Move the speed control lever to the forward
position. The rear wheel should rotate in the
forward direction. Depress the brake pedal all
the way down and release. The speed control
lever should return to the "N't position and the
rear wheel stop turning.
If the rear wheel turns in the forward direc-
tion, loosen jam nut "D" and turn the connect-
ing rod "E" counterclockwise to lengthen it
until the wheel stops turning. (See Illust. 23A).
Illust. 23A
Brake adjustments.
23