


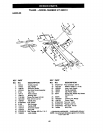

TIRE CARE
CAUTION: When mounting tires, unless
beads are seated, overinflation can cause
an explosion.
• Maintain 20 pounds of tire pressure. If
_tire w_essures are not equal, tiller will
pull to one side.
• Keep tires free of gasoline or oil which
can damage rubber.
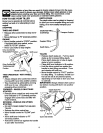
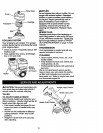
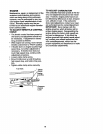
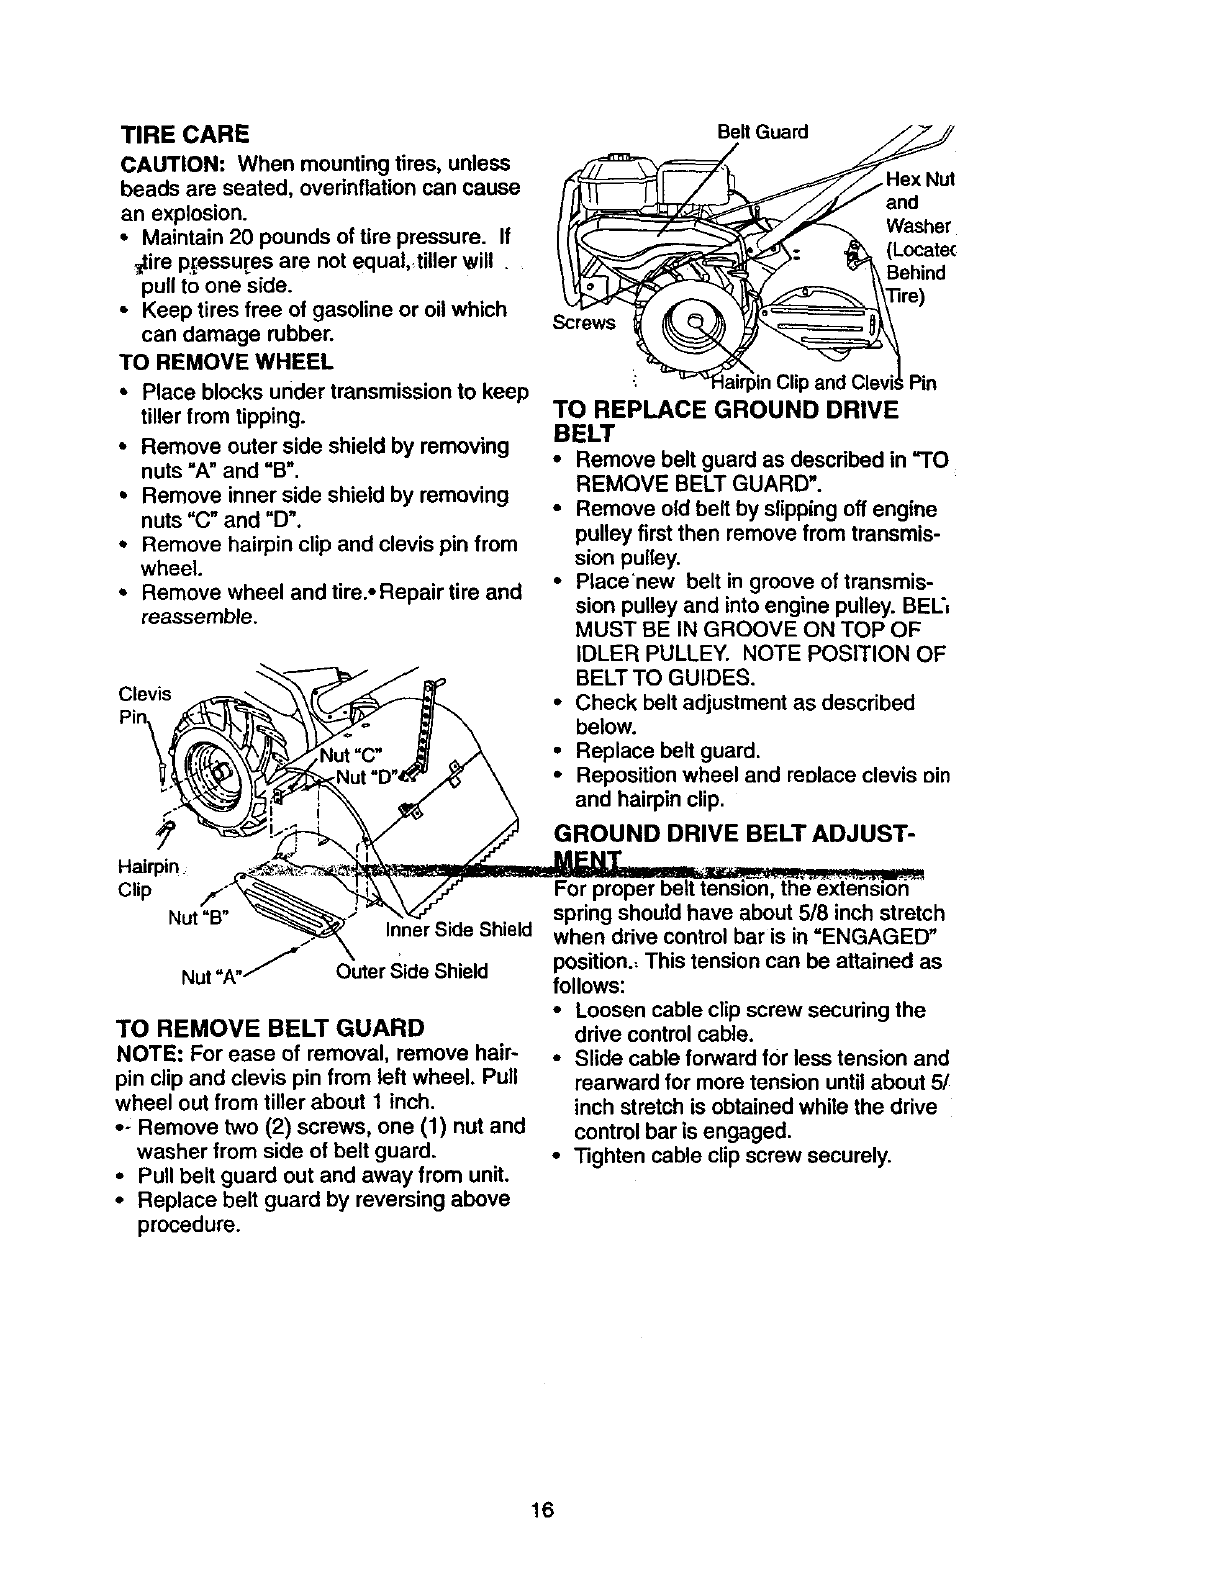
TO REMOVE WHEEL
• Place blocks under transmission to keep
tiller from tipping.
° Remove outer side shield by removing
nuts "A" and "B".
• Remove inner side shield by removing
nuts "C" and "D".
° Remove hairpin clip and clevis pin from
wheel.
• Remove wheel and tire.-Repair tire and
reassemble.
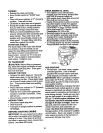
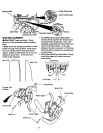
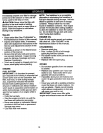
Belt Guard
and
Washer
(Locatec
Behind
Screws
Pin
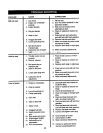
TO REPLACE GROUND DRIVE
BELT
• Remove belt guard as described in "TO
REMOVE BELT GUARD'.
• Remove old belt by slipping off engine
pulley first then remove from transmis-
sion pulley.
• Place'new belt in groove of transmis-
sion pulley and into engine pulley. BEL',
MUST BE IN GROOVE ON TOP OF
IDLER PULLEY. NOTE POSITION OF
_-_ /_,_ BELTTO GUIDES.
Clevis ----- ",\ ff _ _ •
t-m-" _._ \\[_F_ Check belt adjustment as descnbed
\ _--_._"_ _ _ below.
_[ (_%_/j/_../l_tNut "C" _/ ,_k • Replace belt guard.
_._,_'_Nut"D"_'/_' \ ° Repositionwheelandreolaceclevisein
_._":_ )_j_'-Ir_ _'" " _ and hairpin clip.
f GROUNDDR,VEBE'TA U T-
. . -. M_NT ..,
CI,p _ _'_"_-// -For proper belt tensJo'_nlt_h_"_x_t_,_ ''"
Nut"B" _"_'_,= "_"_. '/_f-.. _. spring should have about 5/8 inch stretch
Inner Side Sh=eld
' " when drive control bar is in ENGAGED
_.._ ....... position- This tension can be attained as
Nut "A"/ umer _ae _nlela follows:'"
TO REMOVE BELT GUARD
NOTE: For ease of removal, remove hair-
pin clip and clevis pin from left wheel. Pull
wheel out from tiller about 1 inch.
• - Remove two (2) screws, one (1) nut and
washer from side of belt guard.
• Pull belt guard out and away from unit.
• Replace belt guard by reversing above
procedure.
• Loosen cable clip screw securing the
drive control cable.
• Slide cable forward for less tension and
rearward for more tension until about 5[
inch stretch is obtained while the drive
control bar is engaged.
• Tighten cable clip screw securely.
16