


ASS LY
iii,iiiiiHI,HI '"HHHH' IHHIHH 'I IIIIII 'H'H'HHHIHI ,
0
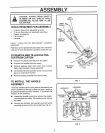
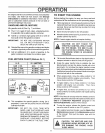
IMPORTANT:
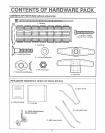
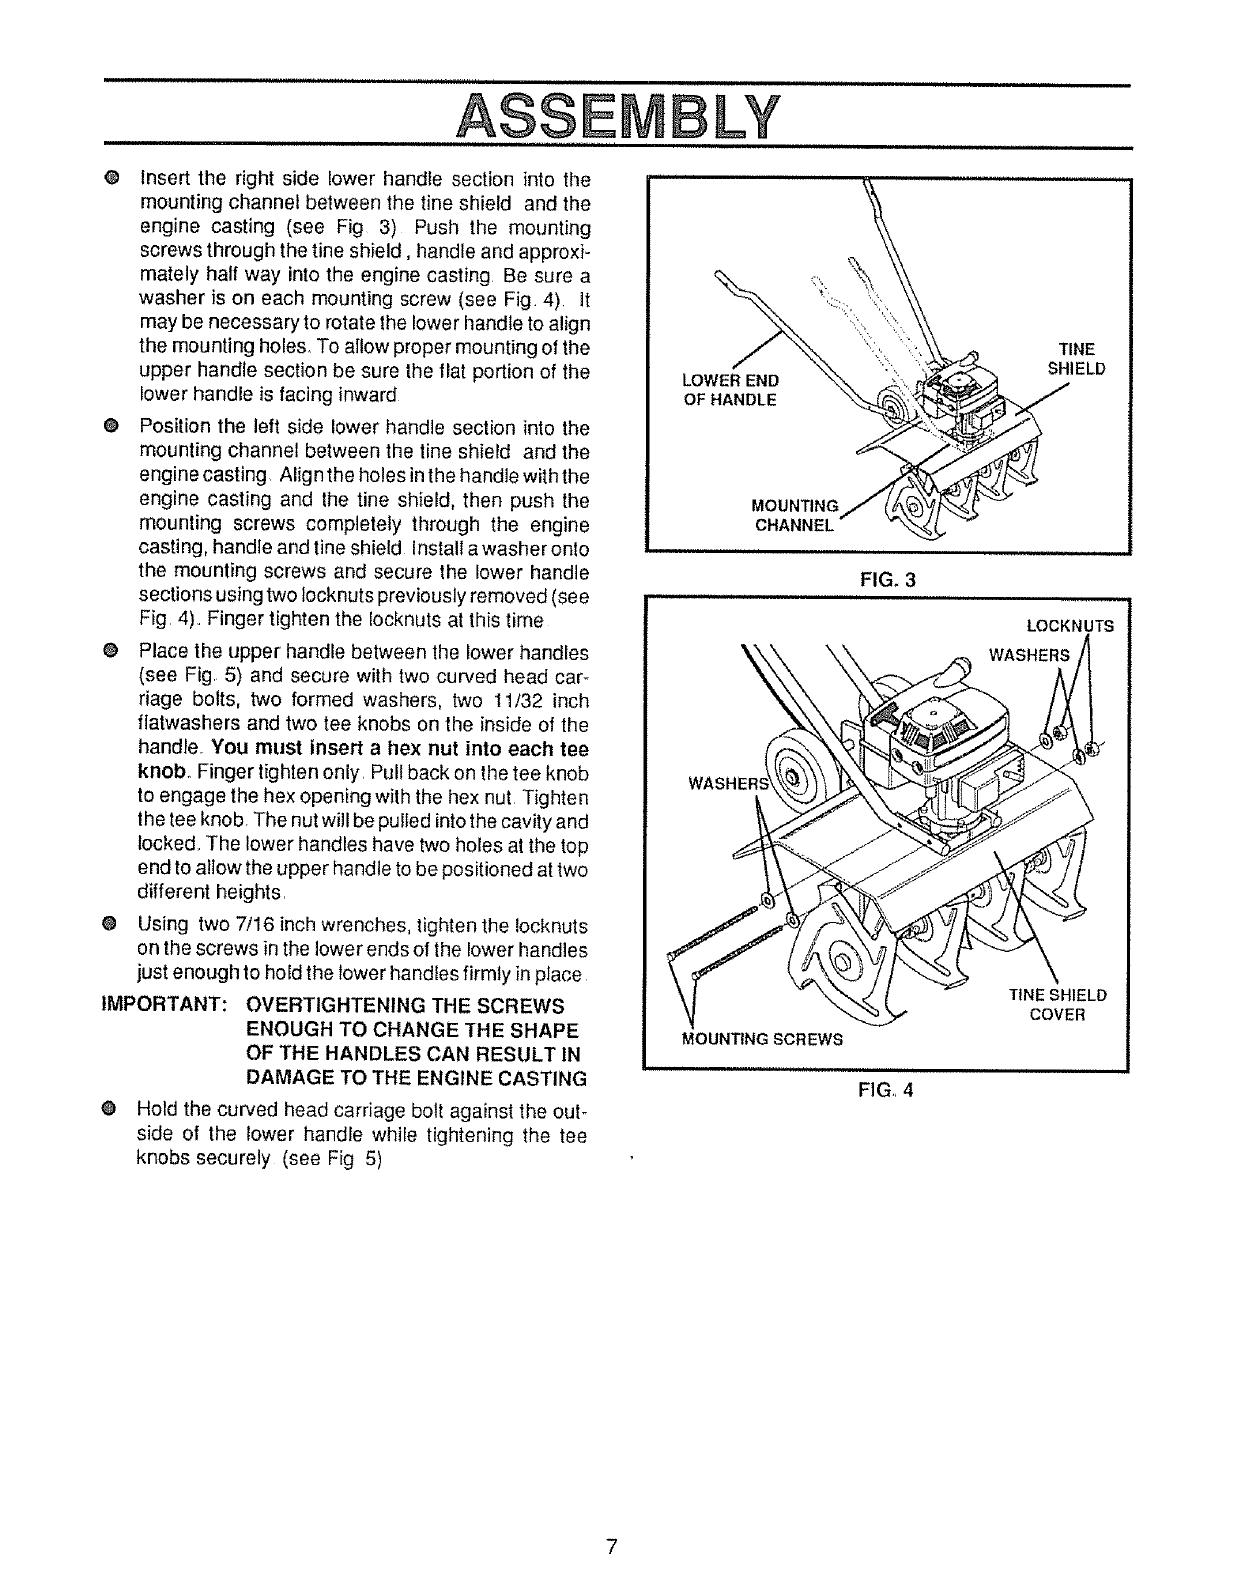
Insert the right side lower handle section into the
mounting channel between the fine shield and the
engine casting (see Fig 3) Push the mounting
screws through the tine shield, handle and approxi-
mately half way into the engine casting Be sure a
washer is on each mounting screw (see Fig 4) It
may be necessary to rotate the lower handle to align
the mounting holes. To allow proper mounting of the
upper handle section be sure the flat portion of the
lower handle is facing inward
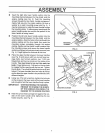
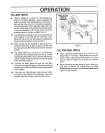
@ Position the left side lower handle section into the
mounting channel between the tine shield and the
engine casting Alig n the holes inthe handle with the
engine casting and the tine shield, then push the
mounting screws completely through the engine
casting, handle and fine shield Install awasher onto
the mounting screws and secure the lower handle
sections using two Iocknuts previously removed (see
Fig. 4).. Finger tighten the focknuts at this time
O Place the upper handie between the Iower handles
(see Fig 5) and secure with two curved head car_
riage bolts, two formed washers, two 11/32 inch
flatwashers and two tee knobs on the inside of the
handle. You must insert a hex nut into each tee
knob.. Finger tighten only. Pull back on the tee knob
to engage the hex opening with the hex nut Tighten
the tee knob. The nut will be pulled intothe cavity and
locked. The lower handles have two holes at the top
end to allow the upper handle to be positioned at two
different heights.
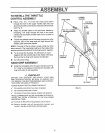
@ Using two 7/16 inch wrenches, tighten the locknuts
on the screws in the lower ends ot the lower handles
just enough to hold the tower handles firmly in place
OVERTIGHTENING THE SCREWS
ENOUGH TO CHANGE THE SHAPE
OF THE HANDLES CAN RESULT IN
DAMAGE TO THE ENGINE CASTING
O Hold the curved head carriage bolt against the ouF
side of the lower handle while tightening the tee
knobs securely (see Fig 5)
LOWER END
OF HANDLE
TINE
SHIELD
MOUNTING
CHANNEL
FIG. 3
H,,,H,,,,,, HHH'H'
LOCKNUTS
WASHERS
WASH
MOUNTING SCREWS
T|NESHIELD
COVER
FIG., 4