8
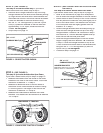
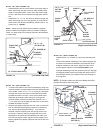
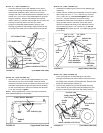
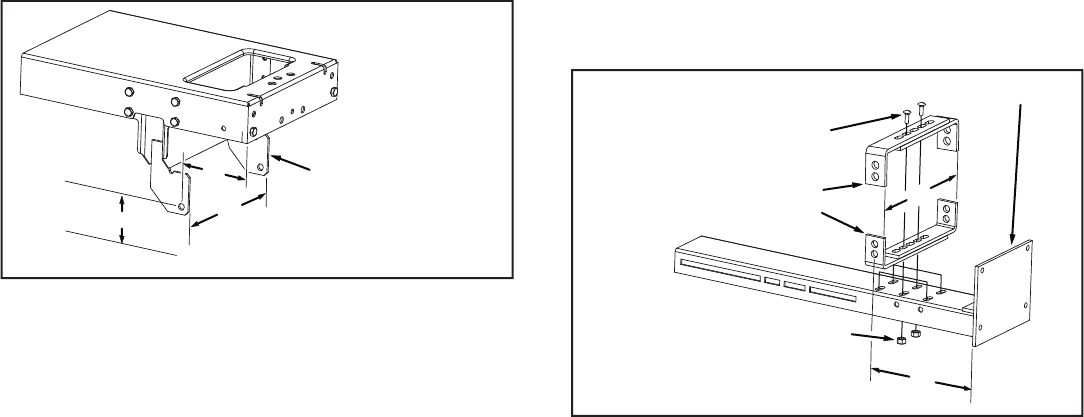
FIGURE 7 - SEARS TRACTOR SHOWN
W
SEARS (LT) TRACTOR FRAME
H
SUSPENSION
BRACKET
G
R
O
U
N
D
L
INSTRUCTIONS FOR TRACTORS WITH DUAL
FRONT DECK SUSPENSION BRACKETS
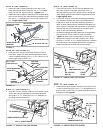
STEP 8:
(SEE FIGURE 8 AND THE ILLUSTRATIONS
ON PAGE 9)
•
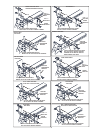
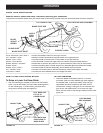
Refer to the illustrations on page 9 for examples of
how to attach the Hanger Brackets on various tractors.
•
Select a set of slots in the top of the Thrust Channel
that will position the front plate slightly out in front of
the tractor frame. The distance from the slots to the
front plate must be slightly greater than the distance
"L"
in step 7.
•
Hold the Hanger Brackets with the ends pointing up.
Stack the short Hanger Bracket on top of the long
Hanger Bracket. If distance
"H"
measured in step 7
was less than 6", hold the brackets together and fl ip
them over so that the ends point down.
•
Slide the Hanger Brackets apart so that the overall
length is slightly less than distance
"W"
measured
in step 7. Center the Hanger Brackets on top of the
Thrust Channel and attach them to the selected slots
using two 3/8" x 1-1/4" carriage bolts (G) and 3/8"
nylock nuts (K).
Do not tighten.
•
Proceed to step 9 on page 10.
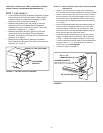
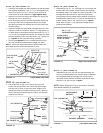
3/8" x 1-1/4"
CARRIAGE BOLT (G)
3/8" NYLOCK NUT (K)
HANGER BRACKETS
Ends down when "H" is 6" or less
Ends up when "H" is more than 6"
W
L
FRONT PLATE
FIGURE 8
STEP 7:
(SEE FIGURE 7)
•
Locate the Mower Deck Suspension Brackets on each
side at the front of the tractor frame. A Sears tractor
is shown below. For examples of brackets on other
tractors see the illustrations on page 9.
• Measure the distance from the center of the deck
attachment hole in the Mower Deck Suspension
Brackets to the front of the tractor frame. This will be
referred to as distance "L" in step 8.
•
Measure the height above the ground of the deck
attachment hole in the Mower Deck Suspension
Brackets. The height of this hole will be referred to as
distance "H" in step 8.
•
Measure the inside distance between the Mower
Deck Suspension Brackets. This will be referred to as
distance "W" in step 8.


