


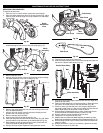
REPLACING THE DRIVE BELT
To replace the drive belt:
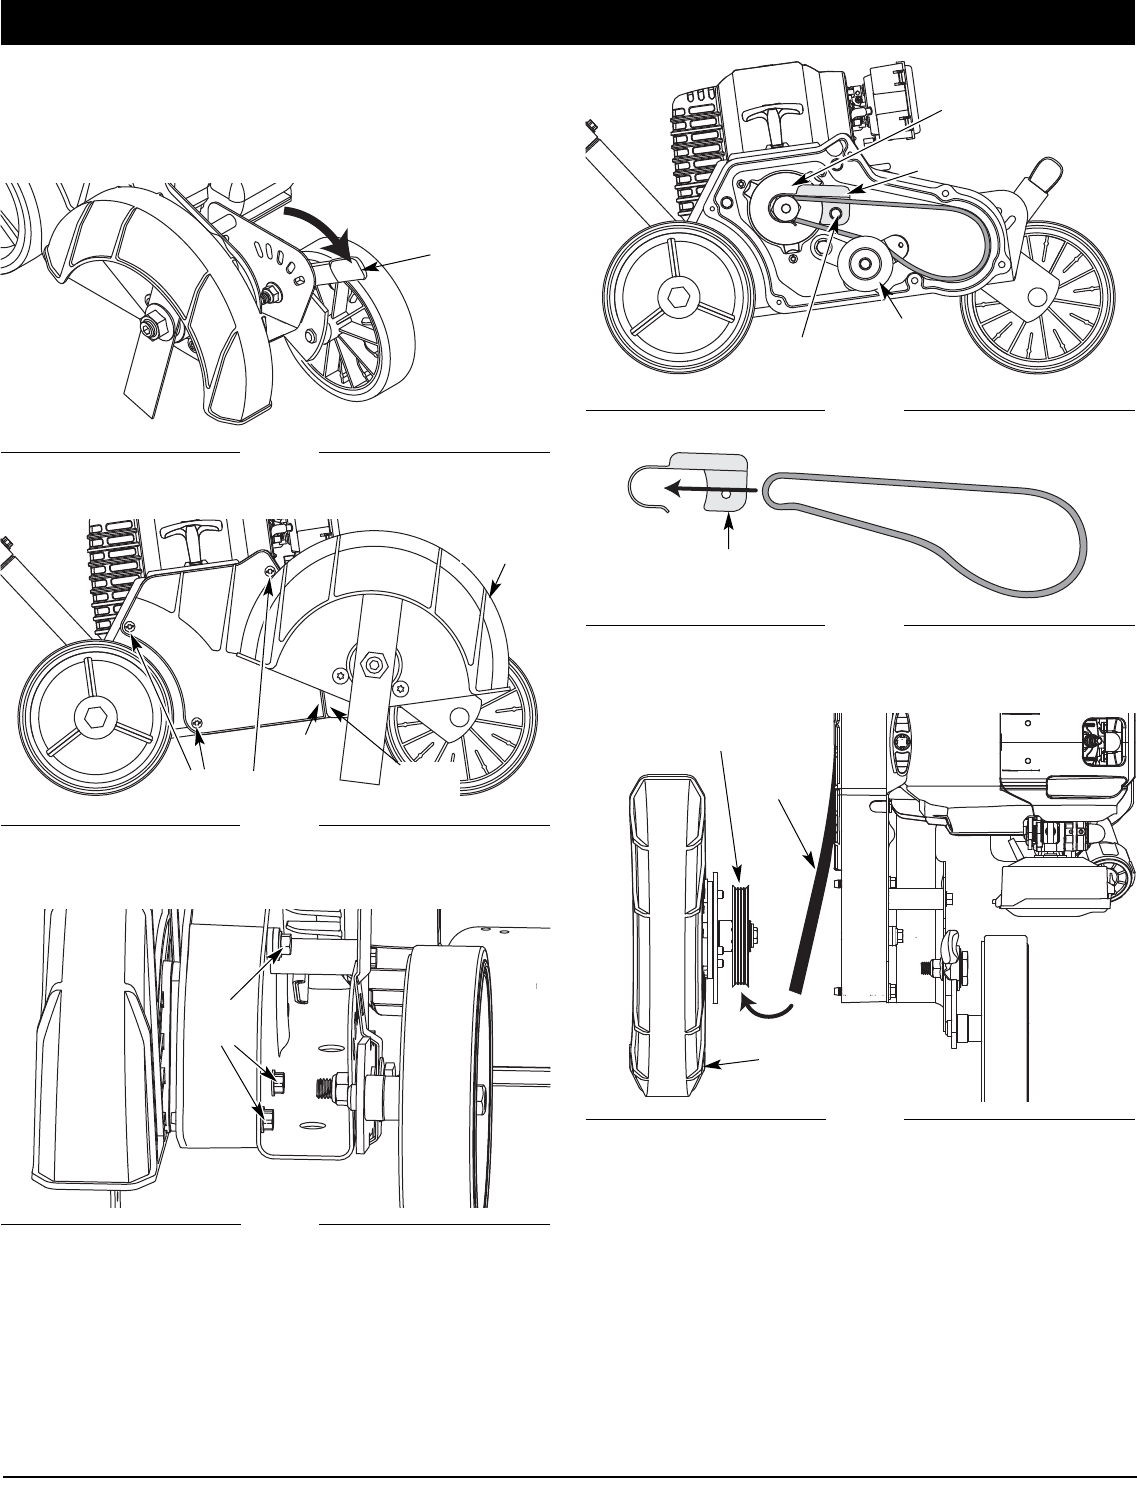
1. Place the unit on a level surface, preferrably a workbench.
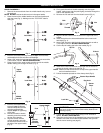
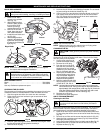
2. Move the depth adjustment lever all the way forward (Fig. 36) to
raise the front wheel enough to provide clearance for the blade
to turn freely.
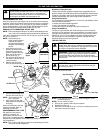
3. Using a flat-head or T-20 Torx screwdriver, remove the 3 Torx
screws holding the belt cover to the belt housing (Fig. 37).
4. Remove the belt cover.
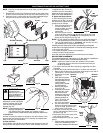
5. Using a 3/8-inch wrench, remove the three hex screws holding
the blade assembly to the belt housing (Fig. 38).
6. Remove the blade assembly from the belt housing and the belt
from the blade assembly.
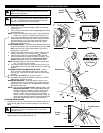
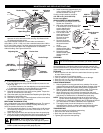
7. Using a 3/8-inch wrench, remove the screw holding the belt
guard to the unit chassis (Fig. 39).
8. Remove the belt guard and belt.
9. Insert a new belt into the belt guard (Fig. 40).
10. Place the belt guard and belt over the drive pulley (Fig. 39). Make
sure the bottom of the belt rests on the belt tensioner (Fig. 39).
11. While holding the belt guard and belt in place, hand-start the
screw that holds the belt guard in place.
12. Using a 3/8-inch wrench, tighten the belt guard hex screw.
MAINTENANCE AND REPAIR INSTRUCTIONS
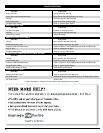
Fig. 37
3 Torx Screws
Belt
Cover
Fig. 36
Depth
Adjustment
Lever
Fig. 38
3 Hex
Screws
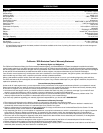
13. Torque the hex screw to 80–100 in.lbs.
14. Hold the blade assembly next to the belt housing and place the
belt over the plastic blade pulley (Fig. 41).
15. Align the grooves and ridges inside the belt with the ridges and
grooves on the pulley.
16. Insert the blade assembly into the belt housing. Make sure that
the bottom of the belt rests on the belt tensioner (Fig. 39).
17. Check to make sure that the belt is still properly aligned with
the plastic blade pulley. If it has moved, realign the belt with the
plastic blade pulley as described in step 15 above.
18. While holding the blade assembly in place, hand-start the hex
screws that hold the blade assembly in place (Fig. 38).
19. Using a 3/8-inch wrench, tighten the hex screws.
20. Torque the hex screws to 85–95 in.lbs.
21. Slide the belt cover behind the blade assembly so that the lip of the
blade cover fits behind the metal edge of the blade assembly (Fig. 37).
22. While holding the belt cover in place, hand start the screw that
holds it in place.
23. Using a flat-head or T-20 Torx screwdriver, tighten the screws.
24. Torque the screws to 15–20 in.lbs.
Fig. 39
Belt Guard
Hex Screw
Fig. 40
Belt Guard
Belt
Belt
Tensioner
Drive Pulley
Fig. 41
Plastic Blade Pulley
Belt
Blade
Assembly
Blade Assembly
Lip
Metal
Edge
13