


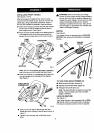

INSTALLING FRONT HANDLE
See Figures 1 and 2.
After removingyour hedge trimmer from its carton,
remove the front handle,screw, and locknut from the
plasticbag. Using a flat blade screwdriver,which is
the onlytool needed for assembly, installas follows:
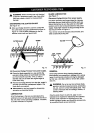
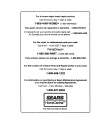
• Orient front handle so thatthe side withthe molded
slotfor lock nutwill be locatedon the left side of
your hedgetrimmer. See Figure I.
• Placethe front handle parallel tothe bladeguard of
your hedgetrimmer, then fit the ears of the front
handle intothe handle slots on the motorhousing.
FRONT
HANDLE
REAR
HANDLE
LOCK
NUT
BLADEGUARD
HANDLE
SLOT
SCREW
KEYEDEAR
Fig. 1
Note: For your convenience and ease of assembly
one of the ears on front handle has been keyed.
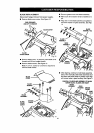
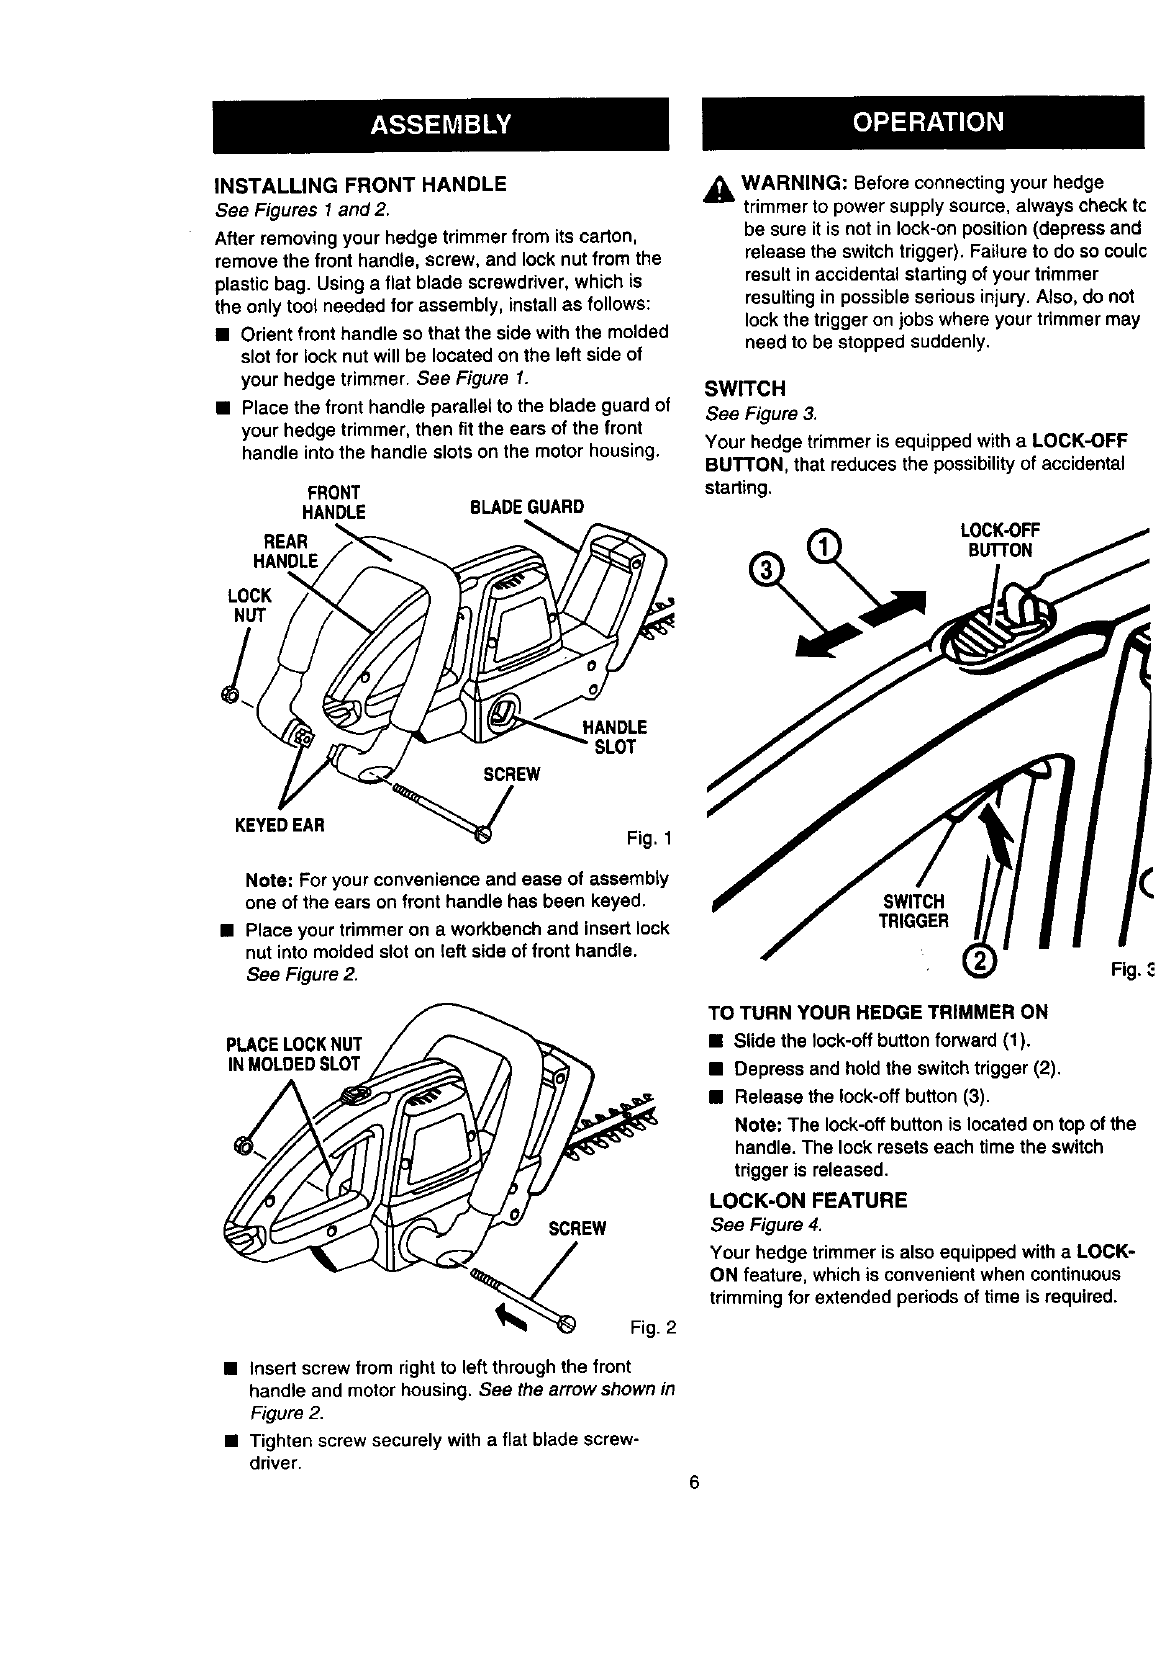
• Place your trimmer on a workbench and insert lock
nut into molded slot on left side of front handle.
See Figure 2.
PLACELOCKNUT
INMOLDEDSLOT
SCREW
Fig. 2
• Insert screw from right to left through the front
handle and motor housing. See the arrow shown in
Figure 2.
• Tighten screw securely with a flat blade screw-
driver.
_, WARNING: Beforeconnectingyour hedge
trimmerto power supplysource, always checktc
be sure itis not in lock-onposition(depressand
release the switchtrigger).Failureto do so coulc
resultinaccidentalstartingofyour trimmer
resultingin possibleseriousinjury.Also,do not
lockthe triggeron jobswhere your trimmermay
need tobe stoppedsuddenly.
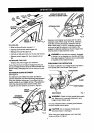
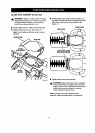
SWITCH
See Figure 3.
Your hedgetrimmer is equipped with a LOCK-OFF
BUTTON, thatreduces the possibilityof accidental
starting.
LOCK-OFF
BUTTON
Fig.
TO TURN YOUR HEDGE TRIMMER ON
• Slidethe lock-off buttonforward (1).
• Depress and holdthe switchtrigger (2).
• Release the lock-offbutton (3).
Note: The lock-offbuttonislocatedon top ofthe
handle. The lock resetseach time the switch
triggeris released.
LOCK-ON FEATURE
See Figure4.
Your hedgetrimmer isalso equippedwitha LOCK-
ON feature, which isconvenientwhen continuous
trimmingfor extended periodsoftime isrequired.
6