BLADE REPLACEMENT
Disconnect hedge trimmer from power supply.
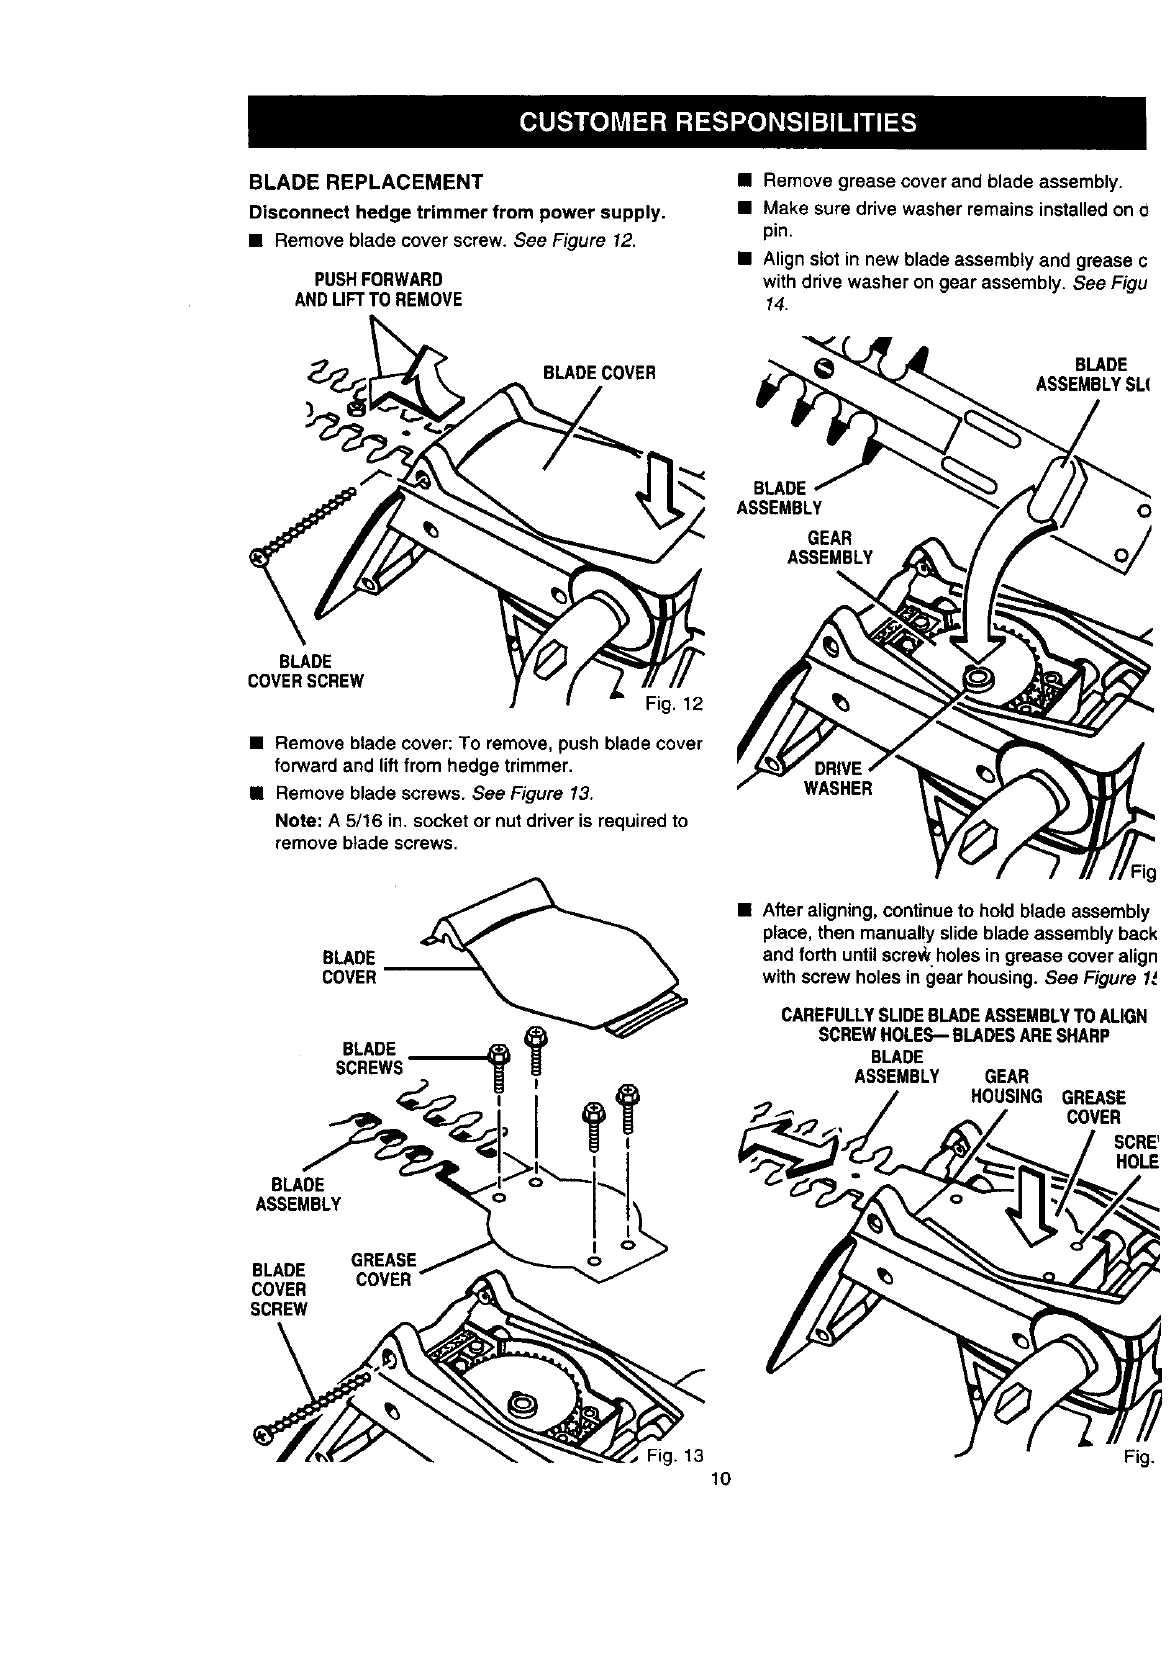
• Remove blade cover screw. See Figure 12,
PUSHFORWARD
ANDLIFTTO REMOVE
• Remove grease cover and blade assembly.
• Make sure drive washer remains installed on d
pin.
• Align slot in new blade assembly and grease c
with drive washer on gear assembly. See Figu
14.
BLADECOVER
BLADE
COVERSCREW
Fig. 12
• Remove blade cover: To remove, push blade cover
forward and lift from hedge trimmer.
• Remove blade screws. See Figure 13.
Note: A 5/16 in. socket or nut driver is required to
remove blade screws.
BLADE
ASSEMBLYSt.(
BLADE
ASSEMBLY O
GEAR
ASSEMBLY
WASHER
BLADE
COVER
BLADE ?
SCREWS
BLADE
ASSEMBLY
BLADE
COVER
SCREW
O
• Afteraligning, continuetohold blade assembly
place, then manually slide blade assembly back
and forth until screwholes in grease cover align
with screw holes in gear housing. See Figure 1A.
CAREFULLYSLIDEBLADEASSEMBLYTOALIGN
SCREWHOLES--BLADESARESHARP
BLADE
ASSEMBLY GEAR
HOUSING GREASE
COVER
SCRE'
HOLE
Fig. 13 Fig.
10


