


CALL TOLL FREE 1-800-DR-OWNER 13
CHAPTER 4
OPERATING YOUR DR 5 -TON ELECTRIC WOOD SPLITTER
This chapter covers the procedures for operating your new DR 5 -TON ELECTRIC WOOD SPLITTER and
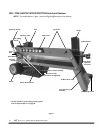
discusses basic operation features. You may find it helpful to review the Controls and Features on page 10.
Before Starting the Electric Motor
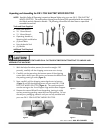
Tools Needed:
• 6mm Hex Wrench
• #3 Phillips Screwdriver
1. Inspect the area in which you will be working.
• Place the wood splitter only on a firm, level, supported surface 2 to 3 feet above the ground.
• NEVER operate the wood splitter on the ground as there is risk of injury and would not be
comfortable for the operator while in use.
• The site must be free of slippery surfaces and potentially hazardous obstacles. Also, make sure
there won't be people or animals within a six-foot radius around the wood splitter.
2. Plan your work before you start.
• Have the logs that you are splitting positioned where you can easily reach them. Remember, the
maximum log length is 20" and the maximum diameter is 12" for this wood splitter.
• Split only dry, seasoned logs as they will split more easily than green logs. Green logs may stick
on the wedge and jam the wood splitter.
• Have a site located where the split wood can be stacked or loaded onto a truck or nearby carrier.
• ALWAYS MAKE CERTAIN THAT THE MACHINE IS ON A FIRM LEVEL SURFACE.
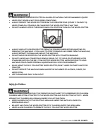
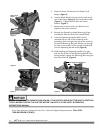
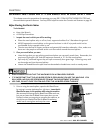
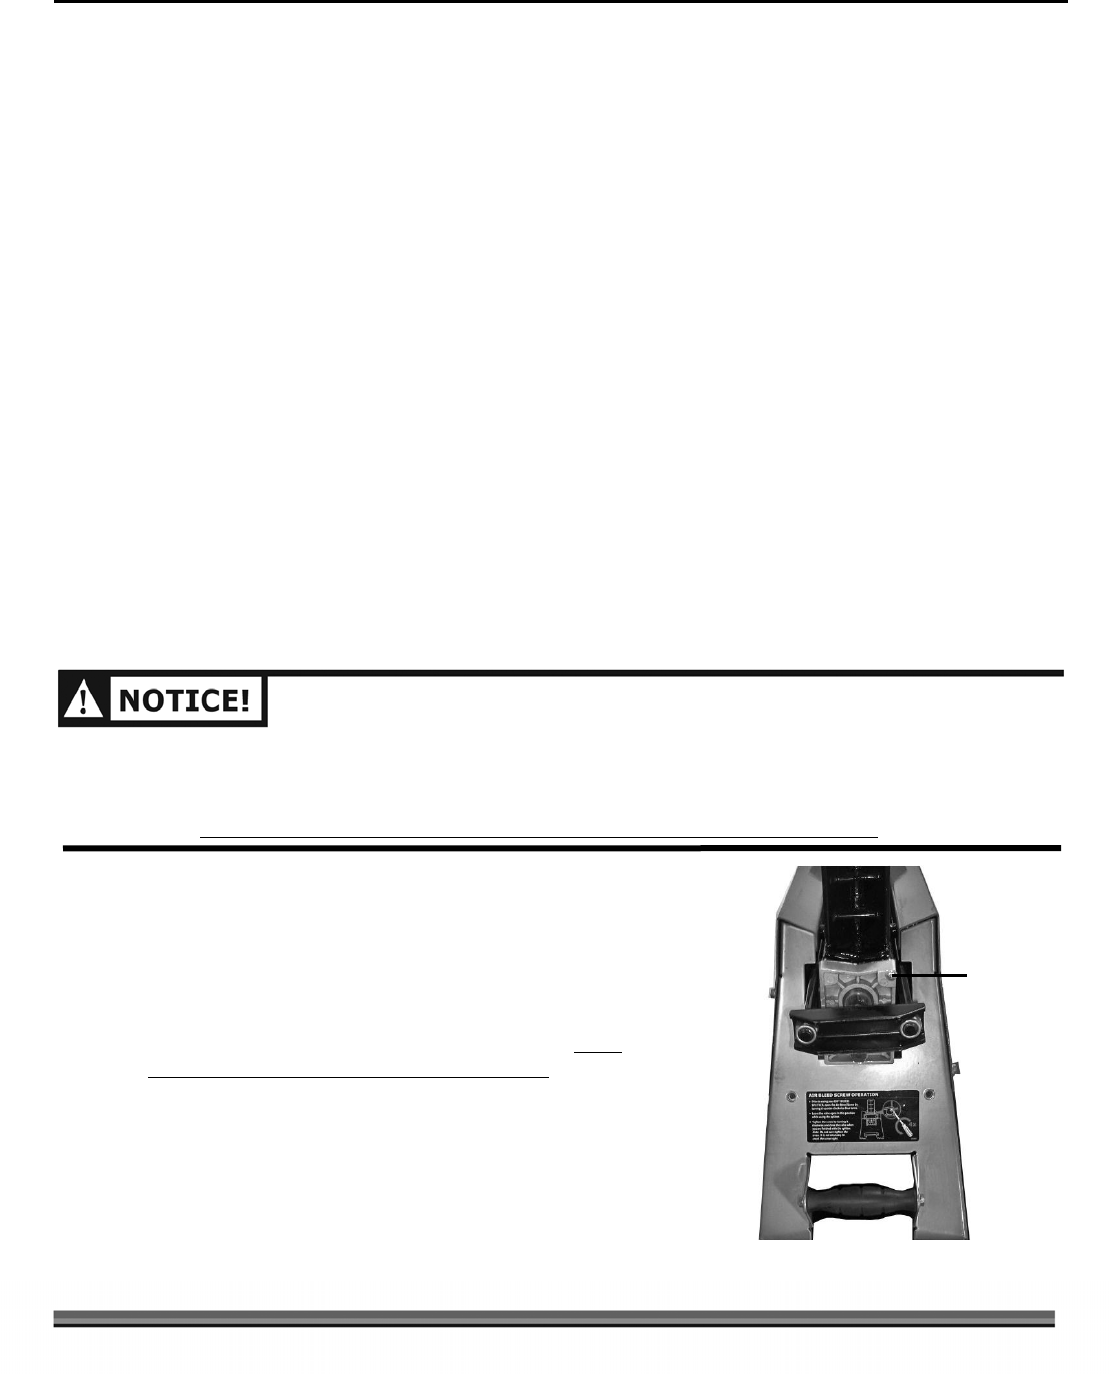
• IT IS IMPORTANT THAT THE AIR BLEED SCREW IS OPEN WHEN YOU USE THE MACHINE. YOU
WILL NEED A #3 PHILLIPS SCREWDRIVER TO MAKE THIS ADJUSTMENT (FIGURE 9).
• USE CARE, DO NOT OVER TIGHTEN AND STRIP THE AIR BLEED SCREW THREADS.
3. Prior to using the wood splitter, open the Air Bleed Screw
by turning it counter-clockwise four (4) times. Leave the Air
Bleed Screw open in this position while using the machine.
We recommend closing the Air Bleed Screw after each use,
but you can leave the Air Bleed Screw open when you are
finished, unless you are going to transport the machine, at
which time you should close the Air Bleed Screw being
careful not to over tighten and strip the screw.
A
ir Bleed
Screw
Figure 9