


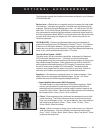

52 • Maintenance
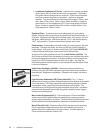
Prior to collimating the primary mirror holder, locate the three (3) screws on the end
plate at the end of the tube. Unthread the three screws and remove the plate from the
end of the tube. Under the end plate there are three (3) sets of two (2) screws. The
shorter Allen screws push the mirror holder which is held by the longer outer screws.
In order to make an adjustment, the outer screw is loosened while the shorter screw is
turned in or out. Then, the outer screw is tightened. Only one of the three (3) sets is
adjusted at a time. Normally motions on the order of 1/8 turn will make a difference,
with only about 1/2 to 3/4 turn being the maximum required.
Do NOT remove
or back out the holder screws more than one (1) to two (2) turns!
With Polaris or a bright star centered in the field of view, focus with your highest
power eyepiece (i.e., one with the shortest focal length). This includes eyepieces
in the 4mm to 6mm range. The star should be well centered to avoid confusing
collimation problems with coma, a problem common to all Newtonian telescopes
especially near the edge of the field. If you notice a flare in the star at one side
(same side) just as you go inside and outside of exact focus, then collimation will
help sharpen the image.
Take note of the direction of the flare. For example, if the flare is toward the 3
o’clock position in the field of view, then you must adjust the screw or combina-
tion of collimation screws necessary to move the star TOWARD the direction of
the flaring. In this case you want to move the star with the adjusting screw to the
right, toward the 3 o’clock position in the eyepiece field of view. It may only be
necessary to adjust the screw to move the star from the center to about half way or
less toward the field’s edge (for higher power oculars). Prior to making any
adjustment, it is advisable to gently back off the pressure on the three (3) outer
screws to where they are snug, yet easily loosened without moving the telescope
unnecessarily.
Collimation adjustments are best made while viewing the star’s position in the field
of view while turning the adjustment screws. This way you can see exactly which
way the movement occurs. It may be helpful for two people working together,
while one views and instructs the other which screws are correctly turned and by
how much. Start by loosening the outer screws and advancing an inner screw to
see if the motion is correct. If not, undo what you did and try another set of
screws.
IMPORTANT: After making the first of each adjustment, it is necessary to reaim the telescope tube
to center the star again in the field of view. It can then be judged for symmetry by
going just inside and outside of exact focus and noting the star’s pattern. Improve-
ment should be seen if the proper adjustments are made. Since three (3) sets of
screws are present, it may be necessary to move at least two (2) sets of screws to
achieve the necessary mirror movement. Do NOT over tighten the outer holding
screws!
Once in collimation, your telescope should not need additional collimation unless
the telescope has been bumped or jarred severely. In fact, most observers will find
the telescope’s collimation right out of the box to be satisfactory. Exact collimation
is only necessary for discriminating observers that require optimal imagery. Adjust-
ing the secondary mirror is NOT needed unless the telescope has been dropped or
damaged. If it requires an adjustment, contact your local astronomy club for more
detailed instructions, consult a telescope users handbook, or call the Celestron
technical support department.