


6
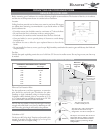
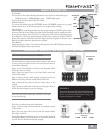
BLADE INSTALLATION
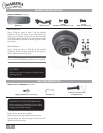
Blade Irons (4)Blades (4)
Pack C:
Blade Screws and Washers (17)
Pack D:
Blade Iron Screws (9)
BLADE HARDWARE (not to scale)
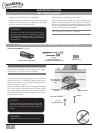
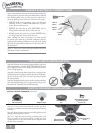
Attach Blade Irons
Step 4. Using the screws in Pack C and the provided
screwdriver, attach the blades to the blade holders by
aligning the screwholes of the blade iron with the holes
in the blade. Attach the blade iron using the four blade
screws provided for each blade, as shown. Tighten securely
by hand only.
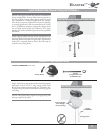
Blade Installation:
Step 5. Using the screws in Pack D and the provided
screwdriver, attach the blade assembly to the motor as
shown. Tighten screws by hand only.
TIP: For balancing purposes, loosely install all four blades
to the motor before tightening the blade screws securely.
CAUTION:
Blade screws must be tightened securely before
operating the fan.
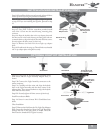
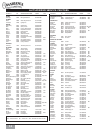
FAN PREPARATION
PERMA•LOCK™ HARDWARE (not to scale)
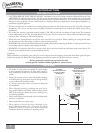
IMPORTANT SAFETY INFORMATION:
Before starting the installation of your ceiling
fan, install the threaded downrod into the motor
coupling and lock the assembly.
Uplight Lightbulbs S-11 25-watt (4) Allen Wrench
3" Perma•Lock™ Downrod
and Ball Assembly
Prepare for fan installation as follows:
Step 6a. Remove the paper shield from the motor.
Step 6b. Route the wires through the Perma•Lock™
downrod and ball assembly.