


3
Ne w Or l e a N s Ce N t e N N i a l
®
INSTALLATION INSTRUCTIONS
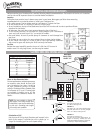
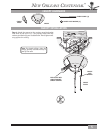
Unpacking: Before assembling and installing your ceiling fan,
removeallpartsfromtheshippingcartonsandcheckthem
against the parts listed here. Before discarding packaging
material,becertainthatallpartshavebeenremoved.
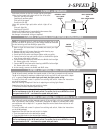
CEILING HARDWARE
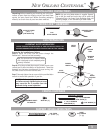
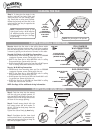
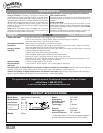
FAN PREPARATION
Prepare for fan installation as follows:
Step A. Route the wires from the motor through the
Perma•Lock™downrodandballassembly.
Step B.Usingtheprovidedallenwrench,loosenthesetscrew
severalturnstoallowinstallationofthedownrod.Threadthe
downrod into the motor coupling until it stops turning, this
will take at least four and a half full turns.
Step C.Securelytightenthesetscrewwiththeprovidedallen
wrench to ensure safe operation of your fan.
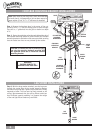
Tip: The downrod has a tapered thread
that is designed to lock completely when
correctly installed.
CAUTION: Failure to fully lock in the down-
rod before securely tightening the set screw
may cause the fan to separate from the
downrod during normal operation!
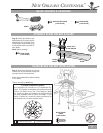
NOTE: Only one set of blade holders is supplied. Depend-
ing on the fan model and series they will be either the
Commodore Style, the Center Style, the Badge Style with
matching badges, or the Standard Style blade holder.
perma•lock™hardware
ALLEN SET SCREW
¼-20 x ¼”
(PRE-INSTALLED)
3mm
ALLEN WRENCH
MOTOR
COUPLING
TAPERED
THREAD
MOTOR
WIRES
GROUND
WIRE
ALLEN
SET SCREW
DOWNROD
& BALL
ASSEMBLY
WIRE NUT (4)
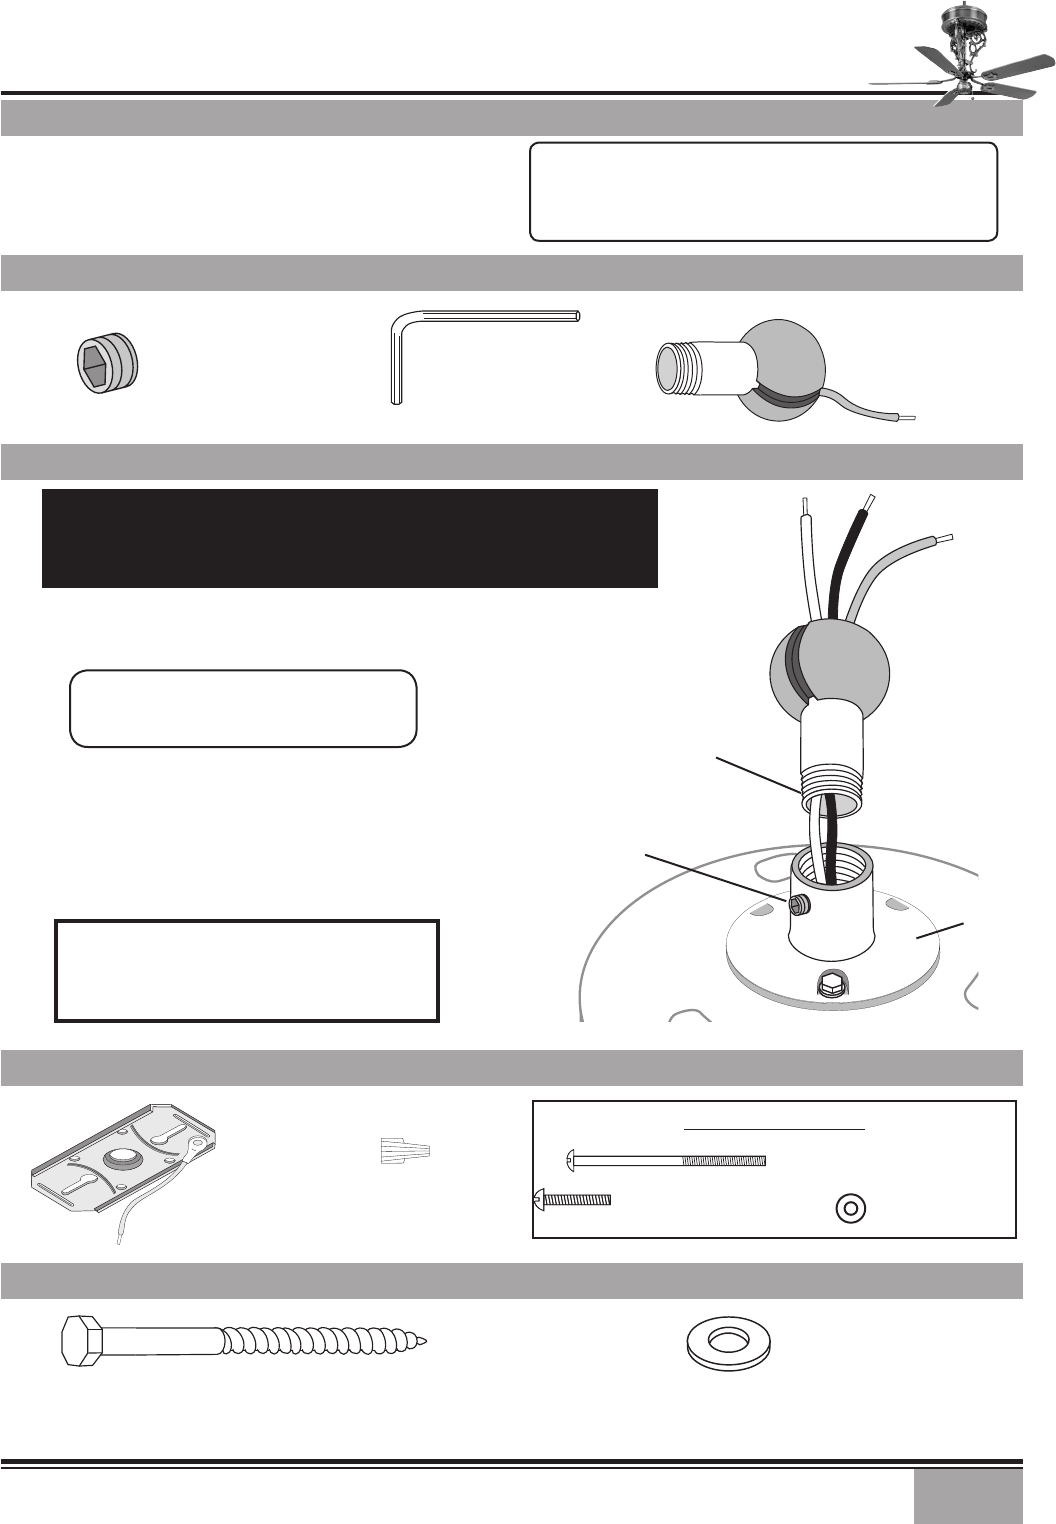
ADDITIONAL HARDWARE
2
1
/4” x 8-32 ROUNDED
HEAD SCREW (2)
FLAT WASHER (2)
1” x 8-32 ROUNDED
HEAD SCREW (2)
SUPPORT INSTALLATION PARTS
LAG SCREW
3
/
8
” #7 X 5” (1)
LARGE
FLAT WASHER
3
/
8
” (1)
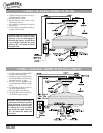
IMPORTANT SAFETY INFORMATION!
BEFORE STARTING THE INSTALLATION OF YOUR CEILING FAN, INSTALL THE
THREADED DOWNROD INTO THE MOTOR COUPLING AND LOCK THE ASSEMBLY
DOWNROD & BALL
ASSEMBLY
CROSSBAR MOUNT-
ING BRACKET