


6
Assembly Instructions and Parts List
PW1586 & PW1587
www.chpower.com
Tips:
Surface Preparation / Cleaning
• Allow steam to penetrate dirty surface for a few seconds before applying brush to work area.
• Have paper towels or a cleaning rag handy – once steam loosens dirt you can easily wipe it up.
Br
ushes
• Use triangle brush for interior surfaces.
• Use triangle brush covered with cloth for more delicate surfaces, such as leather seats.
• Use nylon bristle brush for rugs, console, etc.
• Use the brass bristle brush on hard surfaces such as barbeque grills or to remove rust and paint from
metal objects.
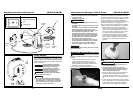
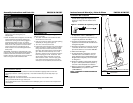
Unclogging Tip
In case the outlet steam tip gets clogged, a wire
cleaner is provided.
1. Turn “Off” the steam unit and allow at least
five minutes for unit to cool.
2. Insert end of wire tip cleaner into small opening
repeatedly to unclog. (See Figure 11)
3. Turn “On” unit and continue use.
4. If tip/nozzle remains clogged, turn off the steam
cleaner and allow it cool for at least 5 minutes.
Using a 3mm allen wrench remove the nozzle
(item 20 in parts list) from the end of the spray
gun. With the nozzle removed, turn on the
steamer to allow it force hot water through the
hose and spray gun for 20 - 30 seconds. Turn
off the steam cleaner and while it is cooling
down clean the nozzle. Once the spray gun is
cool, replace the nozzle using the 3mm allen
wrench, turn on the steamer, and continue use.
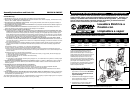
Conexión del Sistema
1. Inserte la lanza en la pistola y gírela en el
sentido de las agujas del reloj hasta que
llegue a su tope, como se muestra en la
Figura 4.
2. Verifique que el interruptor de energía esté
en la posición "OFF" ("APAGADO").
3. Conecte la manguera de alta presión y el
conjunto de pistola en la unidad.
4. Conecte la manguera de jardín según se
explica en Instrucciones de conexión de la
manguera de jardín.
5. Enchufe el cordón de corriente en un toma-
corrientes de 120 V con conexión a tierra,
que se encuentre en un circuito dedicado.
6. Abra la llave del agua.
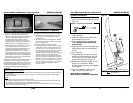
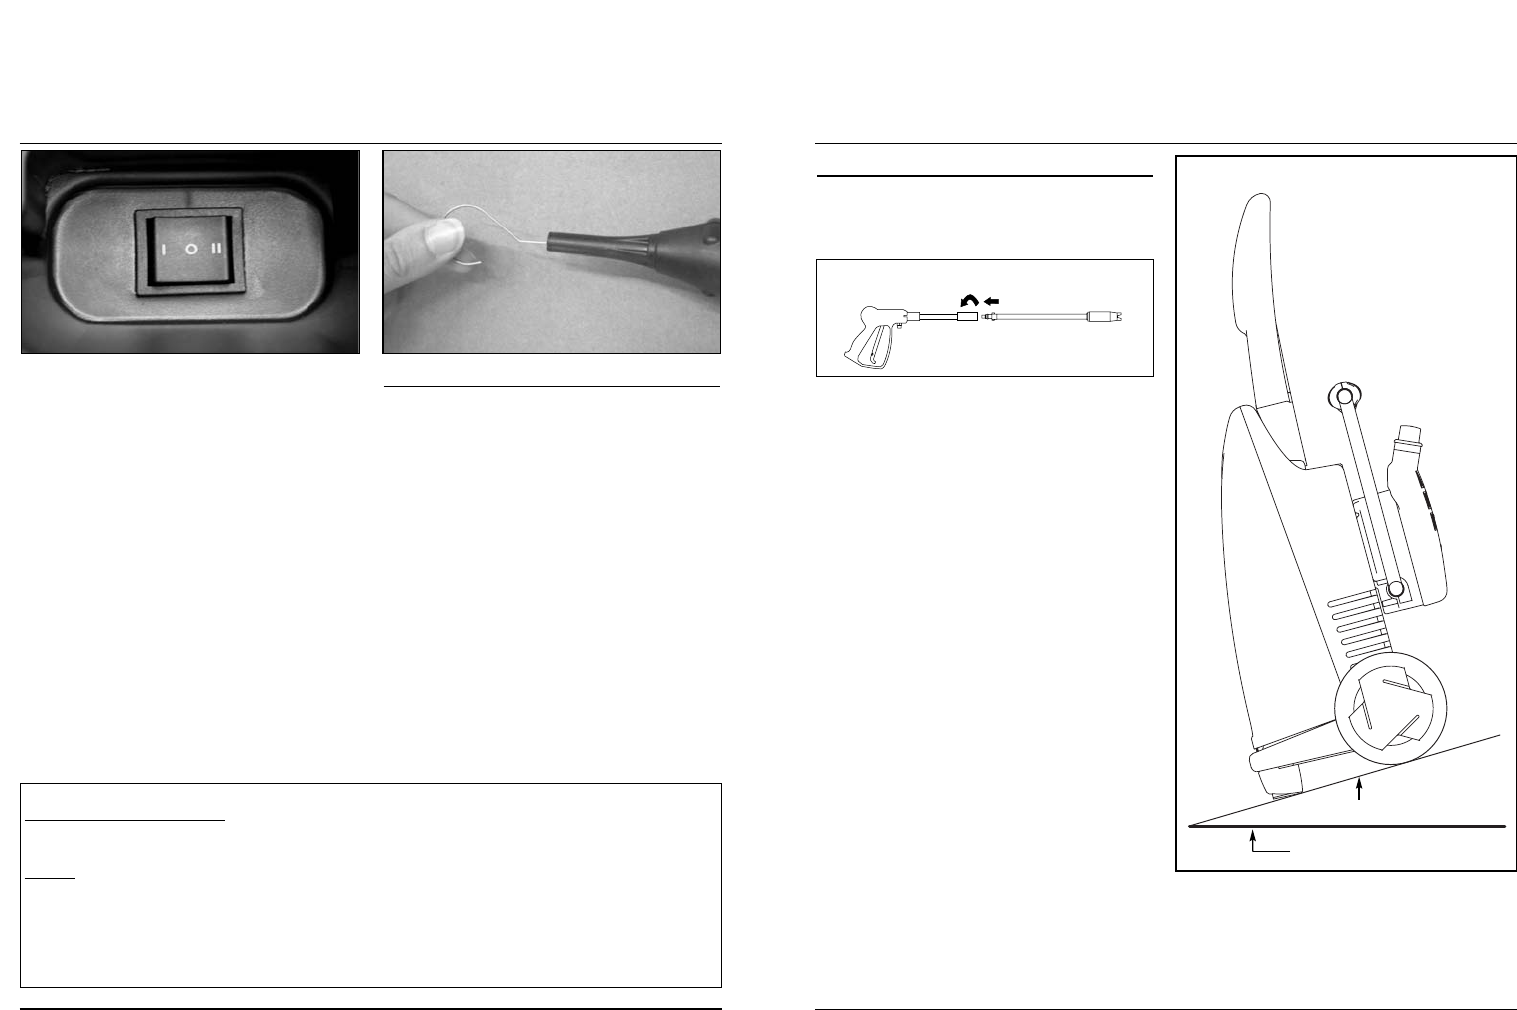
7. Si está operando la unidad en un plano
inclinado como una calzada o cerro, la
parte delantera de la unidad deberá estar
dirigida hacia la bajada, como se muestra
en la figura 5.
8. Presione el gatillo y manténgalo presiona-
do por 1 minuto para liberar la presión y
remover el aire atrapado en el sistema.
9. Mueva el interruptor "ON/OFF" (“ENCENDI-
DO/APAGADO”) a la posición "ON"
("ENCENDIDO").
NOTA: CONSULTE EL INSTRUCCIONES DE
OPERACIÓN.
11 Sp
Figura 4 - Conexión de la pistola y lanza
Instrucciones de Montaje y Lista de Piezas
PW1586 & PW1587
Figure 11Figure 10
people, animals, electrical components or
objects that can be damaged by hot
temperatures.
4. When the water tank is empty the unit will stop
making steam but the heating element will
remain “On” as long as the unit is plugged in
and the power switch is in the “II” position.
When the water tank is empty move the power
switch to the “Off” position “O” before refill-
ing the water tank. A prolonged dry use of
three minutes or more can damage the steam
boiler pump.
ATTENTION: The steamer is equipped with a max
pressure valve. This safety system releases pressure
under the tank when the nozzle in the steamer
handle is blocked. If a blockage occurs you will see
water coming from behind the water tank.
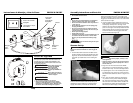
I - Pressure Washer On
O - Off
II - Steamer On
Figura 5
Tierra llana
Plano/calzada/cerro inclinado