


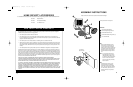


Terminal
Wire Connector
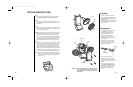
Changing Batteries
1. Unscrew the four screws in front housing
and separate it from rear housing.
2. Carefully peel the tape off the battery,
leaving wires attached to tape.
3. Remove the battery from rear housing,
being careful not to pull on wires.
4. Disconnect wires from battery terminals
and remove battery.
5. Connect wires to new battery terminals.
Make sure red (+) wire is connected to
red (+) terminal and black (-) wire is con-
nected to black (-) terminal.
6. Place new battery in rear housing.
7. Attach tape and wires to front of battery.
8. Attach the front housing to rear housing
using the four screws that were removed
in Step 1.
9. Place switch in the “OFF” position and
charge in full, direct sunlight for THREE
FULL DAYS. Then slide the switch to the
“AUTO” position. The light will turn on
automatically at night when it detects
motion.
65
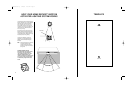
Step 1
After installing your light, leave the switch in the “OFF” position and
charge in full, direct sunlight for THREE FULL SUNNY DAYS.
Step 2
After allowing the battery to fully charge, the motion detector can be
adjusted and tested. Point the motion detector head down 15° from
horizontal level.
Step 3
Move the slide switch to “TEST” position. Turn the range knob all the
way to the minimum setting (counterclockwise). The lights will come
on for a few seconds, then turn off.
Step 4
Wait one minute for the circuit to stabilize, then walk slowly across the
detection zone. The lights will turn on as soon as your presence is
detected. The lights will turn off in approximately 10 seconds after
motion stops or you leave the detection zone. Adjust the detector head
up or down, left or right, in small increments as necessary. Increase
the range by turning the knob clockwise a little at a time and only if
necessary. Most applications work best at the lower range setting.
Step 5
Place the switch to “AUTO” position. The lights may come on for a few
seconds. This is normal. After dark, test your adjustment by walking
slowly across the detection zone. The lights will turn on when your
presence is detected and will stay on as long there is motion in the
detection zone. The lights will turn off in approximately 90 seconds
after you stop moving or leave the detection zone. If additional adjust-
ments are required, it is recommended that they be made in the test
mode during the following day when the switches are easily visible.
NOTE: Remember to switch to “TEST” for daytime testing and switch
back to “AUTO” for nighttime operation. The motion detector has a
built-in photocell sensor that prevents daytime operation in the
“AUTO” position.
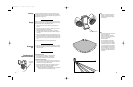
TESTING INSTRUCTIONS
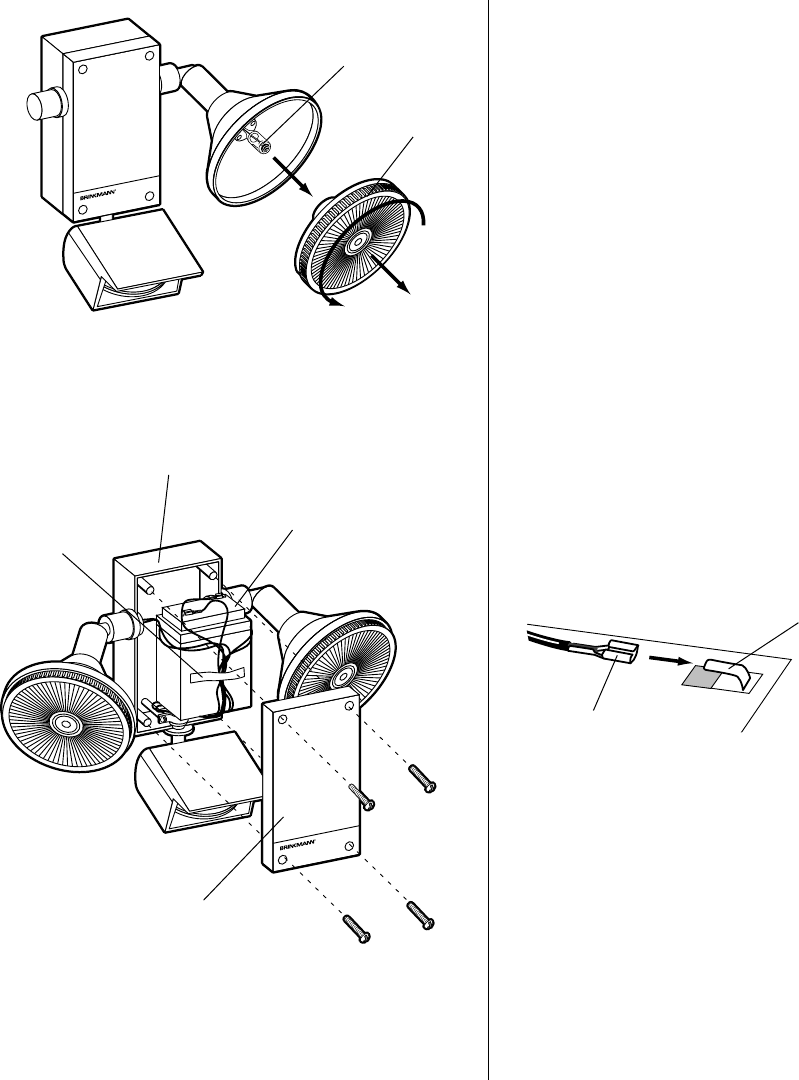
1. Turn lens counterclockwise and remove.
2. Pull bulb straight out and replace with new
bulb. DO NOT PLACE NEW BULB IN BRASS
GROMMET HOLES.
3. Replace the lens by aligning the slots with the
grooves in the top housing and turning clock-
wise to lock in place.
Changing Bulb
Lens
Bulb
IMPORTANT: The sealed battery in this product contains lead and must
be recycled or disposed of properly. For additional infor-
mation regarding disposal, contact your local county solid
waste authority.
Tape
Battery
Rear Housing
Front Housing
INSTR-SM SL-7.q 4/22/02 11:29 AM Page 6