


11
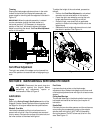
Figure 15
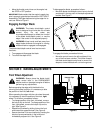
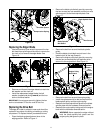
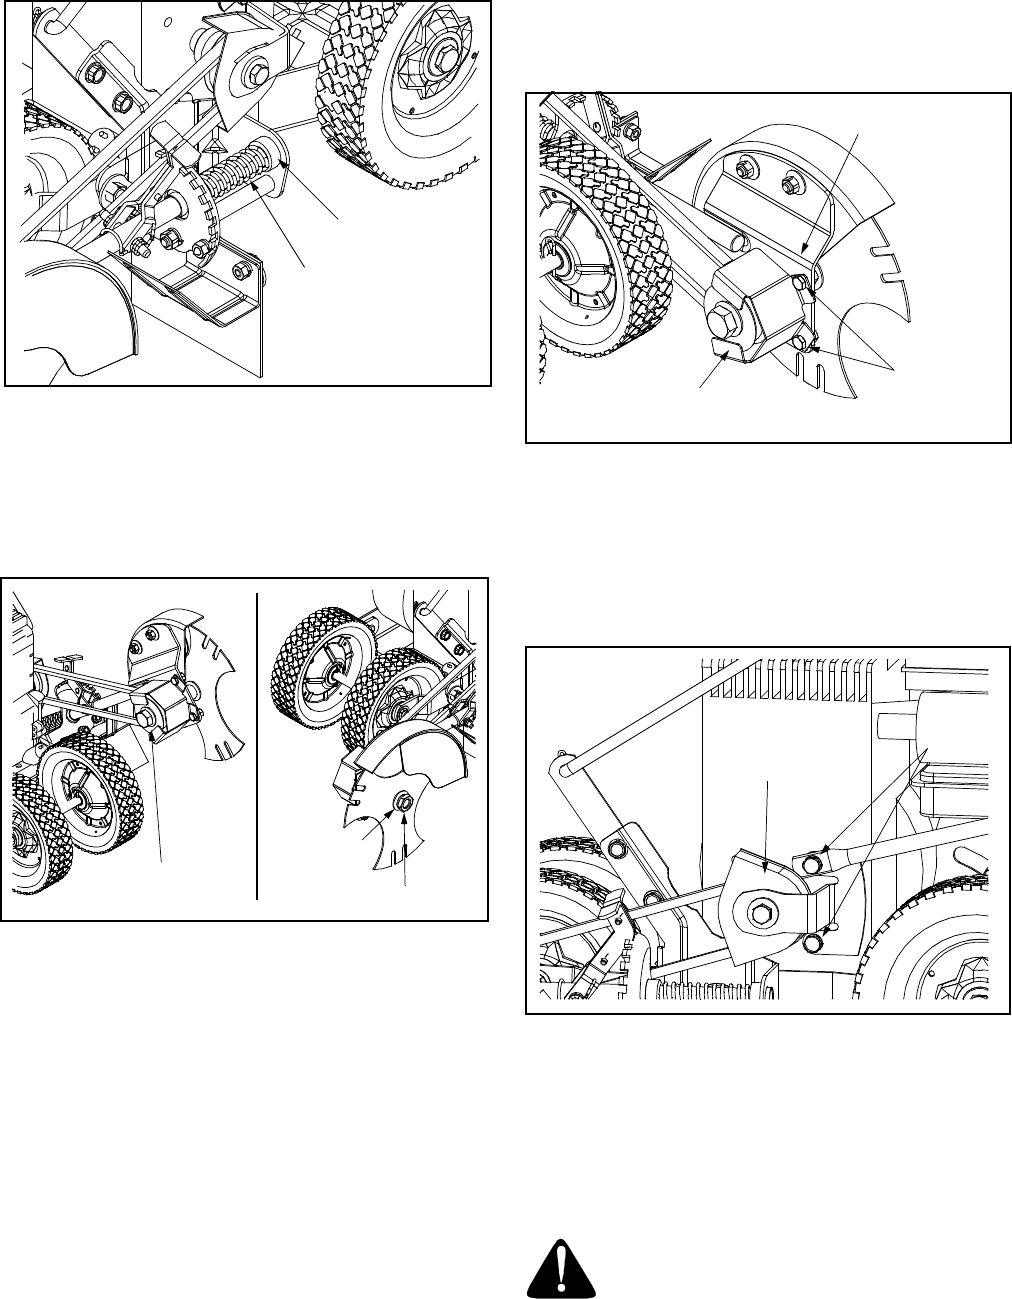
Replacing the Edger Blade
• Use two wrenches (one wrench to prevent the hex
bolt head from spinning and the other to remove the
hex lock nut) to remove the edger blade. See
Figure 16.
Figure 16
• Remove and discard the edger blade but retain the
bell washer and hex lock nut.
• Install the replacement edger blade, the bell
washer (cupped side facing inward) and the hex
lock nut removed earlier.
IMPORTANT:
Use a torque wrench to tighten the hex
lock nut to between 37 foot-lbs. and 50 foot- lbs.
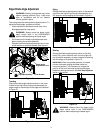
Replacing the Drive Belt
The edger drive belt is subject to wear and should be
replaced if any signs of cracking, shredding or rotting
are present. To replace the belt, proceed as follows:
• Place the blade angle adjustment lever in the
edging position. Refer to Figure 11.
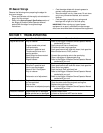
• Remove the blade spindle belt guard by removing
the hex screws, two lock washers and two hex nuts
which secure it to the blade spindle plate. See
Figure 17.
Figure 17
• Remove the belt from around the blade spindle
pulley.
• Place the blade clutch/depth control lever in the
lowest notch (all the way forward).
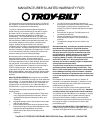
• Remove the engine pulley belt guard by removing
the two hex screws and two lock washers which
secure it to the engine block. See Figure 18.
Figure 18
• Remove the belt from around the engine pulley.
• Install the replacement drive belt around both the
blade spindle pulley and the engine pulley.
• Reattach the blade spindle belt guard to the blade
spindle plate with the hardware removed earlier.
• Reattach the engine pulley belt guard to the engine
block with the hardware removed earlier.
WARNING: Never operate the edger without
both the blade spindle belt guard and the
engine pulley belt guard in place.
Compression Spring
Shoulder Spacer
Hex Lock Nut
Hex Bolt Head
Bell Washer
Blade Spindle Plate
Hex Screws
Blade Spindle
Belt Guard
Hex
Screws
Engine Pulley
Belt Guard