


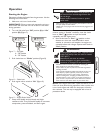
5. Install e-ring with pliers, squeezing from top of e-ring
to bottom of axle.
6. Repeat steps 4 and 5 to secure second wheel.
7. Tip generator so that engine side is down.
8. Line up holes in support leg (E) with holes in
generator frame.
9. Attach support leg using 2 capscrews (M8 x 16 mm)
(F) and 2 hex nuts (G). Tighten with a 13 mm socket
wrench and 13 mm wrench.
10. Return generator to normal operating position
(resting on wheels and support leg).
Verify Engine Oil Level
The generator engine is shipped from the factory filled
with oil (API SJ or higher 10W-30). This allows for
generator operation in the widest range of temperature
and climate conditions. Before starting the engine, check
oil level and ensure that engine is serviced as described in
Maintenance.
NOTE: See Oil in the Maintenance section to review oil
recomendations. Verify provided oil in engine is the
correct viscosity for current ambient temperature.
Add Fuel
All fuel is not the same. If a starting or performance
problem is encountered immediately after new fuel has
been used, try another service station or change brands.
NOTE: This engine is certified to operate on gasoline.
Exhaust Emissions Control System: EM (Engine
Modifications).
Type of Fuel
1. Always use clean, fresh, unleaded gasoline with a
minimum of 87 octane/87 AKI (91 RON) with
equipment. DO NOT mix oil with fuel. DO NOT
modify the engine fuel system or carburetor to run on
alternative fuels.
NOTE: Fuel with up to 10% ethanol (gasohol) or up to
15% MTBE (methyl tertiary butyl ether) is acceptable.
IMPORTANT: Use of any fuel other than those
approved above will void warranty. Some areas require
that fuel pumps be marked if the fuel contains alcohols or
ethers. If you are not sure if your fuel contains alcohol or
ethers that are different than those approved above, then
check with the service station operator.
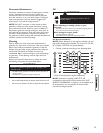
2. Clean area around fuel fill cap, remove cap.
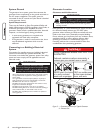
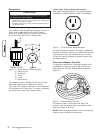
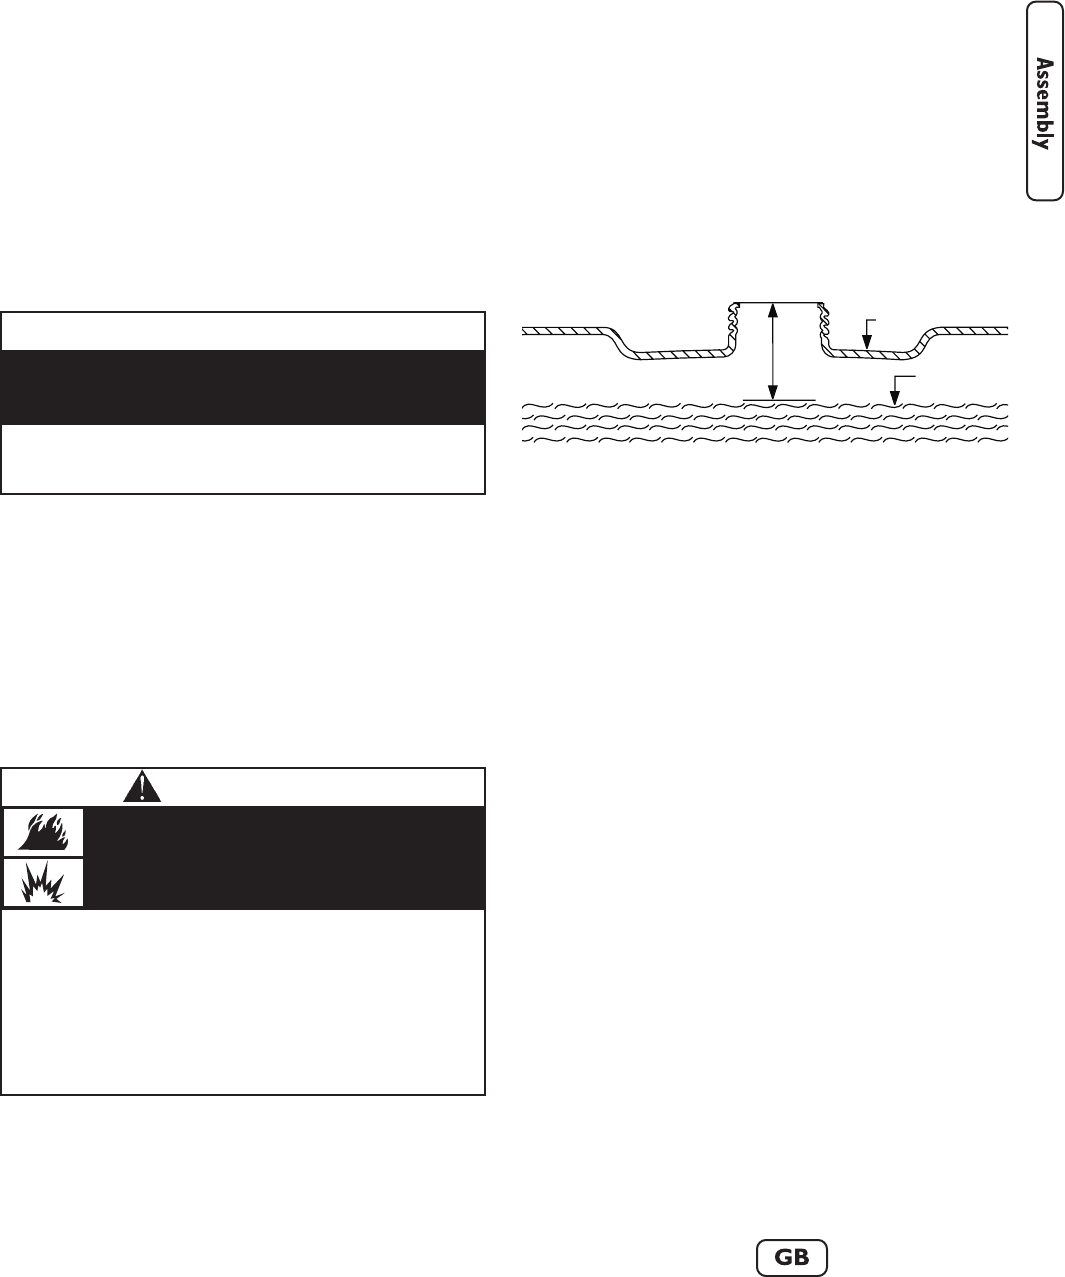
3. Slowly add unleaded gasoline (A) to fuel tank (B). Be
careful not to overfill. Allow at least 1.5" (38 mm) of
tank space (C) for fuel expansion, as shown in Figure 2.
4. Install fuel cap and let any spilled fuel evaporate before
starting engine.
To avoid engine problems, the fuel system should be
treated with a fuel preserver or emptied before storage of
30 days or longer. To protect the fuel system from gum
formation, use Briggs & Stratton FRESH START™ fuel
stabilizer plus. If fuel preserver is not used, drain the fuel
tank, start the engine and let it run until the fuel lines and
carburetor are empty. Use fresh fuel next season. See
Storage in the Maintenance section for additional
information.
NEVER use engine or carburetor cleaner products in the
fuel tank as permanent damage may occur.
High-altitude use
Operation at high altitudes (over 5,000 feet [1524 m]),
may require a high-altitude carburetor jet kit to improve
performance and decrease fuel consumption. See your
local authorized Briggs & Stratton dealer for more
information.
5
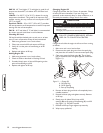
When adding fuel:
• Turn generator OFF and let it cool at least 2 minutes before
removing fuel cap. Loosen cap slowly to relieve pressure in tank.
• Fill or drain fuel tank outdoors.
• DO NOT overfill tank. Allow space for fuel expansion.
• If fuel spills, wait until it evaporates before starting engine.
• Keep fuel away from sparks, open flames, pilot lights, heat, and
other ignition sources.
• DO NOT light a cigarette or smoke.
Fuel and its vapors are extremely flammable
and explosive.
Fire or explosion can cause severe burns or
death.
WARNING
• Refer to Maintenance for oil fill information.
• Damage to equipment resulting from failure to follow this
instruction will void warranty.
Any attempt to crank or start the engine without
verifying it has been properly serviced with the
recommended oil will result in equipment failure.
CAUTION
Figure 2 — Fuel Expansion
A - Fuel
B - Fuel Tank
C - Tank Space
A
B
C