


4
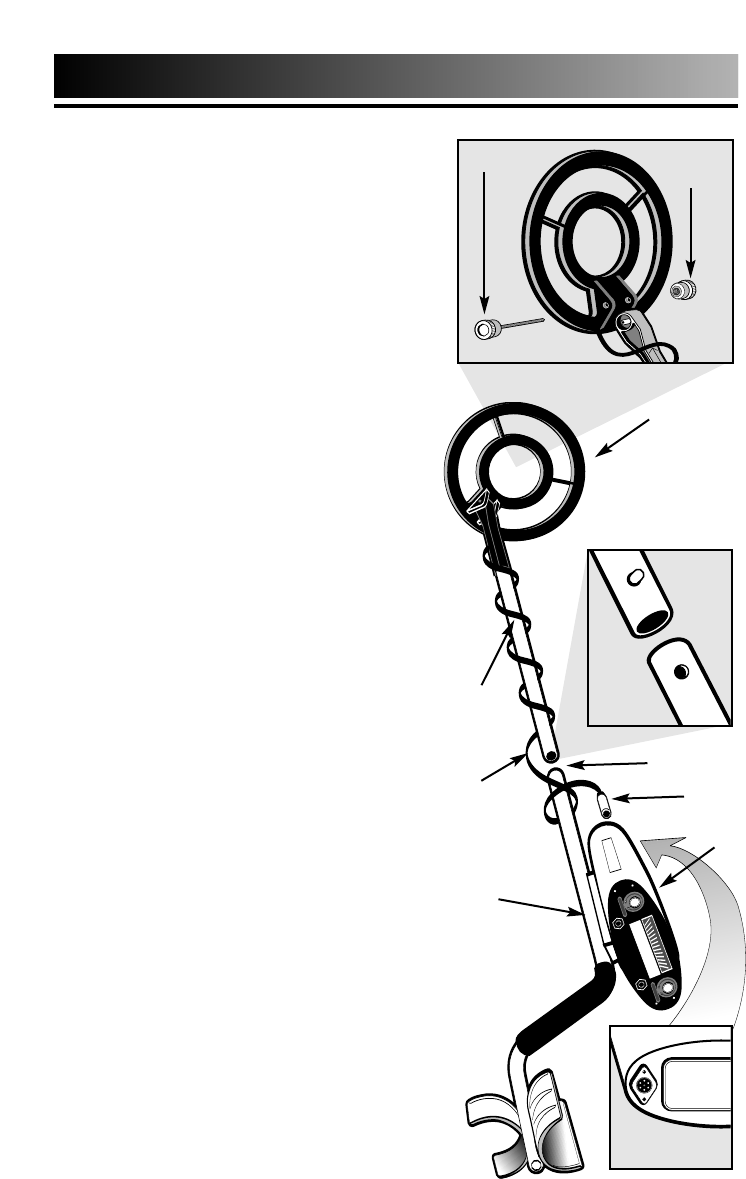
EASY ASSEMBLY
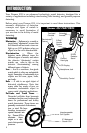
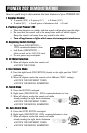
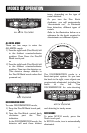
Search Coil
Search
Coil
Cable
Upper
Stem
Control
Housing
Plug
Lower
Stem
Assembling your Pioneer 202 Metal
Detector is easy and requires no tools.
Just follow these steps:
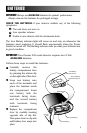
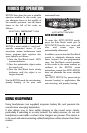
●
1 Using the supplied bolt and knurled
knob, attach the search coil to the
lower stem.
●
2 If your model is equipped with a 3-
piece stem, open the plastic locking
nut on the upper tube by rotating it
counterclockwise. Then slide the
middle tube into the upper tube,
inserting the silver button into the
locating hole which is 1/2” behind the
plastic locking nut. Now tighten the
plastic locking nut.
●
3 Press the button on the upper end
of the lower stem and slide the
lower stem into the upper stem.
Adjust the stem to a length that lets
you maintain a comfortable upright
posture, with your arm relaxed at
your side.
●
4 Wind the search coil cable around
the stem. Leave enough slack in the
cable to let you adjust the coil when
you are hunting on uneven ground.
Then tighten the knob at the end of
the search coil.
Note:
To adjust the coil,
simply loosen the knob.
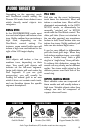
●
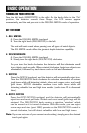
5 Insert the coil’s plug into the
matching connector on the control
housing. Be sure the holes and pins
line up correctly.
Caution:
• Do not force the plug in.
Excess force will cause damage.
• To disconnect the cable, pull on the
plug. Do not pull on the cable.
Lower
Stem
Upper
Stem
Connector
on back of
control housing
Bolt
Knurled
Knob
Bottom view
Bottom side