


9
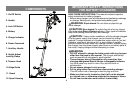
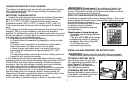
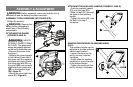
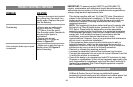
ADJUSTINGTHE HEIGHT OF THETOOL (FIGURE H)
• This tool has a telescopic
mechanism, allowing you to
set it to a comfortable
height.
To adjust the height setting:
• Release the height adjust
locking clamp (H1).
• Gently pull the tube (H2)
up or down to the desired
height.
• Close the height adjust
locking clamp (H1).
RELEASINGTHE CUTTING LINE
In transit, the cutting line is taped to the spool housing.
• Remove the tape holding the cutting line to the spool housing.
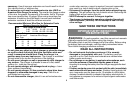
OPERATING INSTRUCTIONS
WARNING: Always use proper eye protection that conforms
to ANSI Z87.1 (CAN/CSA Z94.3) while operating this power tool.
CAUTION: Inspect area to be trimmed and remove any wire,
cord, or string-like objects which could become entangled in the
rotating line or spool. Be particularly careful to avoid any wire which
might be bent outwardly into the path of the tool, such as barbs at the
base of a chain link fence.
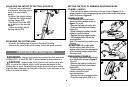
SETTING THE TOOL TO TRIMMING OR EDGING MODE
(FIGURE I, J AND K)
• The tool can be used in trimming mode as shown in figure I or in
edging mode to trim overhanging grass along lawn edges and flower
beds as shown in figure K.
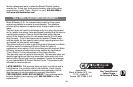
TRIMMING MODE
Fortrimming,thetrimmer head
should bein the positionshown in
figure I.If itis not:
• Removethe batteryfrom the tool.
• Press and holdtheheadrelease
button (I1).
• While holdingtheauxillaryhandle,
rotate the headclockwise.
• Releasetheheadrelease button.
• Lift theedgeguide (J1)into the
closed position.
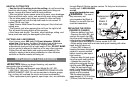
Note: The headwillonly rotate inone
direction.
CAUTION:Wire edgeguide
should only beusedwhenin the
edging mode. Keep wire edge guide
in the retracted positionwhenin the
trimmingmode.
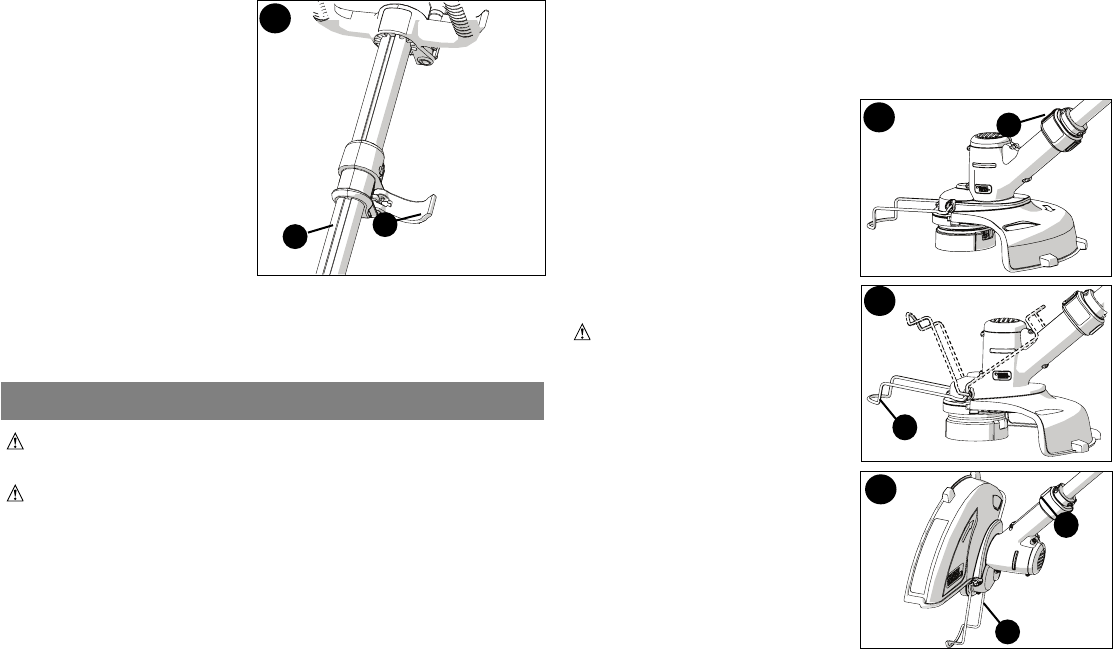
EDGING MODE (FIGURE K)
Foredging, the trimmerheadshould
be inthepositionshownin figureK.
If itis not:
• Removethe batteryfrom the tool.
• Press and holdtheheadrelease
button (K1).
• While holding the auxillary
handle, rotate the head
counterclockwise.
• Release the head release button.
• Drop the edge guide (K2) in to
H
H1
H2
I
K
I1
K2
J
J1
K1