


7
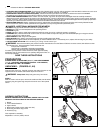
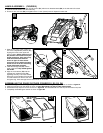
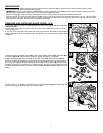
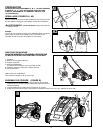
SWITCH USE (FIGURE G)
Your mower is equipped with a special switch. To operate the switch, insert your finger into the opening
(Figure G) and push the lever out so that you can grasp it with your other hand. Pull the lever back to turn the
unit on and hold it against the mower handle to keep it running. To turn the mower off, just release the lever.
The spring loaded "SNAP ACTION" lever will quickly turn the mower off.
WARNING: NEVER ATTEMPT TO OVERRIDE THE OPERATION OF THIS SWITCH.
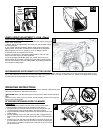
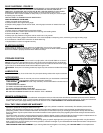
EXTENSION CORD TO ELECTRICAL OUTLET (FIGURE H)
1. Place most of the extension cord close to the electrical outlet, out of
the path of the mower. Attach extension cord to mower.
2. Start in direction where extension cord side of mower is closest to the
outlet. Begin mowing in the area closest to the outlet and mow in a
back and forth manner. Note the cord is kept on cut portion of lawn
and out of the path of the mower. (Figure H)
3. Avoid mowing in circles as cord will be harder to manage.
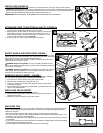
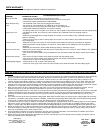
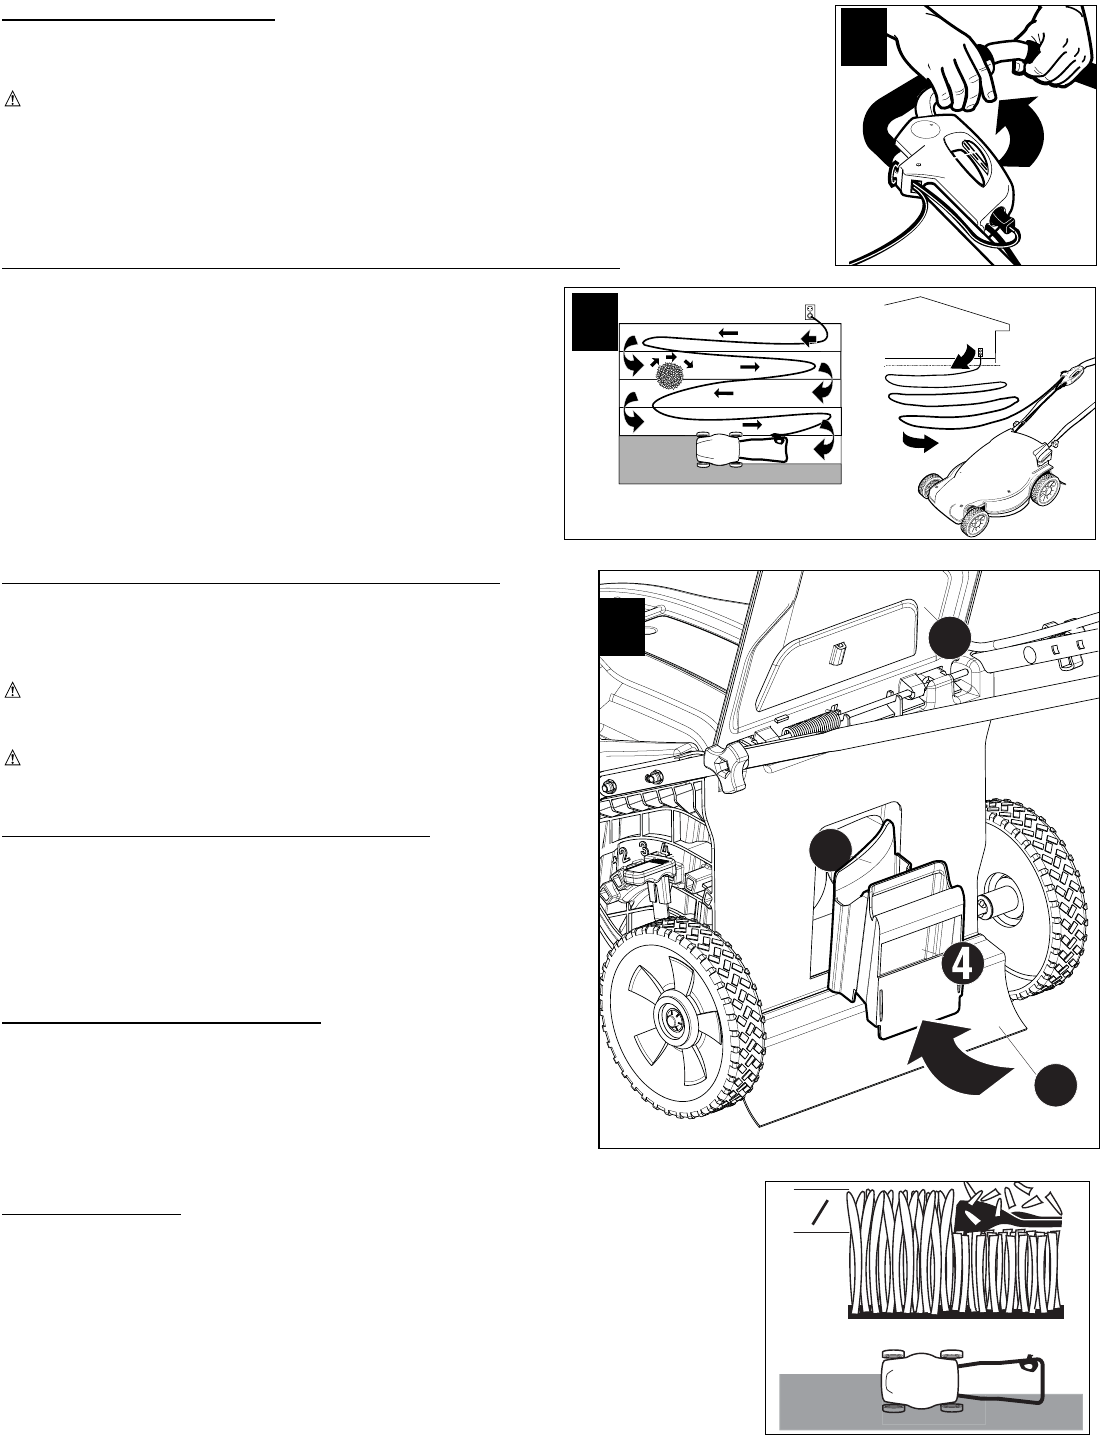
SAFETY SHIELD AND REAR DOOR -FIGURE I
The safety shield (I-1) is designed to minimize the throwing of stones or other
objects by the mower blade backward from under the mower deck. The shield,
along with the rear door (I-2), minimizes the possibility of
accidental foot contact with the blade. DO NOT operate mower without the
safety shield and rear door in place.
DANGER: Sharp moving blade. For your own safety DO NOT use this
mower without either the grass catcher or mulch insert in operating position as
serious injury could result.
DANGER: Sharp moving blade. Do not operate the mower if the rear door
is not closed under spring tension as serious injury could result. Take your
mower to the nearest service center for repair.
REMOVING MULCH INSERT - FIGURE I
To remove the mulch insert (I-3) so that you can bag the grass or discharge
with the optional discharge chute, follow the steps listed below:
1. Turn mower off, wait for blade to stop, and unplug mower.
2. Raise the rear discharge door (I-2) and hold it up.
3. Locate your hand in the handle pocket (I-4), lift and pull out the mulch
insert (I-3) completely.
4. The rear discharge door is spring loaded. When you release it the door will
return to the closed position.
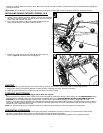
INSTALLING MULCH INSERT
1. Repeat steps 1 and 2 for removing mulch insert.
2. Slide the mulch insert (I-3) into the discharge opening until it is firmly in
contact with the deck.
3. Release rear door and ensure it is properly closed.
MULCHING TIPS
In the mulching configuration your new mower is designed to re-cut the grass clippings into short
lengths. These clippings, which are dispersed as you mow will biodegrade quickly and provide
nutrients for the lawn.
• Set mower at highest cutting height when mowing in rough ground or in tall weeds.
• Do not cut the lawn when it is wet. Wet grass tends to form clumps with the mulching action. The
best time to cut your lawn is in the afternoon.
• For best results, adjust the mower cutting height so that the mower cuts off only the top third of the
grass blades.
• If your lawn is overgrown it may be necessary to increase the cutting height to reduce the pushing
effect and prevent overloading the motor.
• For extremely heavy mulching make narrower cuts and mow slowly.
1
2
3
I
H
G
1
3