


10
Calibration Procedure
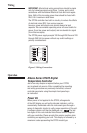
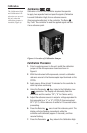
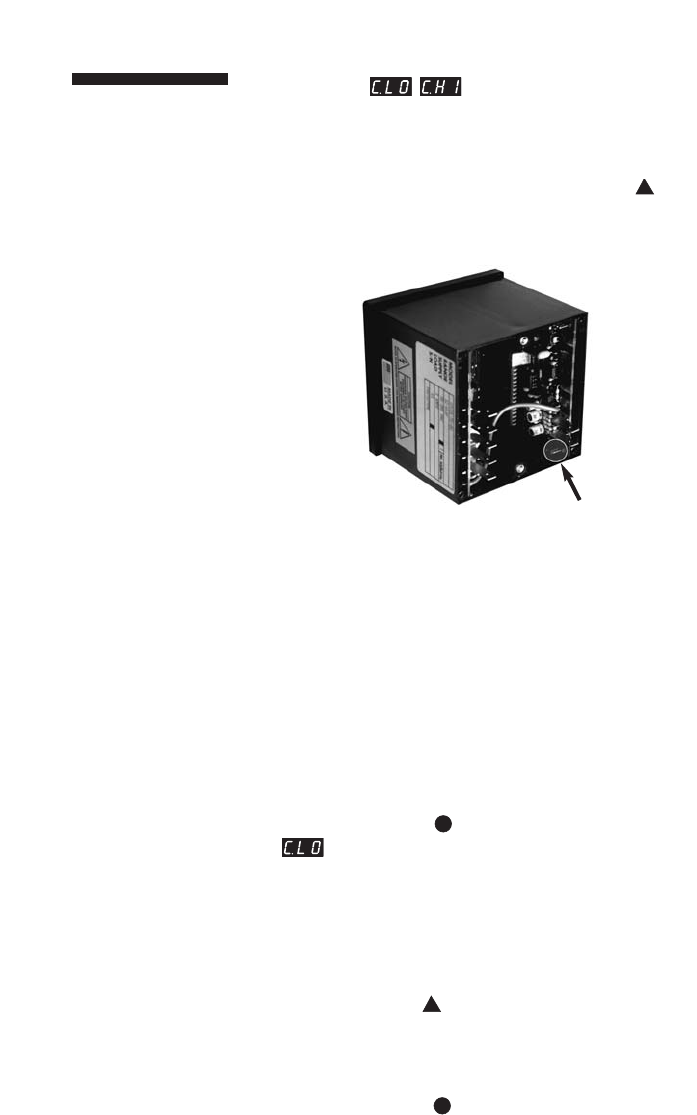
1. Prior to applying power to the unit, install the calibration
jumper on the microprocessor board as shown in
Figure 6.
2. With the instrument still unpowered, connect a calibration
reference source to the thermocouple input terminals on the
OTC25.
3. Apply power. Allow at least 15 minutes for the controller to
warm up before continuing.
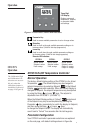
4. Using the Parameter Key, index to the Calibration Low
parameter. The display will alternately flash this
mnemonic and the number “32” (“0” for Celsius units).
5. Adjust the reference source to output a voltage equivalent to
that generated by a “J” or “K” (OTC25 P) thermocouple at
32° F (0° C). Allow reference to settle for 10 seconds before
proceeding.
6. Press the Raise key once to set this reference point. The
display will stop flashing momentarily while the
controller self-calibrates (approx. 3 seconds), and then
resume flashing.
7. Press the Parameter Key, index to the Calibration High
The Calibration High
and Calibration Low
selections are accessi-
ble only when the
calibration jumper is
installed (Figure 6).
Calibration
Calibration
,
Calibration of the OTC25 controller requires the operator
to apply two separate fixed and specific signals (Calibration
Low and Calibration High) from a reference source
(thermocouple calibrator) to the controller. The Raise
Key “tells” the controller to read the applied signal and use
it as a reference point.
Figure 6. Location of Calibration Jumper.