6
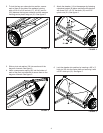
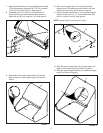
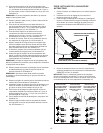
FIGURE 10
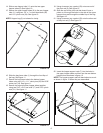
FIGURE 11
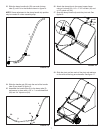
FIGURE 12
Slide a rear hopper tube (11) onto the two upper 14.
hoppertubes(6).Seegure10.
Secure the upper hopper tubes (6) to the rear hopper 15.
tube (11) using two 1/4" x 1" curved head bolts (26)
and1/4"nylocknuts(24).Seegure10.
NOTE: Hopper bag (3) not shown for clarity.
Slidethebagframetube(1)throughthefrontapof16.
thebag.Seegure11.
Secure the bag frame tube to the bottom hopper 17.
tubes using two 1/4" x 1.11" clevis pins (28) and 3/32"
cotterpins(19).Seegure11.
Secure the top and bottom hopper tubes together 18.
using two 5/16" x 3/4" hex bolts (17) and 5/16" nylock
nuts(21).Seegure11.
Using a hammer, tap a palnut (23) onto one end of 19.
thepivotrod(2).Seegure12.
Slide the end of the pivot rod that doesn't have a 20.
palnut on it through the holes in the side of the upper
hoppertubesandthroughthemiddleapofthebag.
Seegure12.
Using a hammer, tap a palnut (23) onto the other end 21.
ofthepivotrod(2).Seegure12.
2
2
23
FIGURE 13
Insert the hopper support rods (7) into the holes in 22.
the upper hopper tubes and then into the rear bottom
hoppertubesasshowningure13.
NOTE: The hopper support rods will bend about as much
asshowningure13whentheyareassembled.
7
7
17
17
28
28
21
19
19
21
1
11
26
26
24
24
6
6


