


78-8130-6151-8-E 23
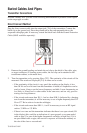
2. Remove the grounding from the near-end of the target cable/pipe.
Note: Never connect, or disconnect the transmitter when the unit is on.
3. Connect the red lead of the transmitter to the shield, neutral, or deenergized target
conductor.
4. Connect the black lead of the transmitter to the ground rod.
5. Perform a battery check by pressing and holding OFF [T-1].
6. Turn the power on the transmitter by pressing OHMS [T-2].
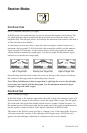
a. A solid tone from the transmitter indicates a complete circuit with a good
ground.
b. A beeping tone from the transmitter indicates a usable ground. An attempt
should be made to improve the ground.
c. No tone from the transmitter indicates a poor, or no ground. The transmitter will
display ‘OL’ in this instance. An attempt should be made to improve the ground.
Verify that the far end is grounded.
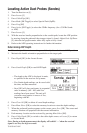
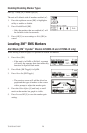
7. Press TRACE [T-3] to set the transmitter to Trace mode.
8. Select a frequency on the transmitter by pressing TRACE [T-3]. The unit will cycle
through the available frequencies (577, 8K, 33K, 133K, and ALL).
9. Press Power [1] to turn on the receiver.
10. Press Locate [5].
11. Press Cable/Pipe [SK].
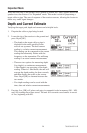
12. Set the Frequency and mode of the receiver.
a. Press Freq [SK]
b. Select the same frequency on the receiver
as the transmitter by pressing Active [SK
Toggle].
c. Press Locate [5] to save the setting and
return to locate mode.
d. Press Mode [SK Toggle] until DirPk is
displayed.
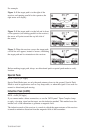
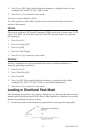
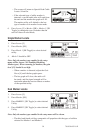
13. Stand away from the suspected target path and adjust the Gain Down [4] until the
bar graph opens completely.
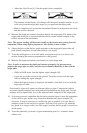
14. Walk in a wide circle with your back toward the transmitter (about 3 to 4.5 meters
away).
− Watch the receiver screen and listen to the signal. Take note of where the
receiver detects the strongest signals.
− The bar graph will close when the unit detects a signal, and the arrows
will reverse.