


13
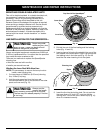
SPEEDSPOOL REPLACEMENT PARTS
Replacement Line . . . . . . . . . . . . . . . . . . . . . . . . 181472
Replacement Line Cartridge . . . . . . . . . . . . . . . . 181460
Inner Reel Spring . . . . . . . . . . . . . . . . . . . . . . . . 181465
Foam Seal . . . . . . . . . . . . . . . . . . . . . . . . . . . . . . 181467
Inner Reel . . . . . . . . . . . . . . . . . . . . . . . . . . . . . . 181464
Bump Knob Assembly . . . . . . . . . . . . . . . . . . . . 181468
These SpeedSpool
®
replacement parts can be
purchased from your local authorized dealer.
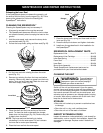
Releasing the Inner Reel
If the SpeedSpool
®
does not release line correctly, pull
the ends of the line firmly from the spool (Fig. 19). If this
does not the release line, follow the Cleaning the
SpeedSpool
®
instructions.
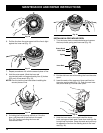
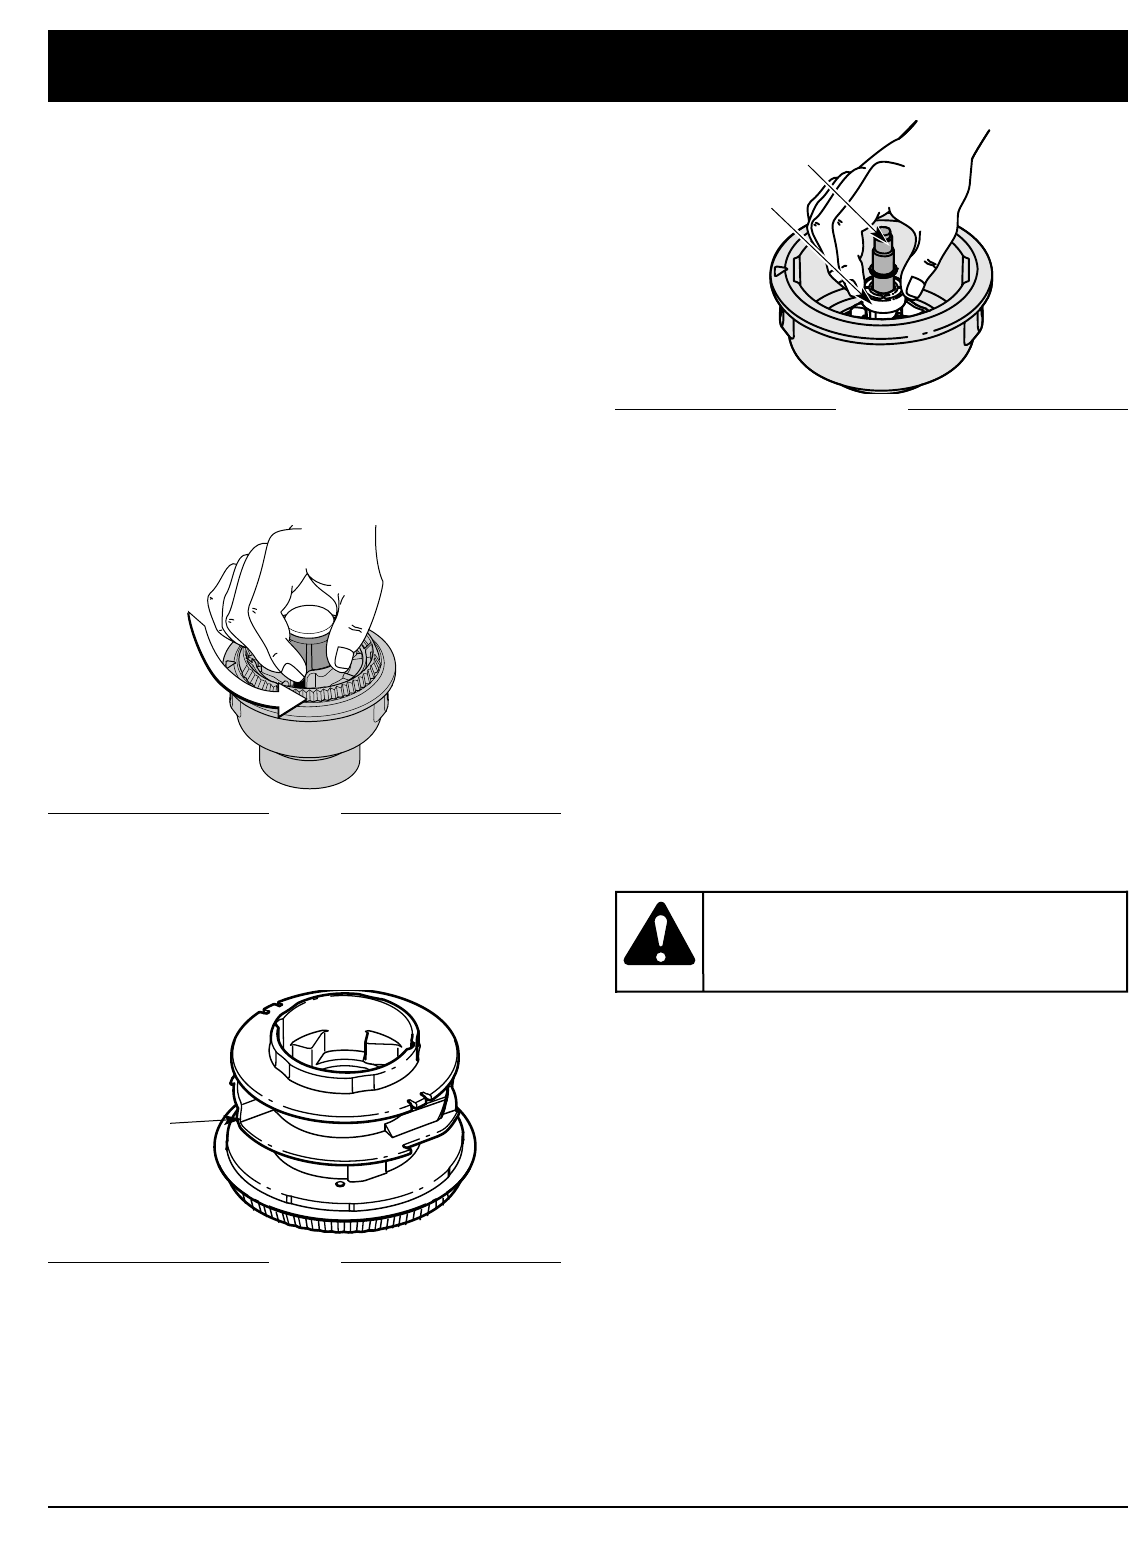
4. Remove any existing line from the inner reel before
cleaning. Remove any debris or grass from the knob,
spring, inner reel and foam seal. Wash the inner reel
with warm soapy water (Fig. 23).
Fig. 22
CLEANING THE SPEEDSPOOL
®
Cleaning the SpeedSpool
®
may be necessary if:
• A jammed or excessive line must be removed
• The SpeedSpool
®
becomes difficult to wind or does
not operate correctly when bumping the head on the
ground
1. Hold the outer spool, and unscrew the bump knob
counterclockwise (Fig. 22).
2. Pull out the bump knob, spring and foam seal (Fig. 20).
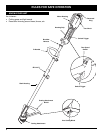
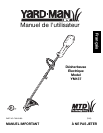
Shaft
Plunger
7. Place the bump knob, spring and foam seal into the
inner reel (Fig. 20).
8. Press the bump knob down and tighten clockwise.
9. Install new line as described in Line Installation for
the SpeedSpool
®
.
5. Clean the shaft and the inner surface of the outer
spool. To clean the shaft underneath the plunger,
press down on the plunger (Fig. 24). Remove any dirt
or debris from the shaft.
NOTE: The inner reel must be totally dry before
reinstalling it into the outer spool. Do not lubricate
the inner reel or outer spool assembly.
6. Place the inner reel into the outer spool.
Fig. 24
Inner Reel
Fig. 23
3. Pull the inner reel with existing line from the outer
spool (Fig. 21).
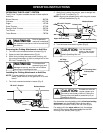
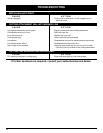
CLEANING THE UNIT
Switch off the unit and disconnect it from the power
source. Use a small brush to clean off the outside of the
unit. Do not use strong detergents. Household cleaners
that contain aromatic oils such as pine and lemon, and
solvents such as kerosene, can damage plastic housing
or handle. Wipe off any moisture with a soft cloth. Also
keep the air vents free of obstructions.
STORAGE
• Store the unit locked up to prevent unauthorized use
or damage.
• Store the unit in a dry, well-ventilated area.
• Store the unit out of the reach of children.
INSPECT EXTENSION CORDS
Inspect all extension cords periodically. Look closely for
deterioration, cuts or cracks in the insulation. Inspect the
connectors for damage. Replace cords if defective or
damaged.
To avoid serious
personal injury,
always turn your unit off and unplug it
before you clean or service it.
WARNING:
MAINTENANCE AND REPAIR INSTRUCTIONS