


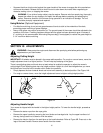
19
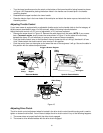
To Remove Blade
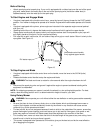
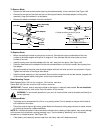
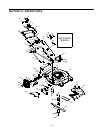
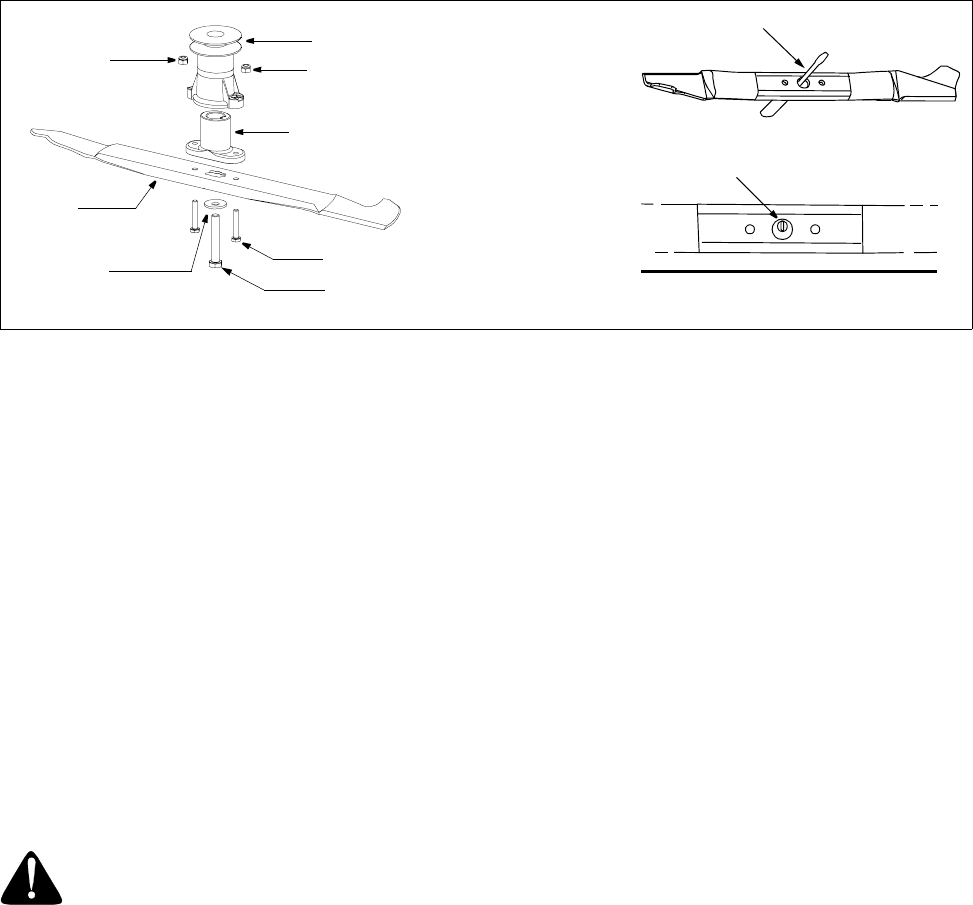
• Remove the bolt and the bell washer securing the blade assembly to the crankshaft. See Figure 18A.
• Remove the two pairs of hex bolt and lock nut holding the blade to the blade adapter and the pulley
assembly. Keep the hardware in a safe place.
• Remove the blade and adapter from the crankshaft.
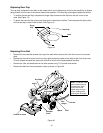
Figure 18
To Replace Blade:
• Before reinstalling the blade and the pulley to the unit, lubricate the engine crankshaft and the inner
surface of the blade adapter with light oil or engine oil. Also lubricate the bolt holes, bolts and inner
surface of the nuts.
• Install the pulley over the blade adapter with the “star” away from the pulley. See Figure 18A.
• Place the new blade on the adapter with the side marked bottom (or with part number) facing away from
the adapter.
• Secure the blade to the pulley and the blade adapter with two hex bolts and lock nuts as shown in figure.
Tighten the hex bolts to the torque listed below.
• Install the blade assembly on the crankshaft. Secure with the large hex bolt and bell washer (cupped side
of the washer against blade) and tighten to the torque listed below.
Blade Mounting Torque:
Blade Adapter Bolts: 120 inch-lbs. minimum; 150 inch-lbs. maximum.
Center Bolt: 450 inch-lbs. minimum; 600 inch-lbs. maximum.
IMPORTANT: The bolt, used to secure the blade to the engine, is specially heat-treated. Do not substitute.
To order replacement bolt, refer to the Parts List section of this manual.
WARNING: To ensure safe operation of your unit, all nuts and bolts must be checked periodically for
correct tightness.
To Sharpen Blade:
• The blade can be sharpened with a file or on a grinding wheel. Do not attempt to sharpen while blade is
still installed on the mower.
• Follow the original angle of grind as a guide. Make sure that each cutting edge receives an equal amount
of grinding to prevent an unbalanced blade.
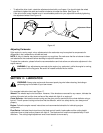
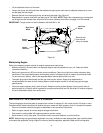
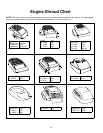
NOTE: An unbalanced blade will cause excessive vibration when rotating at high speeds, may cause damage
to the mower and could break, causing personal injury. Test the blade by balancing it on a round shaft
screwdriver or a blade balancer. See Figure 18B.
• If the blade is not balanced, remove metal from the heavy side until it balances evenly.
1. Insert screw driver through hole
2. Blade should be parallel to ground
Screw
Driver
Ground
Blade
A
B
Pulley Assembly
Lock Nut
Blade Adapter
Bell Washer
Blade
Hex Bolt
Hex Bolt
Lock Nut