


6
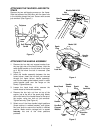
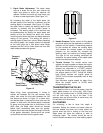
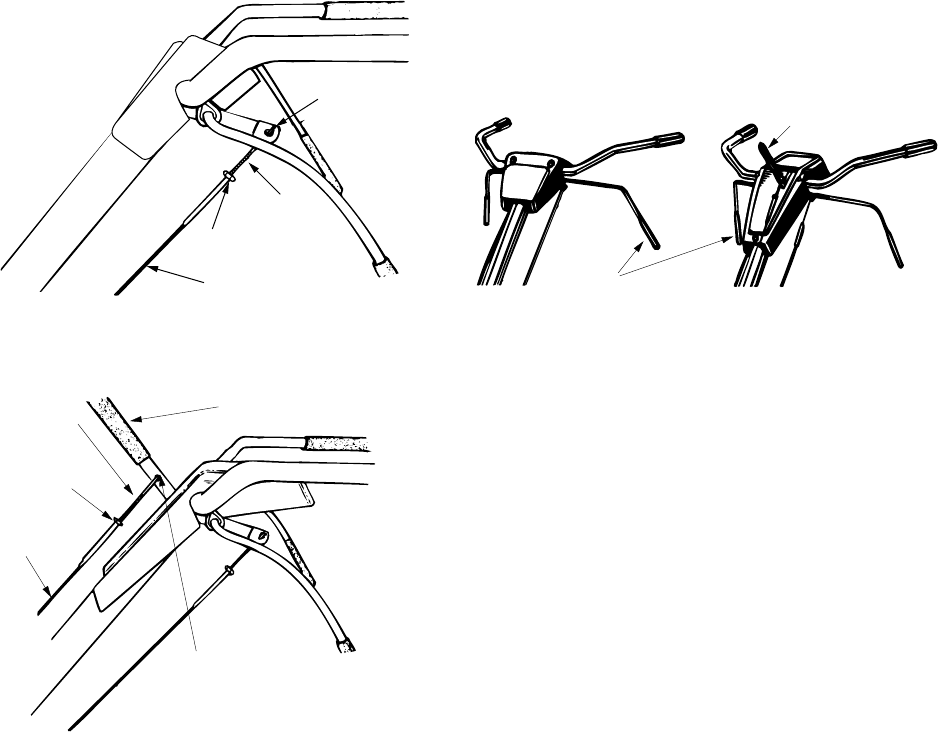
ATTACHING THE CLUTCH CONTROL CABLE(S)
FORWARD CABLE
Attach the end of the forward cable to the bracket
underneath the handle assembly as follows. (On
model 390, the forward clutch cable is the cable
which is attached closer to the rear of the tiller).
1. Loosen the hex nut on the threaded rod near
the end of the cable, and move it up the rod as
far as it will go.
2. Unthread the rod from the rest of the cable.
Hook the “Z” end of the rod into the bracket
underneath the handle assembly from the right
hand side. (See Figure 6.)
3. Thread the rod back into the cable until the
cable is straight. Do not tighten it enough to put
any tension on the spring.
4. Thread the hex nut down against the end of
cable. Use a pair of pliers and a wrench to lock
the nut against the rod.
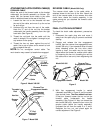
NOTE:
Do not overtighten control cable. Too
much tension may cause it to break when engaged
.
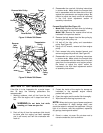
Figure 6 Model 340/345
Figure 7 Model 390
REVERSE CABLE
(Model 390 Only)
The reverse clutch cable is the cable which is
attached closer to the front of the tiller. Attach the
end of the reverse cable to the reverse tine drive
clutch lever, above the handle assembly, in the
same manner as you attached the forward cable.
(See Figure 7.)
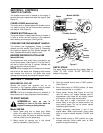
FINAL CLUTCH ADJUSTMENT
To check the clutch cable adjustment, proceed as
follows.
1. Disconnect the spark plug wire and move it
away from the spark plug to prevent accidental
starting.
2. Engage and release the tine engagement
handle, then the reverse tine engagement lever
(model 390 only). If an excessive noise is heard
when releasing either the tine drive clutch
handle or lever, the cable may be too loose.
Adjust either the forward or reverse clutch cable
by loosening the hex nut, threading the rod into
the cable one or two turns, then retightening the
nut.
Figure 8
3. With tine engagement handle in neutral
(released) as shown in Figure 8, pull the starter
rope several times.
The tines should not turn.
If they turn forward, loosen the hex nut on the
forward cable (underneath the handle
assembly). See Figure 6. If they turn toward the
rear (model 390 only), loosen the hex nut on the
reverse cable (above the handle assembly).
Unthread the rod from the cable 2 or 3 turns.
Retighten the hex nut, and check again for
correct adjustment. See Figure 8.
“Z” End
Hooked In
Bracket
Threaded
Rod
Hex Nut
Cable
Reverse
Cable
Hex Nut
Threaded
Rod
Reverse Tine
Engagement Handle
“Z” End
Hooked In
Bracket
Model 390
Model 340/345
Engagement Handle
Tine
Engagement Handle
Reverse Tine