


13
5
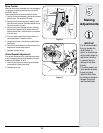
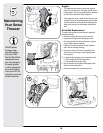
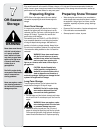
Drive Control
When the drive control is released and in the disengaged
“up” position, the cable should have very little slack. It
should NOT be tight.
Check the adjustment of the drive control as follows:
1. With the drive control released, push the snow thrower
gently forward. The unit should roll freely.
2. Engage the drive control and gently attempt to push
the snow thrower forward. The wheels should not turn.
The unit should not roll freely.
3. With the drive control released, move the shift lever
back and forth between the R2 position and the F6
position several times. There should be no resistance
in the shift lever.
4. If any of the above tests failed, the drive cable is in
need of adjustment. Proceed as follows:
5. Loosen the lower hex nut on the drive cable bracket.
See Figure 6.
6. Position the bracket upward to provide more slack (or
downward to increase cable tension).
7. Retighten the lower hex nut.
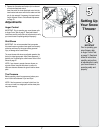
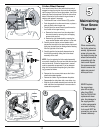
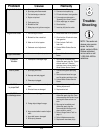
Chute Bracket Adjustment
If the spiral at the bottom of the chute directional control
is not fully engaging with the chute assembly, the chute
bracket can be adjusted. To do so:
1. loosen the two nuts which secure the chute bracket
and reposition it slightly. See Figure 7.
2. Retightening the nuts.
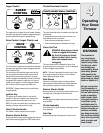
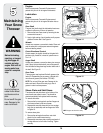
Making
Adjustments
IMPORTANT
It is not recommended
that you operate this
snow thrower on
gravel, as loose stones
can be easily picked up
and thrown, resulting
in personal injury or
damage to the snow
thrower.
If for some reason, you
must operate the snow
thrower on gravel,
adjust the skid shoes
for maximum clearance
between the ground
and the shave plate.
Figure 6
Figure 7