


6
S
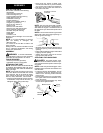
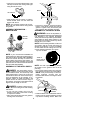
Insert a hexwrench into aligned holes. This
will keep the shaft from turning while tight-
ening the trimmer head.
Hex Wrench
S
While holding the hex wrench in position,
thread trimmer head onto the shaft and
tighten until secure.
NOTE:
The retaining washer must be posi-
tioned with the raised section facing toward
the gearbox.
ASSEMBLY INFORMATION --
BRUSH BLADE
BRUSH
BLADE
NOTE:
If your unit has been assembled for
trimmerhead use,refer t othe sectionA TTACH-
ING THE PLASTIC SHIEL D AND TRIM MER
HEAD and reverse the steps to rem ove the
plastic shield and trimmer head before y ou
mount the metal shield and blade. Store t hese
parts f orfuture u se.Neverusethe tr imm erhead
with the metal blade installed.
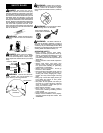
ASSEMBLY OF THE METAL SHIELD
DANGER:
The metal shield must be
properly installed on the tool anytime the tool
is used wi th the blade. The forward tip of the
metal shield helps to reduce the occurrence
of blade thrust which can c ause s eriousinjury
such as amputation to the operator or by-
standers. Failure to install the shield in the
position shown can result in serious injury to
the operator. The length of the shield must be
aligned with the length of the tube.
DANGER:
The blade issharp andcan
cut you. Besure towear gloves while working
with blades.
S
If your unit has a plastic cover over the
threads on the shaft, remove the covering
to expose the threads.
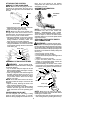
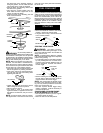
S
Place the metal shield under the gearbox,
and align the screw holes.
Shield
Gearbox
S
Insert the 4 mounting s crews through the
bottom of the shield. Thread them into the
gearbox. Tighten evenly and securely with
one of the hex key wrenches provided.
ASSEMBLY OF THE METAL BLADE
WARNING:
Donot use any blades,or
fastening hardwar e other t han the washers and
nuts illustra te d in t he following illustrations .
These par ts m ust be provided by Weed E ater,
and installed as shown below. Failure to use
proper parts can c ause the bl ade to f ly of f and
seriously hurt y ou or other s.
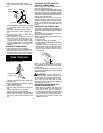
NOTE:
When installing theblade, makesure
you install it with the correct side facing up
(marked on the blade). If you are re-installing
an older blade and the writing has worn off,
use the following illustration as a guide.
Teeth on
blade point in
this direction
Top view of blade
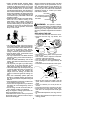
NOTE:
The dust cup and retaining washer
are located on the gearbox and not in the
parts bag.
S
Remove the retainer washer from the gear-
box, and leave the dus t cupon thegearbox.
NOTE:
It may be necessary to remove a
plastic protective covering from the
threaded shaft before removing the retain-
ing washer.
Retaining
Washer
Dust Cup
S
Install the blade over the threaded shaft ex-
tending from the gearbox between the dust
cup and the retaining washer. Make sure