


6
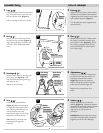
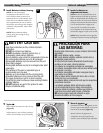
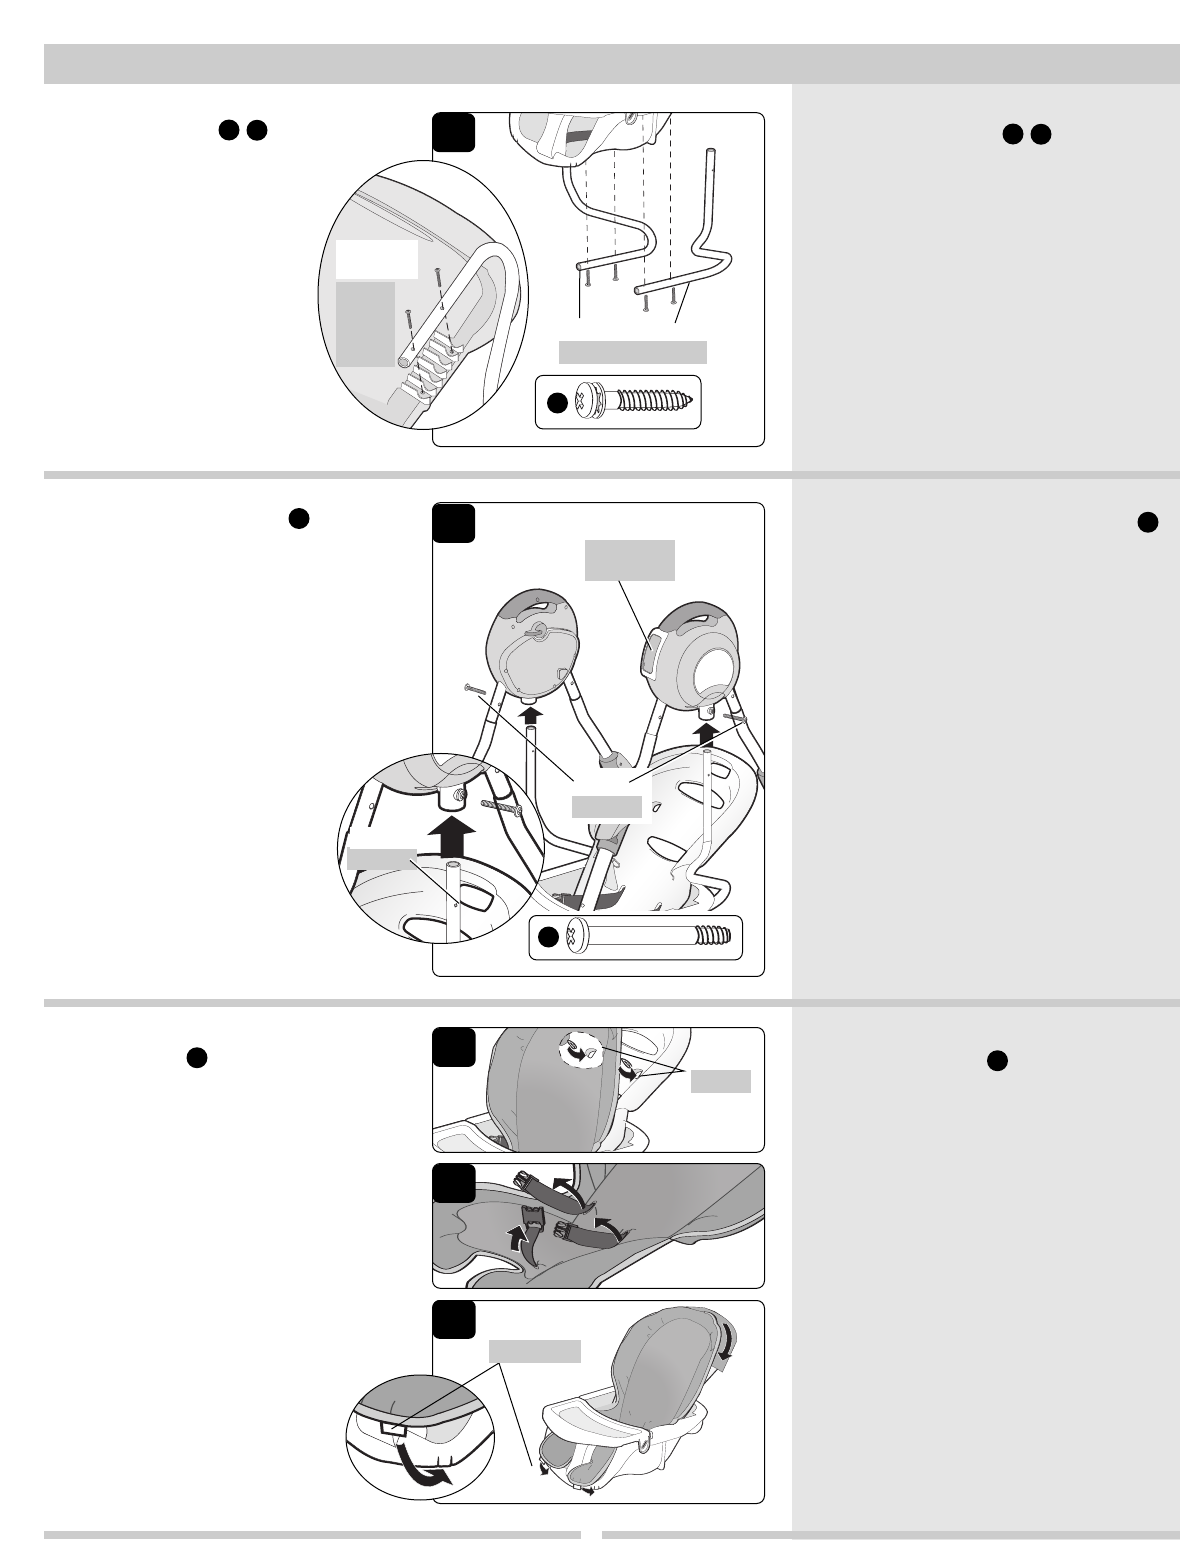
6 Secure Seat Assembly :
Position swing with speed control
facing forward.
Slide each hanging
arm into housing. Continue supporting
the seat assembly throughout this step.
Align hole in hanging arm with hole
in housing.
Secure each side with one
#8 x 1.25”
Phillips Shoulder Screw
.
TIP:
Screw should be aligned to
surface of housing. Screw
should not protrude. (
Do not
overtighten.)
6 Asegure el conjunto del asiento :
Ubique el columpio en su posición con
el control de velocidad mirando hacia
adelante. Deslice cada brazo colgante
dentro del alojamiento. Continúe
sosteniendo el conjunto de asiento
durante todo este paso. Alinee el
orificio del brazo colgante con el
orificio del alojamiento.
Asegure cada lado con dos tornillos
Phillips con pivote #8 x 1.25 pulg.
CONSEJO: El tornillo debe estar
alineado con la superficie del
alojamiento. El tornillo no debe
sobresalir. (No ajuste excesivamente.)
4
C
7a
7b
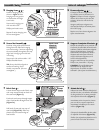
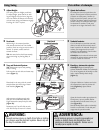
7 Fabric Seat :
Locat
e elastic loops under f
abric seat
and wrap around hooks on back of
the seat back (Figure 7).
F
eed each waist strap thr
ough up
per
slots. Feed buckle through lower slot
(Figure 7a).
Pull back of seat pad over top of
seat back (Figure 7b). Slide two
plastic clips on bottom edge of
seat bucket.
7 Asiento de tela :
Ubique los lazos elásticos debajo del
asiento de tela y envuélvalos alrededor
de los ganchos en la parte posterior
del respaldo del asiento (Figura 7).
Introduzca cada tira para la cintura
por una de las ranuras superiores.
Introduzca la hebilla por la ranura
inferior (Figura 7a).
Coloque la almohadilla de tela sobre
el respaldo del asiento (Figura 7b).
Deslice los sujet
adores plásticos en la
parte inferior del cubo del asiento.
Assemble Swing
(continued)
Arme el columpio
(continuación)
5
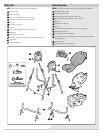
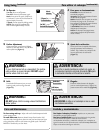
5 Hanging Arms :
Position hanging arms as
shown in Figure 5. Place
hanging arm into grooves
o
n seat bucket and align
screw holes.
S
ecure each hanging arm
with two
#8 x .875”
Phillips pan head
screws.
Repeat for other hanging arm.
Do not overtighten.
5 B
razos colgantes :
Coloque los brazos colgantes en
su posición como se muestra en la
Figura 5. Coloque el brazo colgante
dentro de las muescas del cubo del
asiento y alinee los orificios de los
tornillos.
Asegure cada brazo colgante con
dos tornillos Phillips de cabeza plana
#8 x 0.875 pulg.
Repita con el otro brazo colgante. No
ajuste excesivamente.
K
C
L
L
D
K
D
K
C
Hanging Arms
Brazos colgantes
Hole
Clips
Sujet
adores
Speed Control
Control de
velocidad
Screw
Tornillo
Orificio
7
2 Loops
2 Lazos
Bottom of
Seat
Parte
inferior
del
asiento