


12
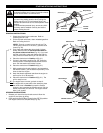
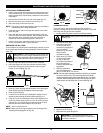
CHANGING THE OIL
For a new engine, change the oil after the first 10 hours of
operation. Change the oil while the engine is still warm. The oil will
flow freely and carry away more impurities.
1. Unplug spark plug boot to prevent accidental starting.
2. Remove the oil fill plug.
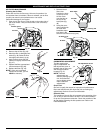
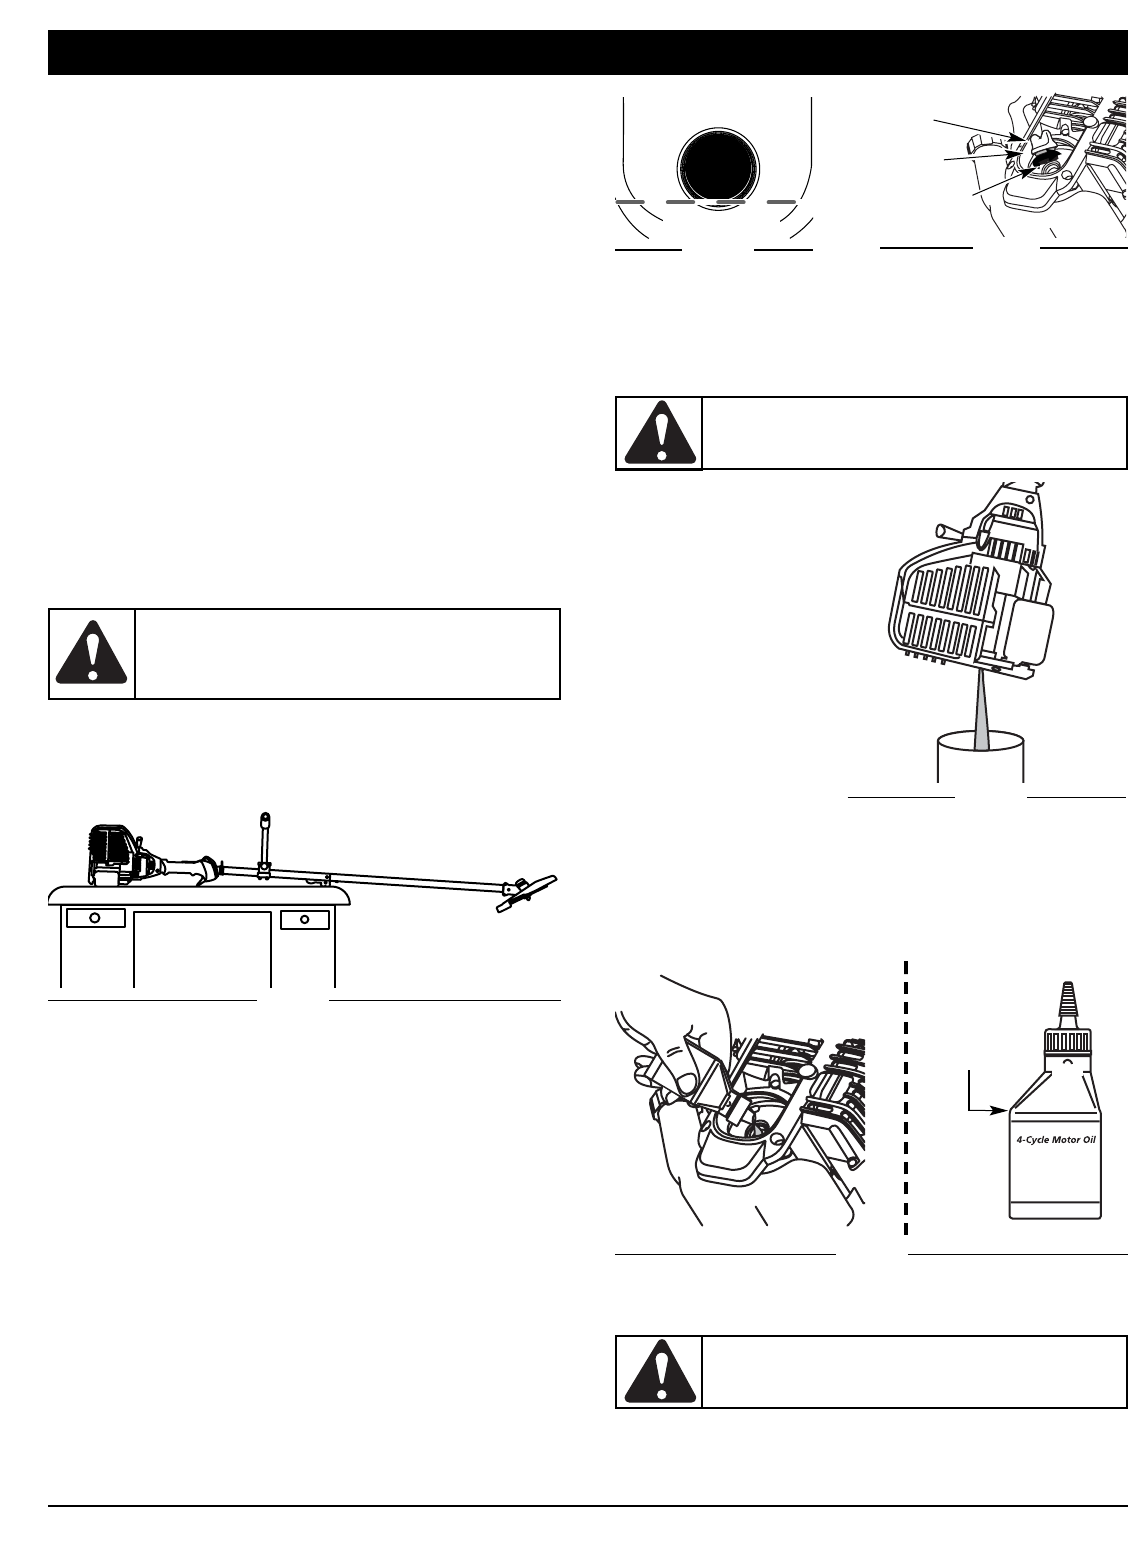
3. Pour the oil out of the
oil fill hole and into a
container by tipping the
unit to a vertical
position (Fig. 43). Allow
ample time for
complete drainage.
4. Wipe up any oil residue
on the unit and clean
up any oil that may
have spilled. Dispose of
the oil according to
Federal, State and local
regulations.
5. Refill the crankcase
with 3.04 fluid ounce
(90 ml) of SAE 30 SF, SG, SH oil.
NOTE: Use the bottle and spout saved from initial use to measure
the correct amount of oil. The top of the label on the bottle
measures approximately 3.04 ounces (90 ml) (Fig. 44). Check
the level, See Checking the Oil Level. If the level is low, add a
small amount of oil and recheck. Do not overfill (Fig. 44).
6. Replace the oil fill plug.
7. Reconnect the spark plug boot.
WARNING: Wear gloves to prevent injury when
handling unit.
Fig. 43
Fill Level
Fig. 44
WARNING: To avoid serious personal injury,
always turn the unit off and allow it to cool before
you clean or service it.
MAINTENANCE AND REPAIR INSTRUCTIONS
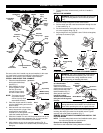
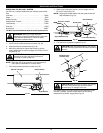
INSTALLING A PREWOUND REEL
1. Hold the outer spool with one hand and unscrew the bump
knob clockwise (Fig. 31). Inspect the bolt inside the bump
knob to make sure it moves freely. Replace the bump knob
if damaged.
2. Remove the old inner reel from the outer spool (Fig. 31).
3. Remove the spring from the old inner reel (Fig. 31).
4. Place the spring in the new inner reel.
NOTE: The spring must be assembled on the inner reel before
reassembling the cutting attachment.
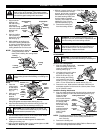
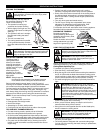
5. Insert the ends of the line through the eyelets in the outer
spool (Fig. 39).
6. Place the new inner reel inside the outer spool. Push the
inner reel and outer spool together. While holding the inner
reel and outer spool, grasp the ends and pull firmly to
release the line from the holding slots in the spool.
7. Hold the inner reel in place and install the bump knob by
turning counterclockwise. Tighten securely.
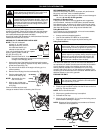
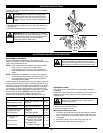
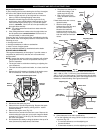
CHECKING THE OIL LEVEL
The importance of checking and maintaining the proper oil level
in the crankcase cannot be overemphasized. Check oil before
each use:
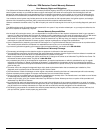
1. Stop the engine and allow oil to drain into the crankcase.
2. Place the engine on a flat, level surface with the cutting
head shield hanging off a work bench or table to get a
proper oil level reading (Fig. 40).
3. Keep dirt, grass clippings and other debris out of the engine.
Clean the area around the dipstick before removing it.
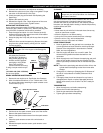
4. Remove the oil fill plug.
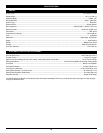
5. Look into the oil fill hole, use a flashlight if needed. The oil
should be just touching the inner most thread (Fig. 41).
6. If the oil level is not touching the inner most thread on the
oil fill hole, add a small amount of oil to the oil fill hole and
recheck (Fig. 41). Repeat this procedure until the oil level
reaches the inner most thread on the oil fill hole.
NOTE: Do not overfill the unit.
NOTE: Make sure the O-ring is in place on the oil fill plug when
checking and changing the oil (Fig. 42).
CAUTION: To prevent extensive engine wear and
damage to the unit, always maintain the proper oil
level in the crankcase. Never operate the unit with
the oil level below the bottom of the dipstick.
Fig. 40
Oil Fill Plug
Oil Fill Hole
O-Ring
MaxOil Fill Line
Fig. 42
Fig. 41