


8
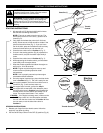
USING THE EDGER AS A DEPTH GUIDE
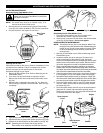
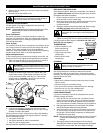
The edge guide is also effective as a depth guide when
trimming next to solid structures like walls, block fences or
foundations (Fig. 15).
To adjust the guide’s length, loosen the depth adjustment nut
that is located on top of the guide (Fig. 15). Next, pull the guide
out as far as it will go. This length is equal to the length of the
trimming line. Tighten the wing nut.
Using the edge guide in this manner will greatly reduce line
wear. Without it, trimming line will wear away more quickly as is
repeatedly hits the structure you’re trimming near.
c) Tighten the wing nut and bolt.
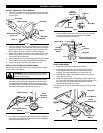
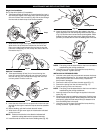
3. Rotate the edge guide. Accomplish this by loosening its
wing nut slightly and turning the guide to the left (when
facing the unit away from the engine). Turn the guide about
90˚ (Fig. 13) or until it resembles the position shown in
Figure 14.
Fig. 12
4. Start the unit following the instructions described in
Starting/Stopping Instructions.
5. Hold the shaft grip with your left hand and the D-handle
with your right (Fig. 14).
NOTE: You must use the edger in the left-handed position
shown in Figure 14. Operation in any other position
may cause poor performance and could starve the
engine of fuel.
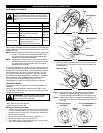
On/Off Stop
Control
Fig. 13
Fig. 15
Fig. 14
Depth
Adjustment Nut
OPERATING INSTRUCTIONS
6. Line up the cutting line with the edge of the sidewalk. The
edge guide wheel will run parallel to the cutting line and roll a
couple inches from the end of the sidewalk.
7. Squeeze the throttle control. The cutting attachment will trim
the grass at the location where the two surfaces meet,
producing a cleanly trimmed edge.
8. When you are done using the edger, move it out of the way.
Loosen its wing nut and rotate the edger 180˚ from it the
position shown in Figure 13. The edger will rest above the
cutting attachment guard. Re-tighten the wing nut and
operate the trimmer normally.